Create AWS Resources
To prepare your AWS environment for deploying the Ververica Agent on an Amazon EKS cluster, complete the following steps:
- Set up resources, including IAM roles, policies, and S3 buckets.
- Create and configure your S3 bucket to store runtime artifacts and Flink checkpoints.
- Enable Kubernetes OIDC (OpenID Connect) for IAM Roles for Service Accounts (IRSA).
- Set up IAM roles and policies that securely manage the Ververica Agent.
Once these steps are complete, your environment will be configured for a deployment of the Ververica Agent.
Set up AWS Resources
Ververica strongly recommends using the provided CloudFormation script to create all required resources automatically. This approach ensures you have the right AWS Identity and Access Management (IAM) roles, policies, and S3 bucket set up with minimal manual effort. However, if you need more control or want to understand each component, you can manually complete the steps outlined in this document.
Open the AWS console with the CloudFormation template preloaded.
Note: When specifying stack details, you can rename the pre-filled parameters (e.g., VVCTenantPolicy, VVCAdminRole) if needed.
Create an S3 Bucket
-
Use the AWS CLI or the AWS Management Console to create an S3 bucket that stores runtime artifacts and Flink checkpoints. You can also use an existing bucket if you prefer.
S3 bucket names must be globally unique. A common practice is to include your AWS account ID in the bucket name. For example:
aws s3api create-bucket --bucket vv-agent-bucket-1234567890 --region eu-central-1 -
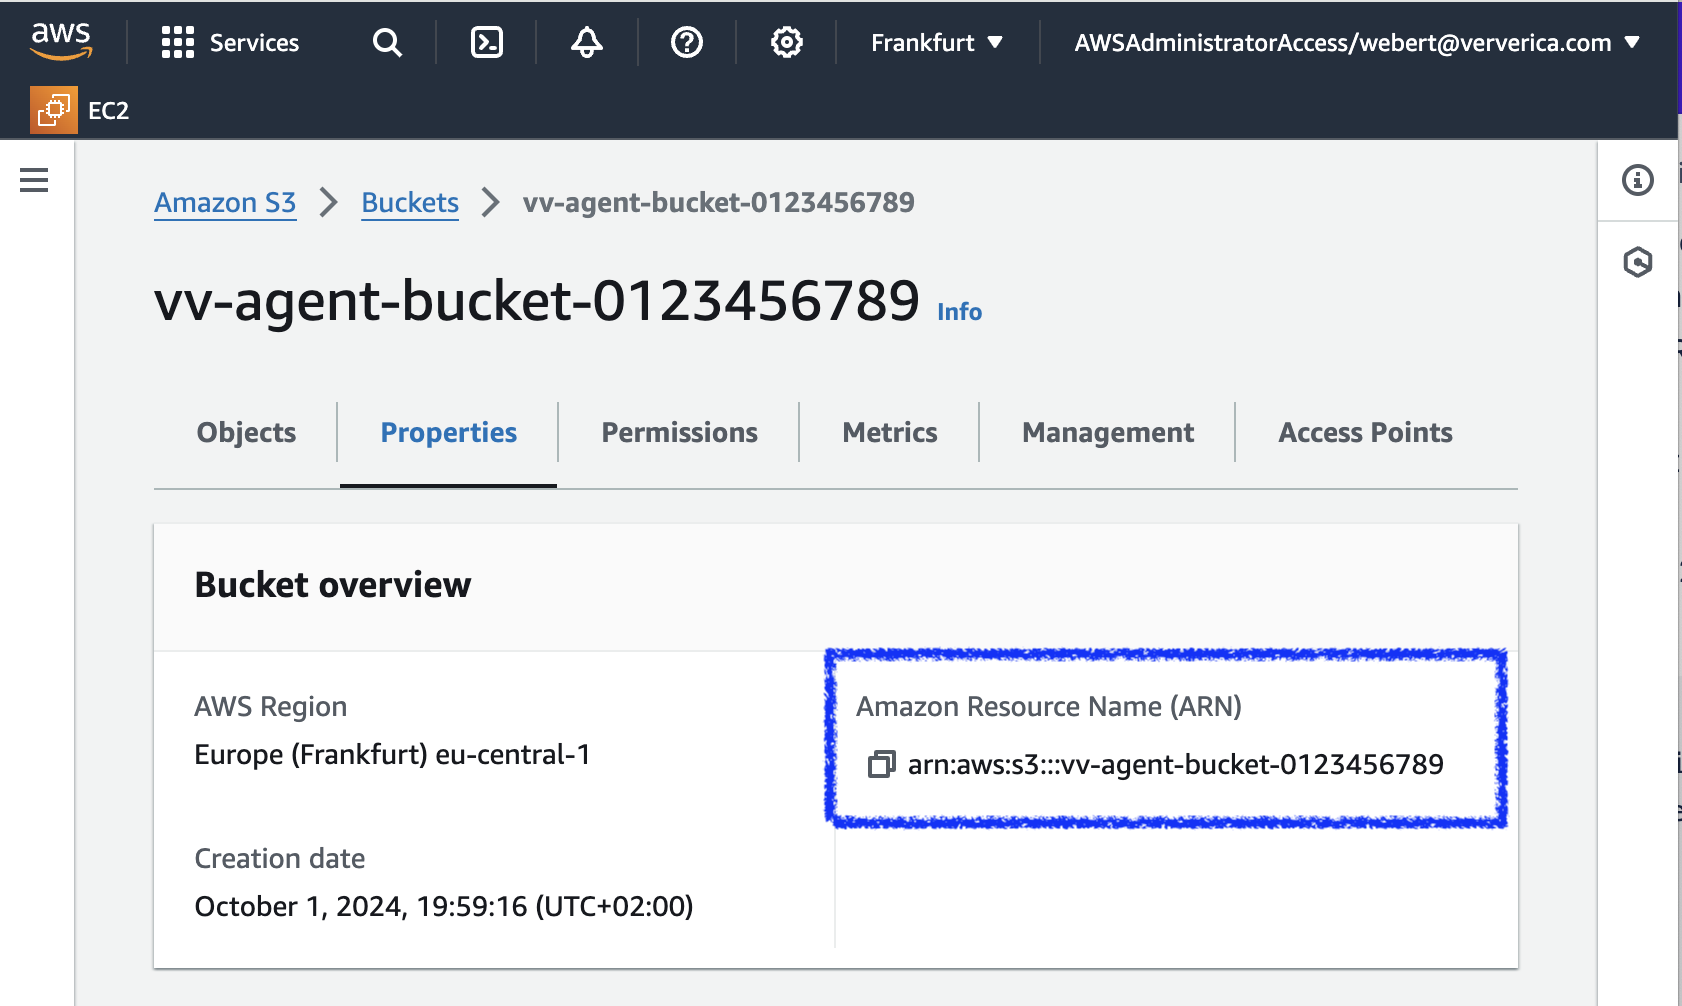
After creating the bucket, write down its Amazon Resource Name (ARN) for later use.
-
Configure Cross-Origin Resource Sharing (CORS) for the bucket to ensure that only allowed origins can access the bucket, enforcing least privilege principles. The following configuration permits access from a Ververica website endpoint and required methods:
a. In the AWS Management Console, open your S3 bucket.
b. Go to Permissions.
c. Scroll down to Cross-origin resource sharing (CORS) and click Edit.
d. Add the following JSON code:[
{
"AllowedHeaders": ["*"],
"AllowedMethods": ["GET", "POST", "PUT", "DELETE", "HEAD"],
"AllowedOrigins": ["https://app.ververica.cloud"],
"ExposeHeaders": ["ETag"],
"MaxAgeSeconds": 3000
}
]3e. Click Save changes.
Enable Kubernetes OIDC
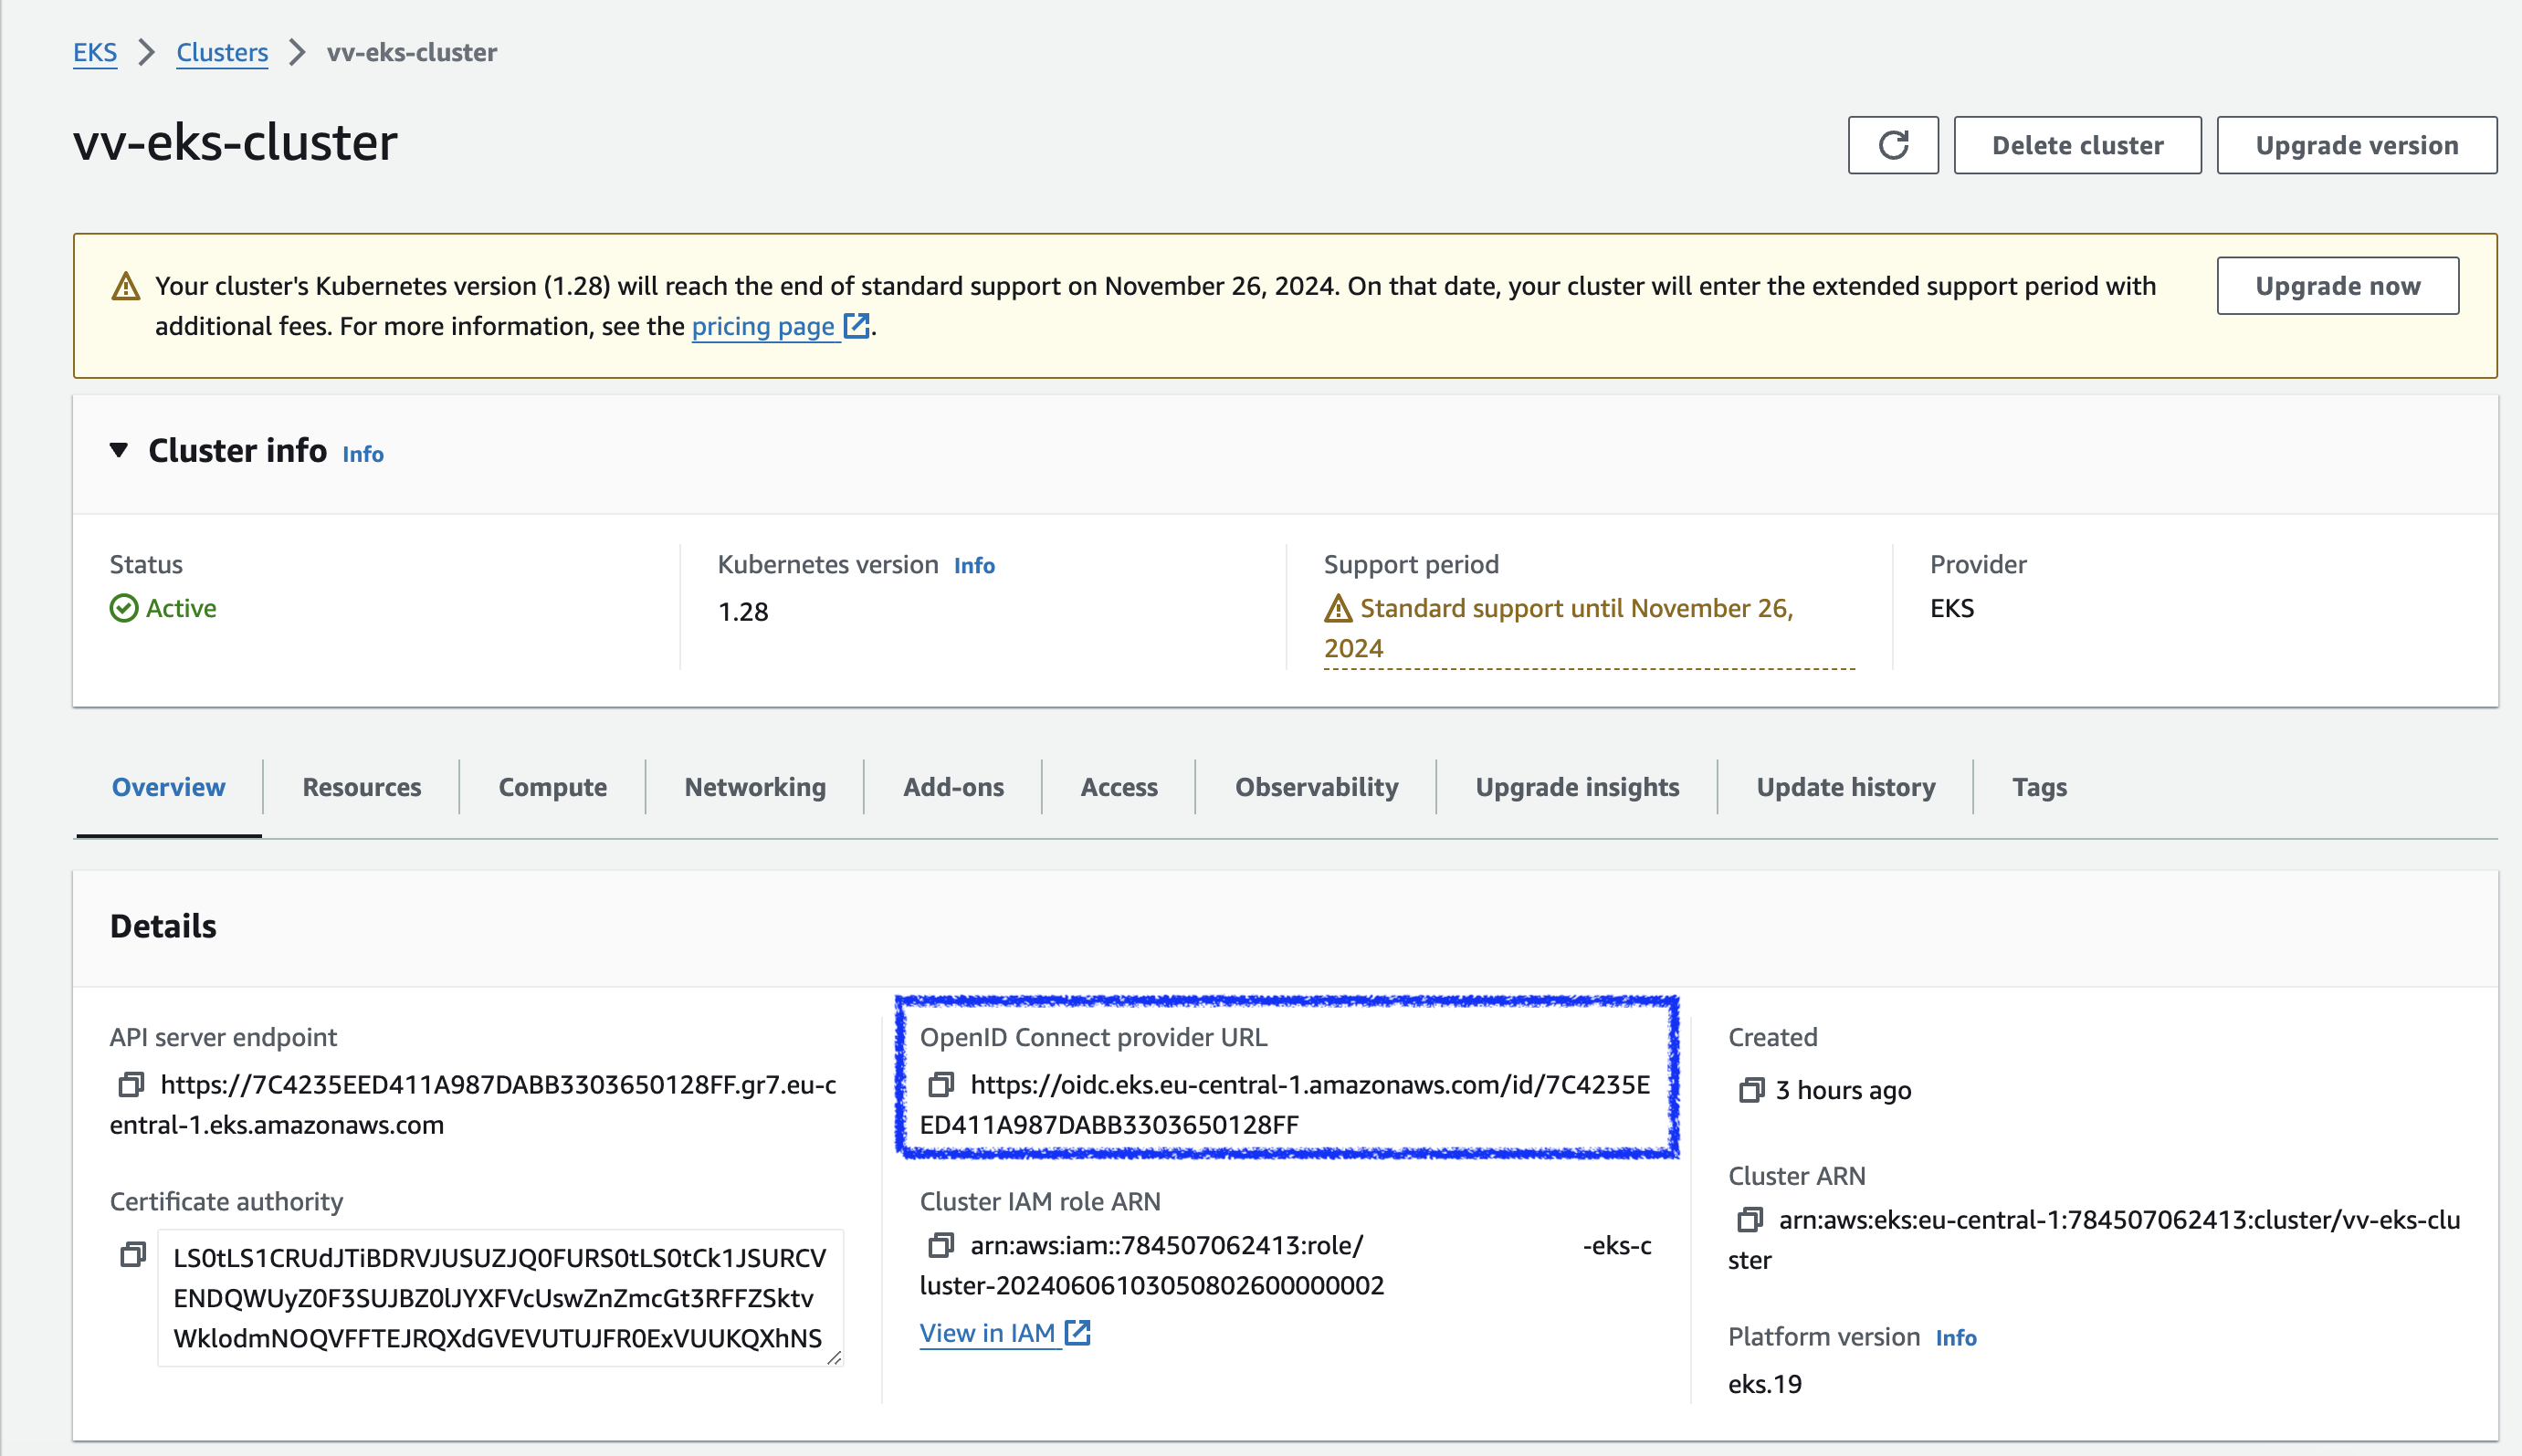
The agent uses IAM Roles for Service Accounts (IRSA) to authorize API calls to AWS. Your Amazon EKS cluster provides an OpenID Connect (OIDC) provider URL that you can use to configure pod permissions with IAM Roles.
-
To obtain the EKS Cluster’s OIDC Provider URL, enter the AWS CLI command, replacing
$cluster_namewith your cluster’s name:aws eks describe-cluster --name $cluster_name --query "cluster.identity.oidc.issuer" --output textYou can also find it by going to your AWS Console on the EKS page.
-
Configure Provider:
a. Navigate to Identity Providers and choose Add provider.
b. Set Provider type to OpenID Connect.
c. For Provider URL, paste the OIDC Provider URL you obtained in the previous step.
d. For Audience, addsts.amazonaws.com.
e. (Optional) Add tags.
f. Click Add provider.
Set Up IAM Roles and Policies
You need to create two IAM roles and their corresponding policies for the Ververica Agent (vv-agent):
- VVCTenantRole: Manages the S3 bucket.
- VVCAdminRole: Serves as the IRSA role for the Agent pod.
For zero-trust practices, restrict the policy to a specific S3 bucket (e.g., vv-agent-bucket-0123456789). If using a single agent for multiple workspaces, you may allow a wildcard pattern like vv-agent-bucket-*.
Create the Tenant Policy (VVCTenantPolicy)
-
In the IAM console, go to Policies and choose Create policy.
-
On the Create policy page, switch to the JSON editor.
-
Copy and paste the following JSON, making sure to replace the S3 bucket ARN with your own:
  {
      "Version": "2012-10-17",
      "Statement": [
          {
              "Effect": "Allow",
              "Action": [
                  "s3:PutObject",
                  "s3:GetObject",
                  "s3:DeleteObject"
              ],
              "Resource": "arn:aws:s3:::vv-agent-bucket-*/*"
          },
          {
              "Effect": "Allow",
              "Action": [
                  "s3:ListBucket",
                  "s3:GetBucketLocation"
              ],
              "Resource": "arn:aws:s3:::vv-agent-bucket-*"
          }
      ]
} -
Click Next, review the policy, and give it the name VVCTenantPolicy.
-
Click Create policy.
Create the Tenant Role (VVCTenantRole)
- In the IAM console, go to Roles and choose Create role.
- On Select trusted entity, choose AWS account as the trusted entity type.
- Select This account, then click Next.
- On Add permissions, search for VVCTenantPolicy and select it.
- Click Next and then review the role settings.
- Name the role VVCTenantRole.
- Click Create role.
Create the Admin Policy (VVCAdminPolicy)
-
Repeat the steps for creating a policy (as done for VVCTenantPolicy), but use the following JSON. Replace
<REPLACE_WITH_ACCOUNT_ID>with your AWS account ID:{
"Version": "2012-10-17",
"Statement": [
{
"Effect": "Allow",
"Action": [
"sts:AssumeRole"
],
"Resource": "arn:aws:iam::<REPLACE_WITH_ACCOUNT_ID>:role/VVCTenantRole"
}
]
} -
Name the policy VVCAdminPolicy.
Create the Admin Role (VVCAdminRole)
- In the IAM console, go to Roles and choose Create role.
- Select Web identity as the trusted entity type.
- For Identity provider, select the EKS cluster OIDC provider.
- For Audience, select
sts.amazonaws.com. - Click Next.
- On Add permissions, search for VVCAdminPolicy and select it.
- Click Next, then name the role VVCAdminRole.
- Confirm that the trust policy and permissions are correct.
- Click Create role.