Configure the Snowflake Connector
The Ververica Snowflake connector is a sink-only connector, which means it is designed exclusively to send data to the Snowflake data warehouse. It does not support reading or extracting data from Snowflake. This functionality aligns with typical use cases where data is streamed from various sources, processed or aggregated in Apache Flink, and then persisted in Snowflake for further analysis or storage.
This connector uses the most recent Flink interfaces, Sink<InputT> and SinkWriter<InputT>, to write data to a configurable Snowflake table.
Prerequisites
Complete the following prerequisites before configuring the Snowflake connector.
-
Ensure you have your organization's Snowflake Account Identifier. You can find this information in the Snowflake documentation.
-
Verify your Snowflake Account has the necessary privileges to access the specific tables you need to interact with. (While
ACCOUNTADMINprivileges allow for comprehensive access, the minimum requirement is to have sufficient permissions for the tables involved in your tasks.) -
Configure Key-Pair Authentication using the instructions for configuring key-pair authentication outlined in the Snowflake documentation.
-
Set up a SQL worksheet to create a table for transferring data from Ververica Cloud to Snowflake. Use the following SQL commands to create your database and table in Snowflake:
-- Create a database if it does not exist
CREATE DATABASE IF NOT EXISTS SNOW_TEST;

-- Create or replace a table in the public schema
CREATE OR REPLACE TABLE SNOW_TEST.PUBLIC.SNOW_TEST (
    ID NUMBER(38,0),
    NAME VARCHAR(16777216),
    AGE NUMBER(38,0)
); -
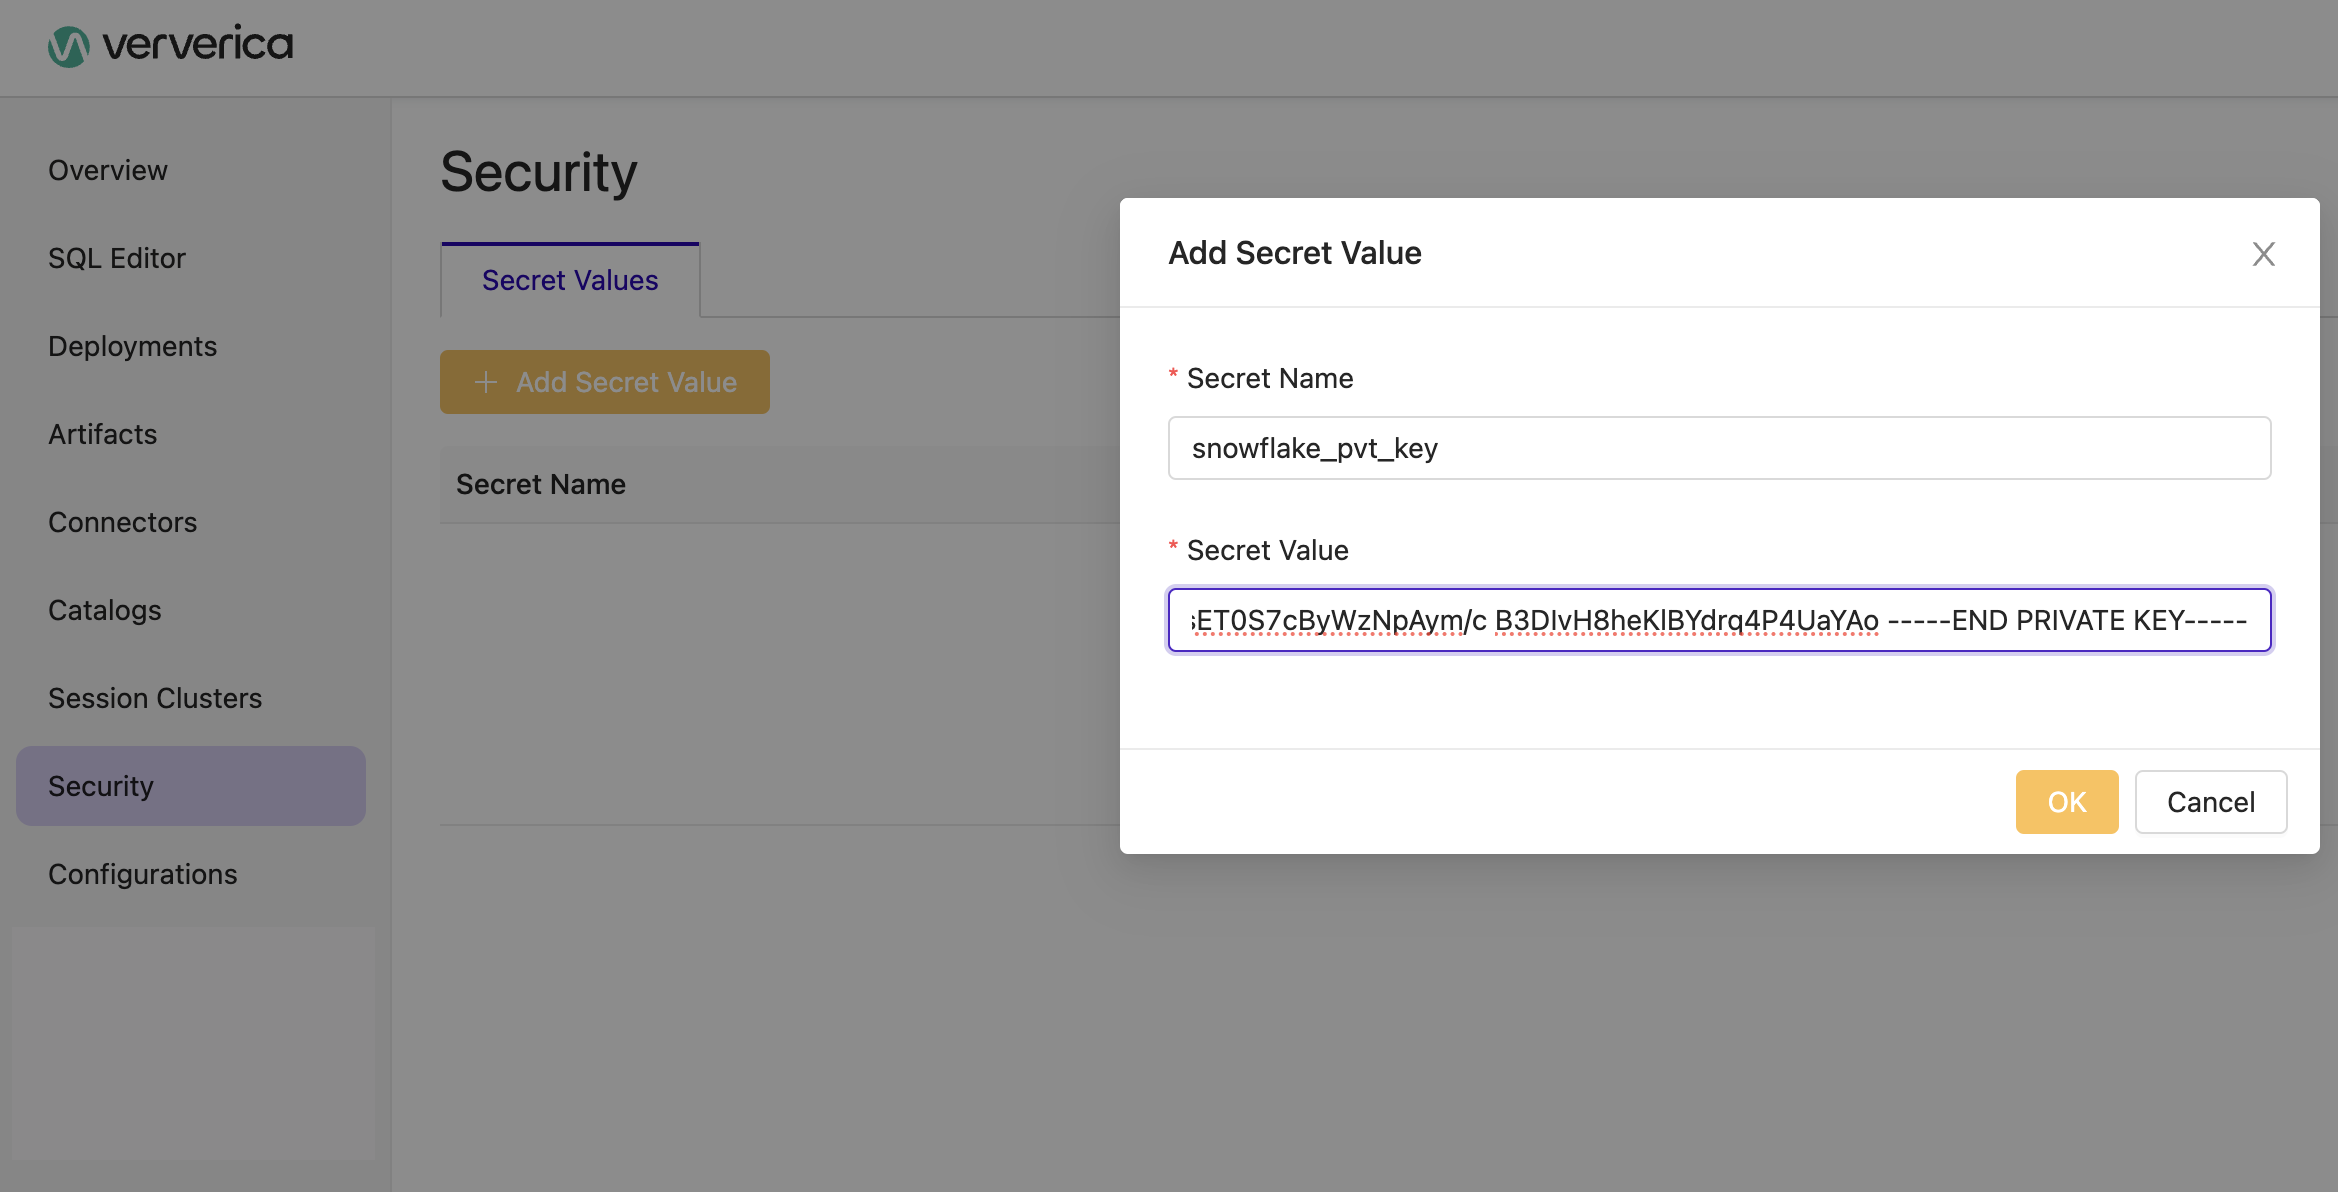
Create a Secret for your SQL Script. Ververica recommends creating a secure key within your SQL script before deploying the script. (This practice is often necessary for compliance and operational security.)
- 5a. Go to Security → Secret Values.
- 5b. Click Add Secret Value.
- 5c. Fill in Secret Name and Secret Value. Note that they both are case-sensitive. Then click OK.
How To Configure the Snowflake Connector
The three steps for configuring the Snowflake connector to work with Ververica are:
- Step 1: Prepare the SQL Script to Generate Data
- Step 2: Deploy the SQL Script on Ververica Cloud
- Step 3: Verify the Results
Prepare the SQL Script to Generate Data
The following SQL script generates random users, inserts them into the Snowflake database, and logs the output.
Replace <your-account-id> and <your-user-name> with the relevant details found in your Snowflake admin panel.
-- Create a temporary table to generate data
CREATE TEMPORARY TABLE datagen (
    `ID` BIGINT,
    `NAME` STRING,
    `AGE` INT
) WITH (
    'connector' = 'datagen',
    'fields.ID.kind' = 'sequence',
    'fields.ID.start' = '1',
    'fields.ID.end' = '1000000',
    'fields.AGE.min' = '18',
    'fields.AGE.max' = '35',
    'fields.NAME.length' = '8',
    'rows-per-second' = '1'
);

-- Create a temporary table in Snowflake to receive data
CREATE TEMPORARY TABLE snowflake WITH (
    'connector' = 'snowflake',
    'url' = 'https://<your-account-id>.snowflakecomputing.com',
    'user' = '<your-user-name>',
    'user-role' = 'ACCOUNTADMIN',
    'db' = 'SNOW_TEST',
    'schema' = 'PUBLIC',
    'table' = 'SNOW_TEST',
    'private-key' = '${secret_values.snowflake_pvt_key}'
) LIKE datagen (EXCLUDING ALL);

-- Create a temporary table to print data to Flink logs
CREATE TEMPORARY TABLE print WITH (
    'connector' = 'print',
    'logger' = 'true'
) LIKE datagen (EXCLUDING ALL);

-- Insert and log data
BEGIN STATEMENT SET;
insert into snowflake select * from datagen;
insert into print SELECT * from datagen;
END;
Deploy the SQL Script on Ververica Cloud
- Copy and paste the SQL code into a Ververica SQL worksheet.
- Replace placeholders with your details in the Ververica SQL worksheet.
- Deploy the worksheet. (Choose
vera-1.0.3-u1-flink-1.17engine version.)
Verify the Results
After running your SQL script, you can verify the results from the Task Manager logs or the Snowflake table.
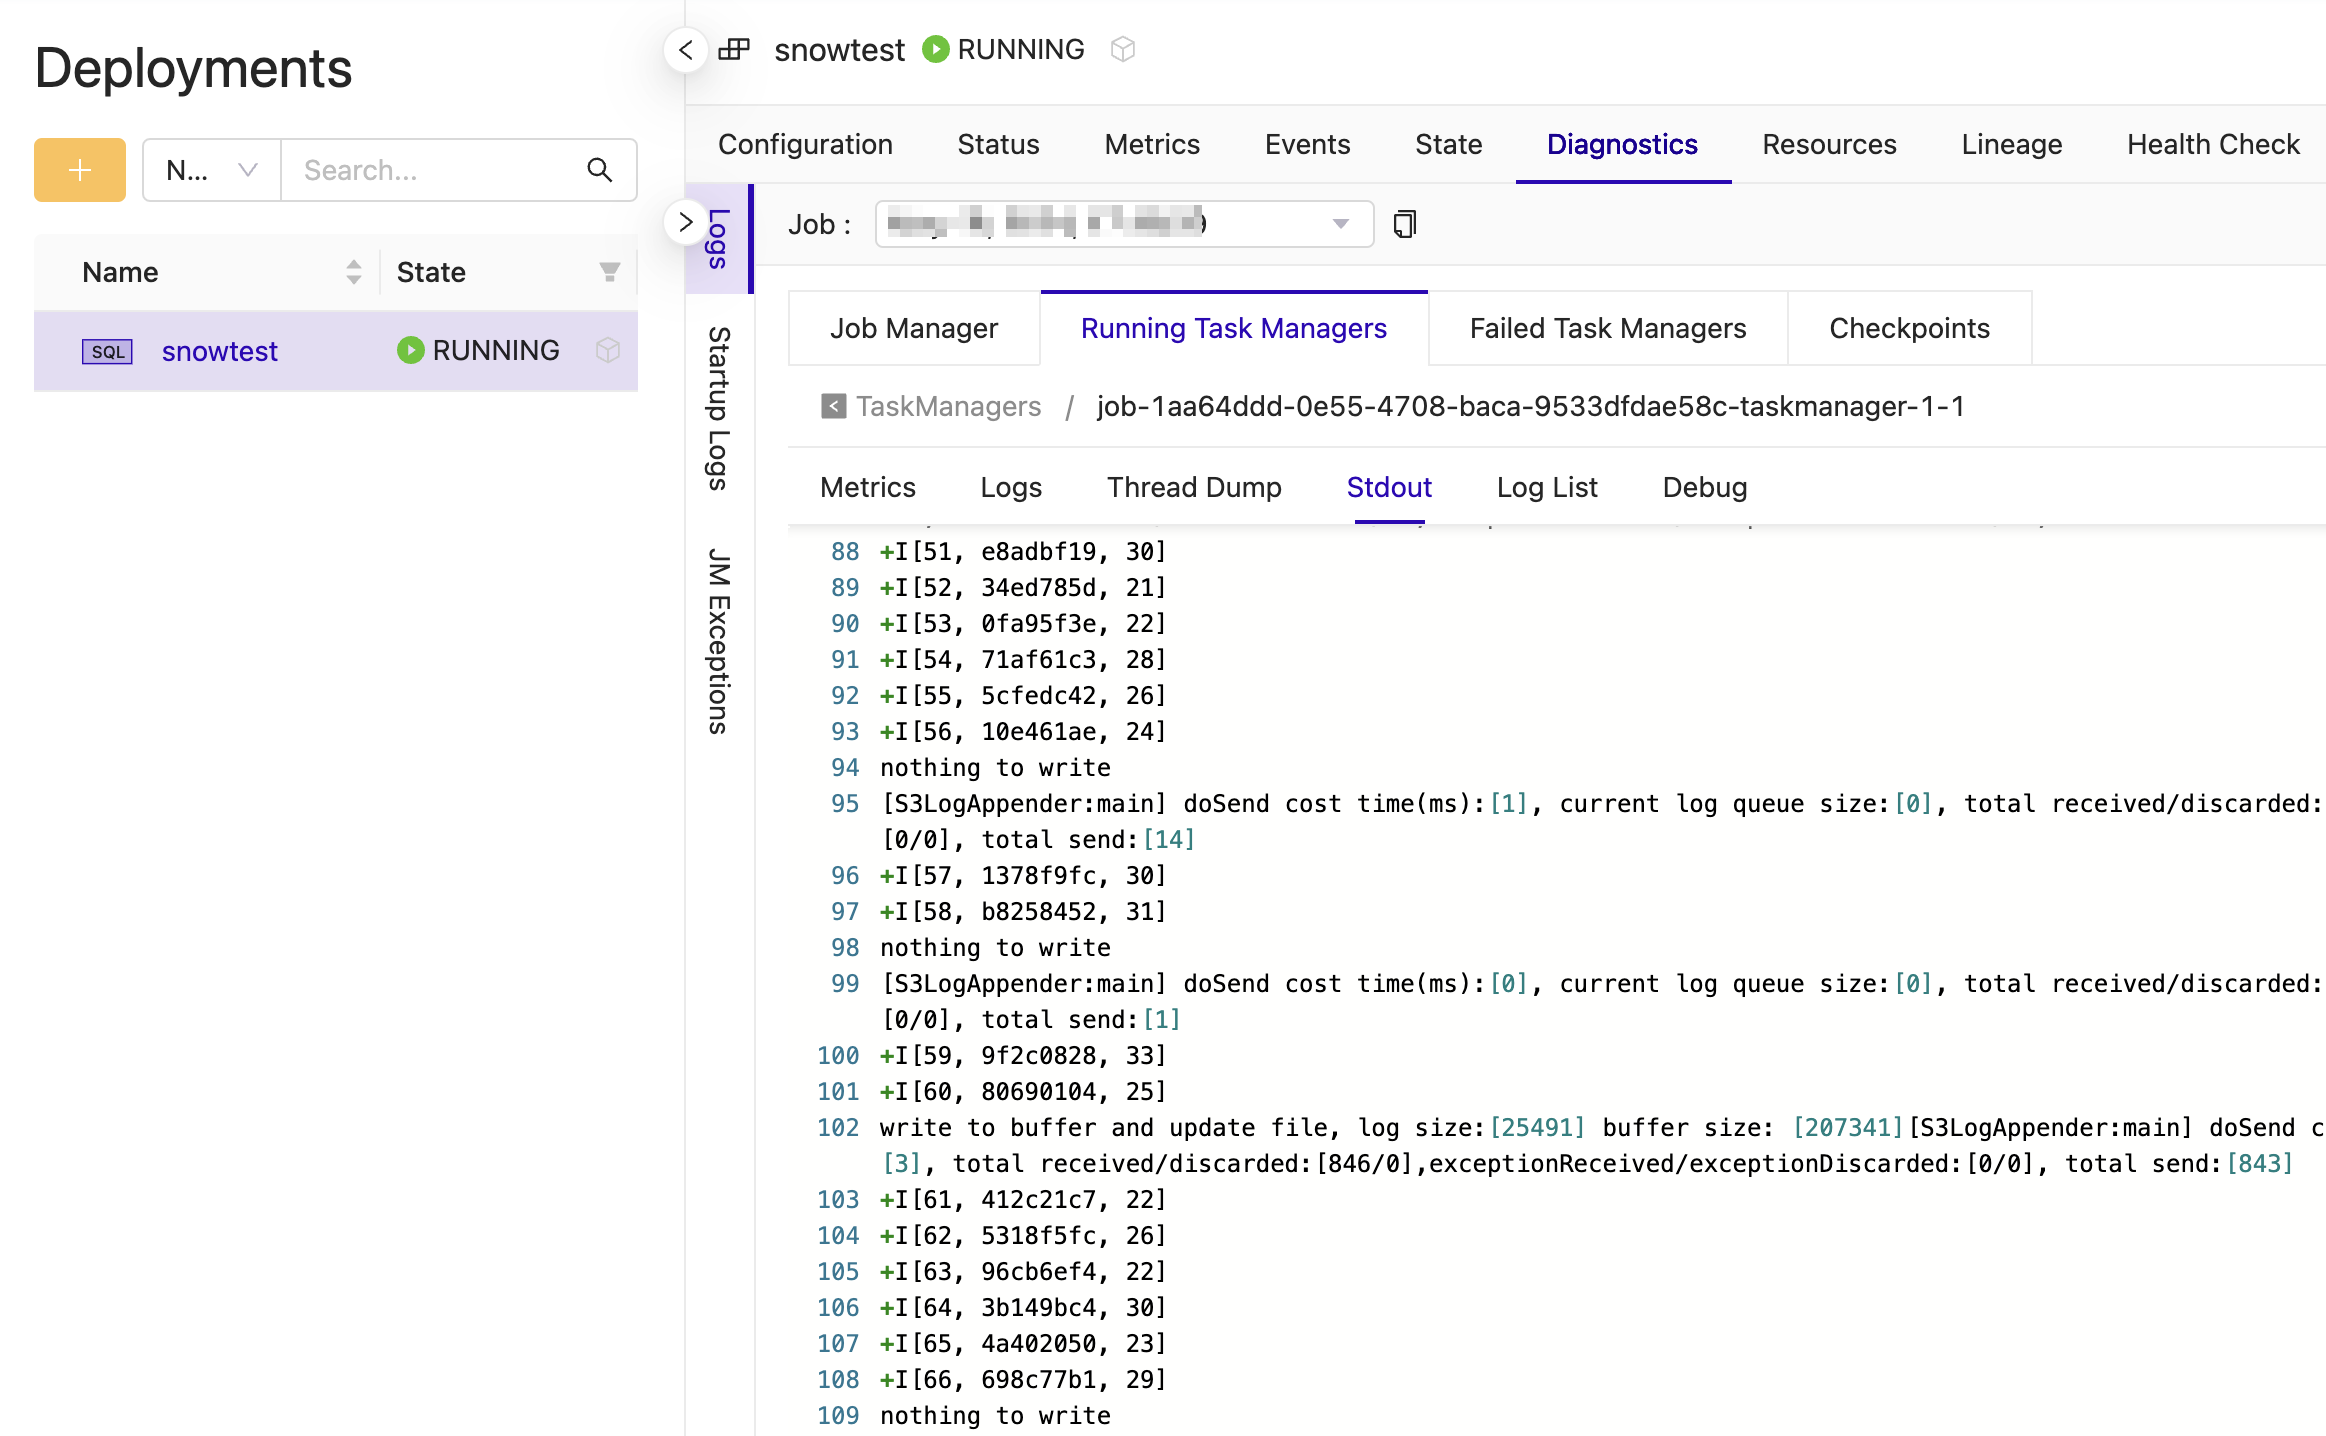
Task Manager Logs
You can check the logs for your task manager to see the printed data.
- Go to Deployments and click the deployment you want to check.
- Display the Logs > Diagnostics > Running Task Managers tab.
- Click the name of the TaskManager.
- Display the Stdout tab.
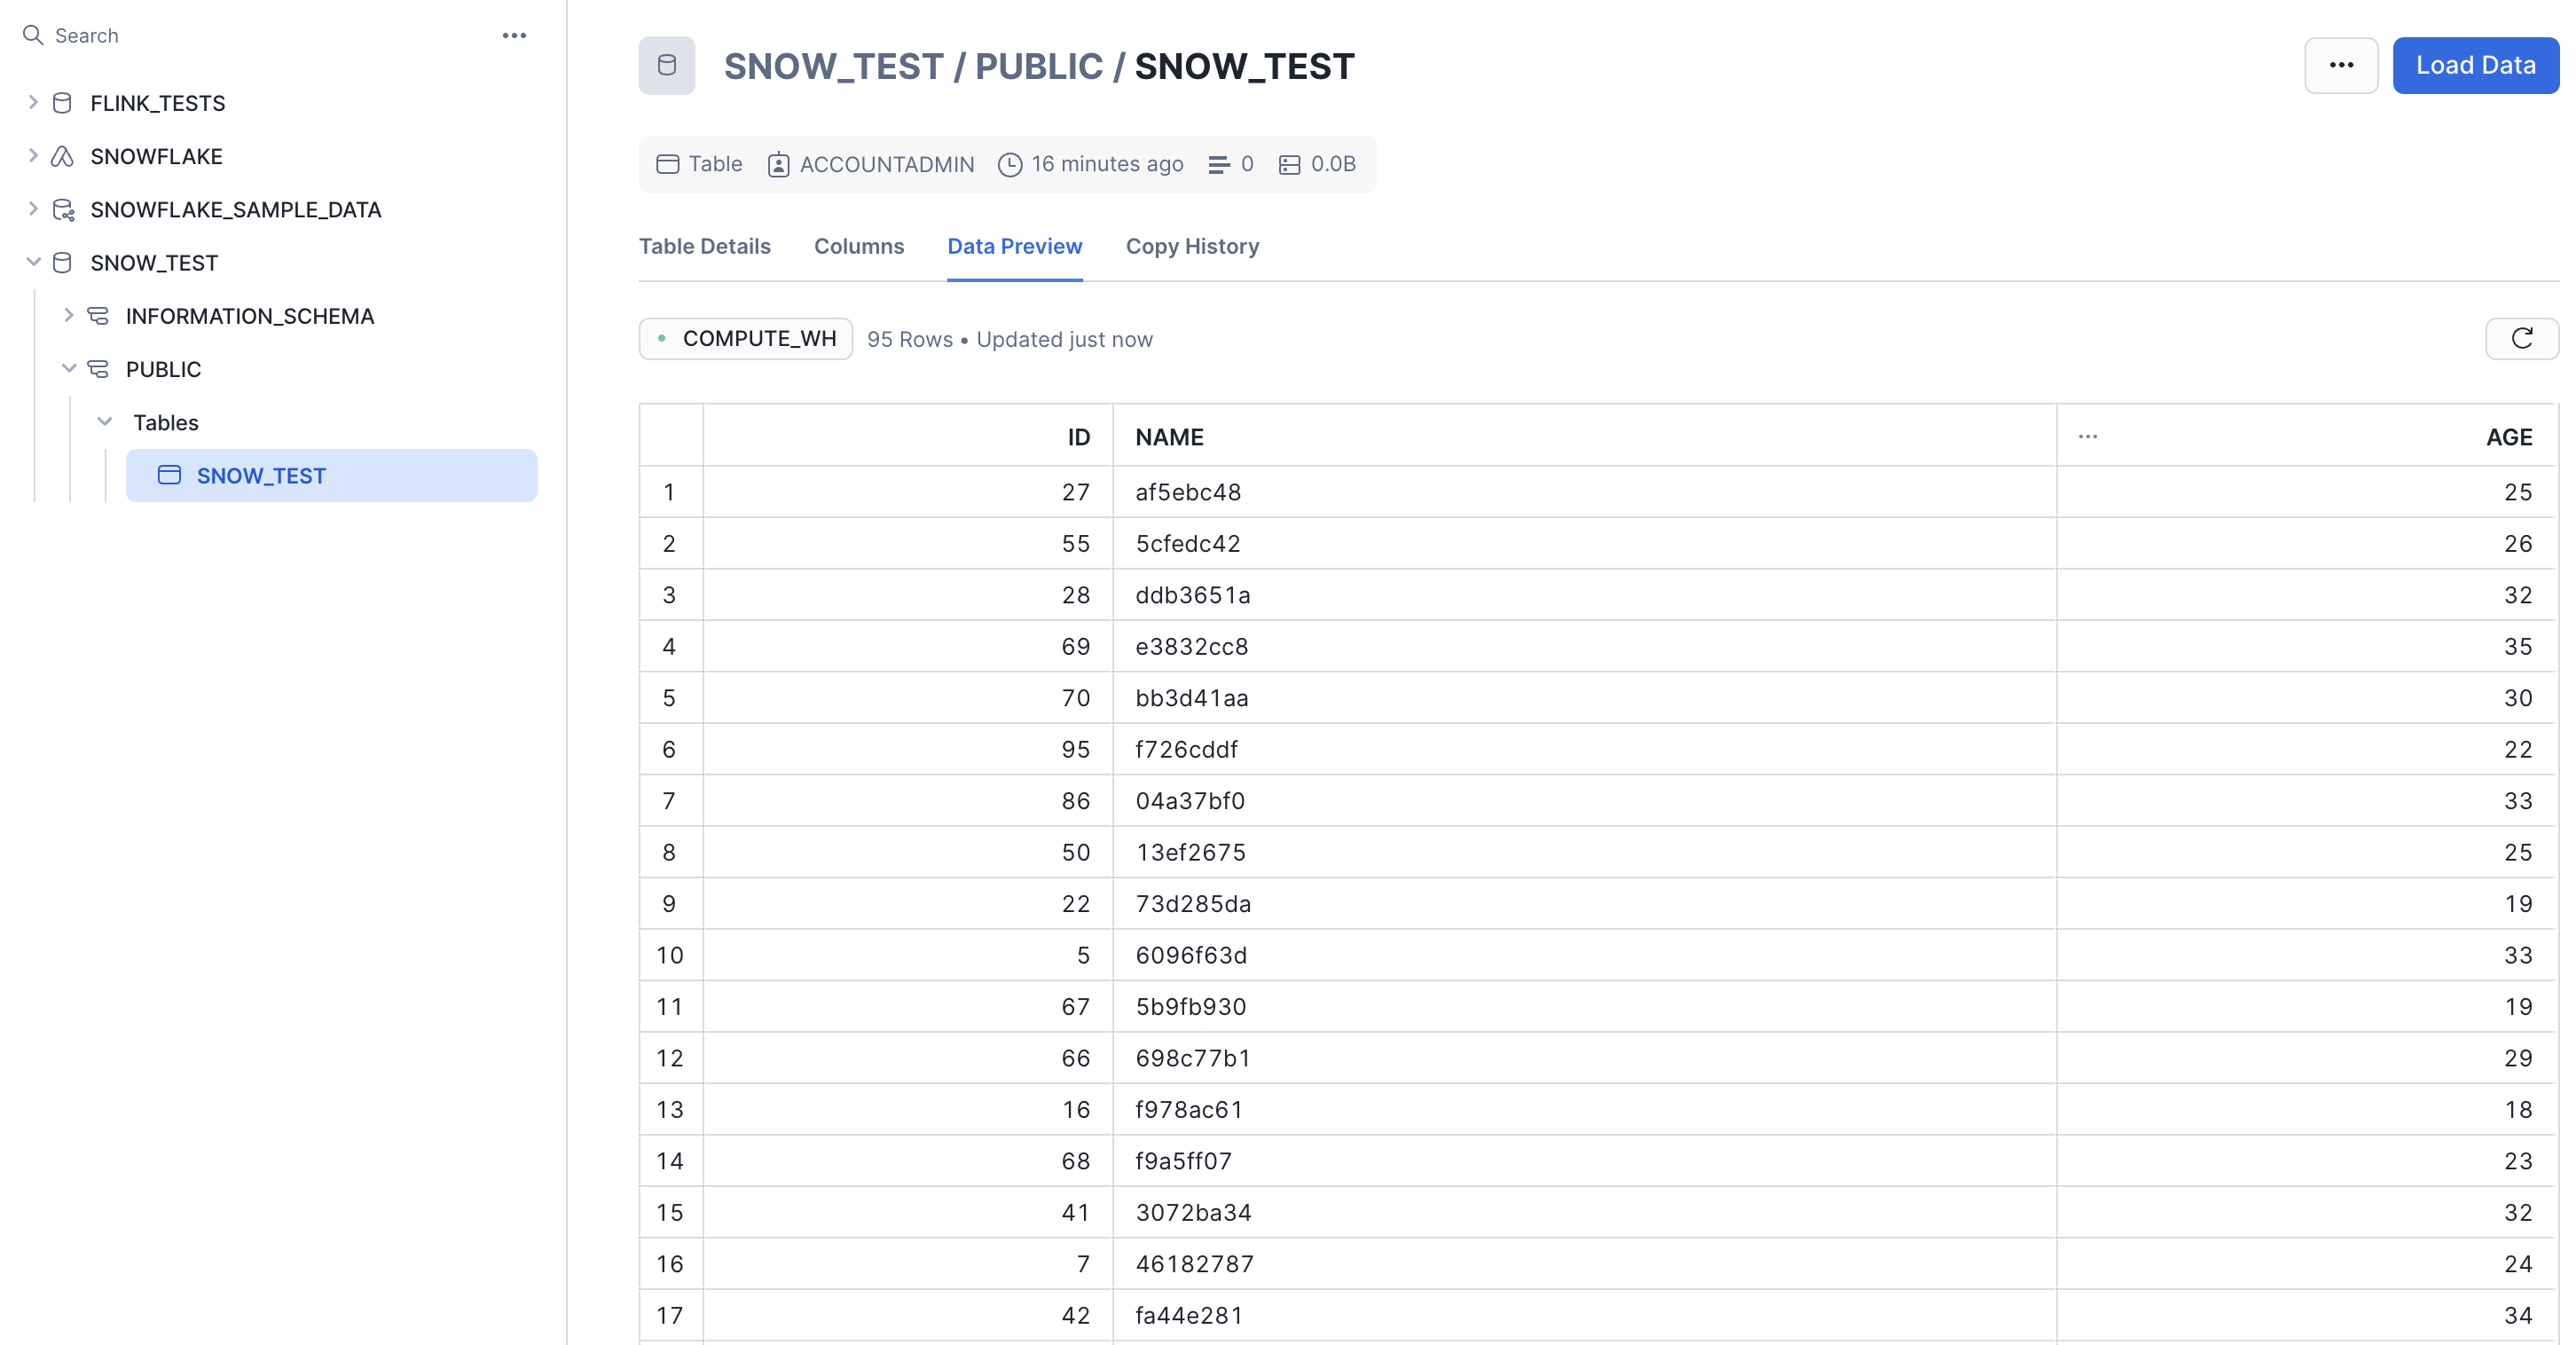
Snowflake Table
You can verify the data inserted in the Snowflake table by querying the table or checking the database's data preview tool.
Reference: Flink to Snowflake Type Mapping
The table below maps Flink data types to Snowflake data types. "Type" refers to data types used in Flink and Snowflake databases and indicates the different categories of values that a column or variable can hold in each system.
- For Flink, "type" refers to how data is structured (e.g., CHAR, BOOLEAN, DECIMAL), representing specific types of data.
- For Snowflake, "type" refers to its own set of data types that the platform supports (e.g., VARCHAR, NUMBER, FLOAT).
The table shows the compatibility and potential casting (converting a data value from one type to another) between the two systems. For example, Flink’s CHAR type maps directly to Snowflake’s CHAR type, so it can be stored and processed in the same way on both platforms.
| Flink Type | Castable Snowflake Types |
|---|---|
| CHAR, VARCHAR | CHAR, VARCHAR |
| SMALLINT | VARCHAR, CHAR, BOOLEAN, NUMBER, FLOAT |
| BOOLEAN | BOOLEAN, CHAR, VARCHAR |
| BINARY | BINARY |
| VARBINARY | BINARY |
| TINYINT | BINARY, NUMBER, FLOAT, BOOLEAN |
| DECIMAL | VARCHAR, CHAR, BOOLEAN, NUMBER, FLOAT |
| INTEGER, DATE | VARCHAR, CHAR, BOOLEAN, NUMBER, FLOAT |
| BIGINT | VARCHAR, CHAR, BOOLEAN, NUMBER, FLOAT |
| FLOAT, DOUBLE | NUMBER, FLOAT, BOOLEAN |
| ARRAY | STRING |