Getting Started - Flink Operations
Please see Getting Started - Installation to install Ververica Platform before going through this guide.
If you have installed the optional logging or metrics integrations, please check the logging setup and the metrics setup to ensure you have the correct services port-forwarded to access them on your local machine.
In this guide, you will create and manage a Ververica Platform Deployment based on a JAR that packages an Apache Flink® DataStream, DataSet or Table API program. Please see Getting Started - Flink SQL for information on how to use Flink SQL in Ververica Platform.
Creating Your First Deployment
Deployments are the core resource to manage Apache Flink® jobs within Ververica Platform. A Deployment specifies the desired state of an application and its configuration. At the same time, Ververica Platform tracks and reports each Deployment’s status and derives other resources from it. Whenever the Deployment specification is modified, Ververica Platform will ensure the running application will eventually reflect this change.
You can either use the web user interface or the REST API to manage Deployments.
- Web User Interface
- REST API
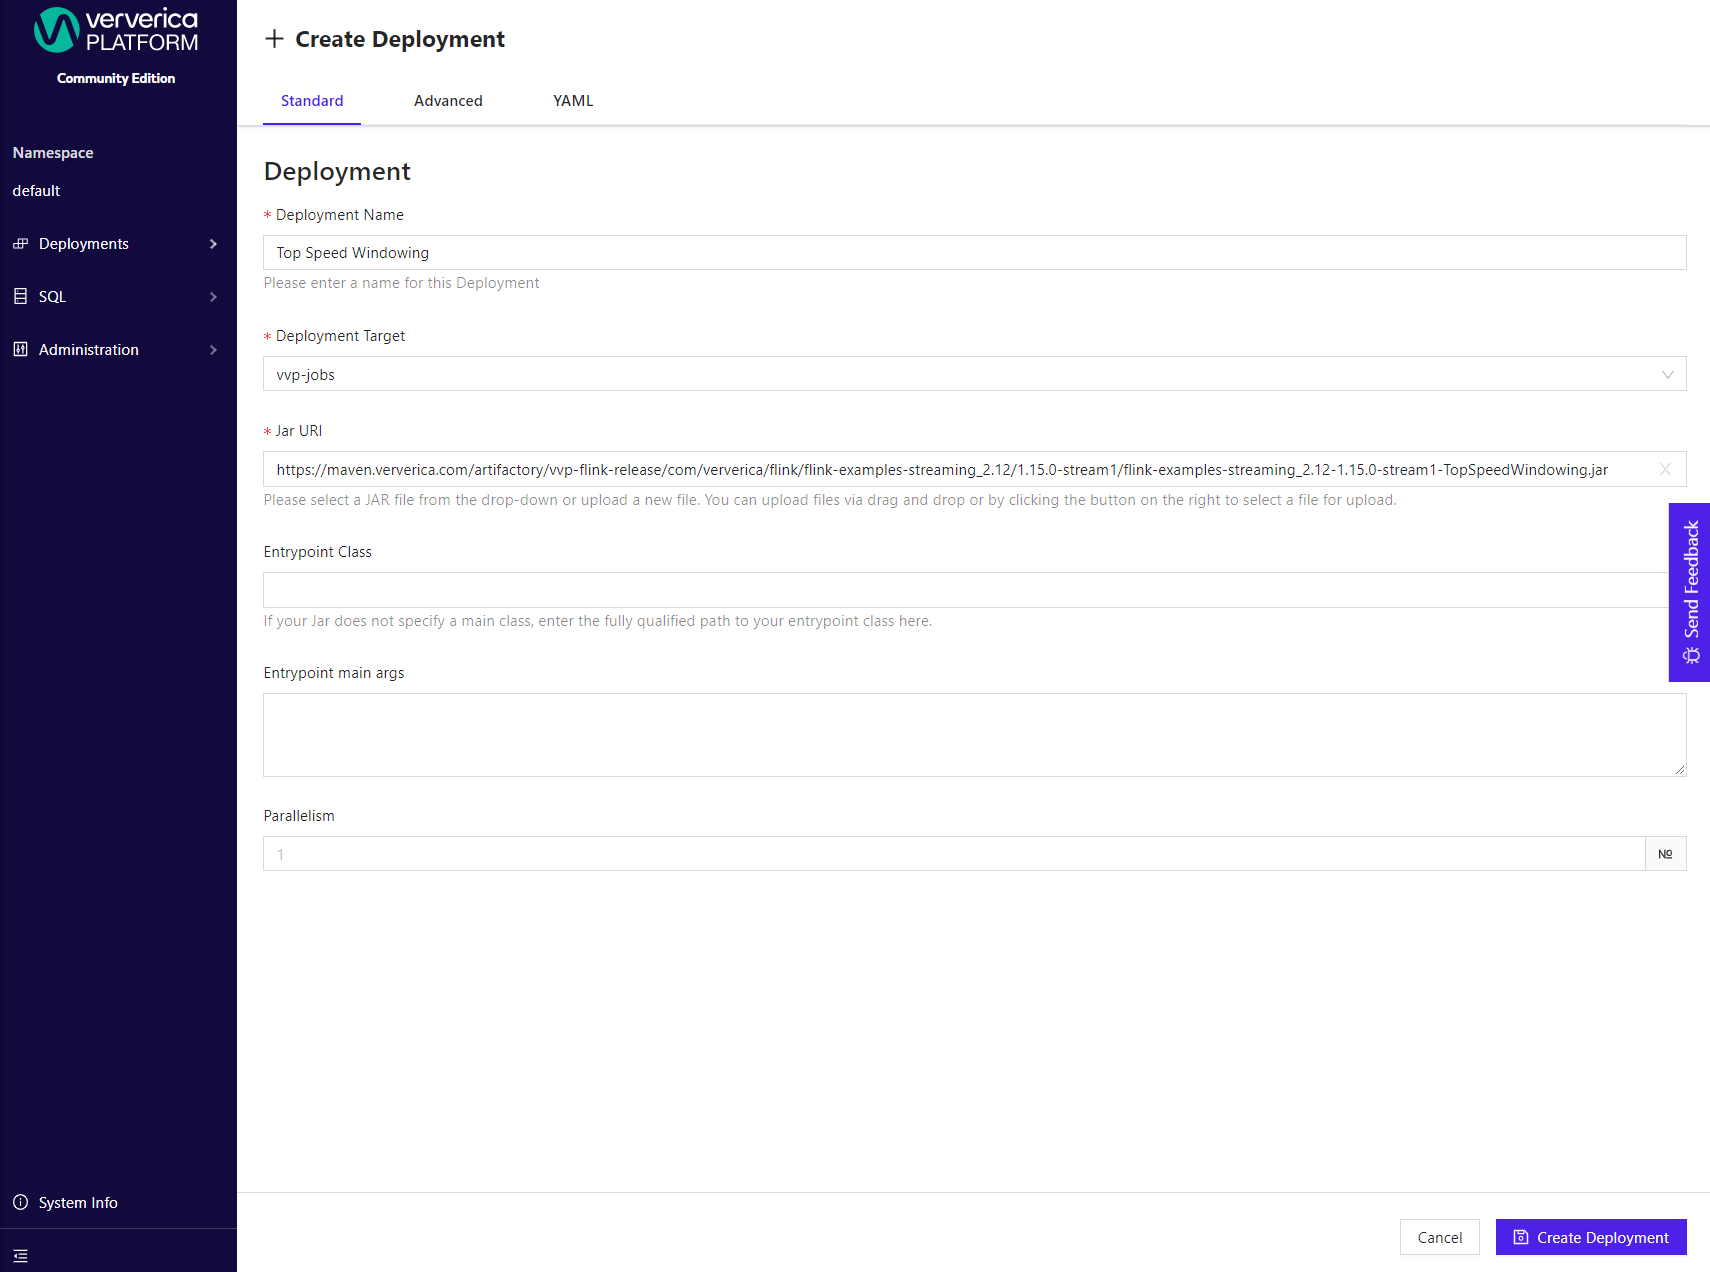
Click + Create Deployment in the top right of the "Deployments" page. For your first Deployment we recommend to use the Standard view.
-
Name: Provide a name such as
Top Speed Windowing -
Deployment Target: Create a new Deployment Target. A Deployment Target links a Deployment to a Kubernetes namespace, into which your Flink applications will be deployed. In this case you can use the
vvp-jobsnamespace that we created earlier. -
Parallelism: Set the parallelism to
1 -
Jar URI: Provide a URI to the JAR containing your Flink program. If you do not have have an artifact at hand, you can use
Flink 1.19.0
https://repo1.maven.org/maven2/org/apache/flink/flink-examples-streaming/1.19.0/flink-examples-streaming-1.19.0-WindowJoin.jar``Flink 1.18.0
https://repo1.maven.org/maven2/org/apache/flink/flink-examples-streaming/1.18.0/flink-examples-streaming-1.18.0-WindowJoin.jar``Flink 1.18.1
https://repo1.maven.org/maven2/org/apache/flink/flink-examples-streaming/1.18.1/flink-examples-streaming-1.18.1-WindowJoin.jar``To provide your own JAR, click on the upload icon on the right side of the Jar URI field and upload your program.
Finally, click
Create Deploymentto start your Apache Flink® application.
POST vvp-resources/deployment_target.yaml to Ververica Platform's REST API to create the Deployment Target:
      curl localhost:8080/api/v1/namespaces/default/deployment-targets \
         -X POST \
         -H "Content-Type: application/yaml" \
         -H "Accept: application/yaml" \
         --data-binary @vvp-resources/deployment_target.yaml
Afterwards, you can POST vvp-resources/deployment.yaml to Ververica Platform REST API to create the Deployment:
      curl localhost:8080/api/v1/namespaces/default/deployments \
         -X POST \
         -H "Content-Type: application/yaml" \
         -H "Accept: application/yaml" \
         --data-binary @vvp-resources/deployment.yaml
Ververica Platform will now create a highly available Flink cluster, which runs your Flink application in the vvp-jobs Kubernetes namespace.
Checkpointing and Savepoints, as well as Flink Jobmanager failover, have automatically been configured by the platform based on our Universal Blob Storage configuration.
Once the Deployment has reached the RUNNING state you can also check out the Flink UI.

Upgrading Your First Deployment
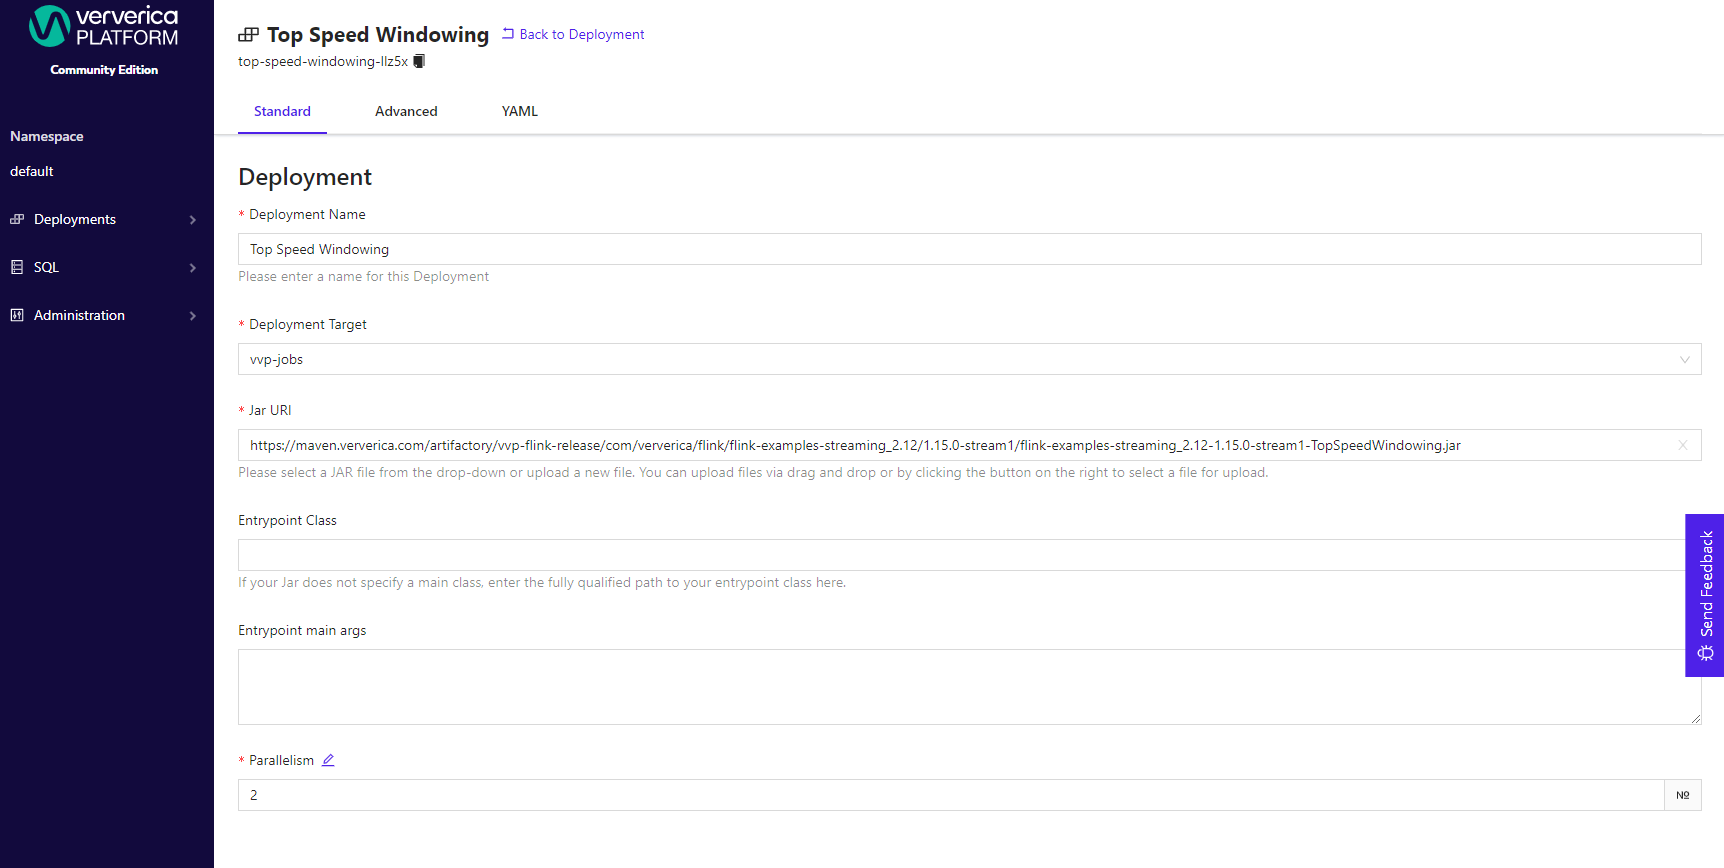
One of the core features of Ververica Platform is application lifecycle management for stateful stream processing applications. As part of this, Ververica Platform takes care of consistently migrating your distributed state when you make changes to your application. For example, you can change your Deployment by changing the parallelism, i.e. rescaling your Flink job.
- Web User Interface
- REST API
In the Deployment overview page, click Configure Deployment, change the parallelism to 2, and click
Save Changes.
Change the value of spec.template.parallelism in vvp-resources/deployment.yaml to 2.
Then PATCH the existing Deployment with the changed resource. For this, you need the metadata.name of your Deployment.
If you did not change the default in vvp-resources/deployment.yaml, the name is top-speed-windowing.
Afterwards, you can PATCH your Deployment with the modified version of vvp-resources/deployment.yaml to scale up the Deployment.
      curl localhost:8080/api/v1/namespaces/default/deployments/top-speed-windowing \
         -X PATCH \
         -H "Content-Type: application/yaml" \
         -H "Accept: application/yaml" \
         --data-binary @vvp-resources/deployment.yaml
Under the hood, Ververica Platform now performs an application upgrade according to the configured Upgrade and Restore Strategy.
For your Deployment, these default to STATEFUL and LATEST_STATE and Ververica Platform has triggered a graceful shutdown of your Flink application while taking a consistent snapshot of its state via a savepoint.
You can see a list of all past savepoints and retained checkpoints for this Deployment in the Snapshots tab.
It then restarts your application from the latest snapshot, which is the one taken during shutdown.
Next Steps
Now that you have a Ververica Platform instance and your first Deployment is up and running, check out the following to learn more about the platform:
- Have a look at the
Advancedtab for configuring Deployments and learn more about Deployments and how to manage their lifecycle. - Take a deep dive into administration and customization, e.g. around logging and metrics, deployment defaults or access control.
- Have a look at how to manage artifacts.