Amazon S3
Amazon S3 (Simple Storage Service) is a highly scalable and durable object storage service offered by AWS. It's designed to store and retrieve data from anywhere on the web, making it a great fit for web applications, backup and restore solutions, archiving, and big data analytics. S3 provides easy-to-use management features, fine-tuned access controls, and robust security capabilities, including rest and transit encryption.
Prerequisites
To set up the integration, ensure an IAM user with the requisite permissions is available. This user should be permitted to create the IAM role and Amazon S3 bucket. To create a S3 bucket, follow the guidelines provided in the Amazon S3 documentation. Upon successful creation, retrieve the Amazon Resource Name (ARN) of the S3 bucket. Flink jobs will utilize this ARN for seamless data processing and analysis.
Create a S3 bucket
Step 1: Sign in to the AWS Console
- Go to AWS Management Console.
- Sign in with your credentials.
Step 2: Open S3
- In the AWS Console, type S3 in the search bar and click on S3 to open the service.
Step 3: Create a bucket
- Click Create bucket.
- Enter a unique Bucket name (e.g.,
my-bucket-ververica). - Click Create bucket.
Step 4: (Optional) Adjust bucket settings
- Block Public Access: Keep it enabled for security unless you want the bucket to be publicly accessible.
- Versioning: Enable it if you want to keep versions of your files.
- Encryption: Enable to secure your files automatically.
Step 5: Upload files (optional)
- Click on the bucket name to open it.
- Click Upload to add files to your bucket.
Create a permissions policy
1. Navigate to the IAM Console:
- Sign in to AWS Management Console.
- In the search bar, type IAM and go to the Identity and Access Management (IAM) dashboard.
2. Open the Policies section:
- In the left-hand navigation pane, click on Policies.
- You will see a list of existing policies. You’ll create a new one.
3. Create a new policy:
- Click the Create Policy button.
4. Choose the Policy Creation Method:
- You can create the policy using the Visual Editor or write it directly in JSON.
5. Define permissions (JSON example):
If you are using the JSON editor, here’s an example of a simple policy that grants s3:PutObject, s3:GetObject, and s3:DeleteObject permissions to a specific S3 bucket:
{
    "Version": "2012-10-17",
    "Statement": [
        {
            "Effect": "Allow",
            "Action": ["s3:PutObject", "s3:GetObject", "s3:DeleteObject"],
            "Resource": "arn:aws:s3:::my-vvc-bucket/*"
        },
        {
            "Effect": "Allow",
            "Action": ["s3:ListBucket"],
            "Resource": "arn:aws:s3:::my-vvc-bucket"
        }
    ]
}
6. Review and finalize the policy:
- Once you've configured the policy, click Next.
- Optionally, add tags to the policy for easier tracking or management.
- Give the policy a Name and an optional Description.
- Click Create Policy.
Create an IAM role in AWS
Follow these steps to create an IAM Role that grants third-party access, like Ververica Cloud, to your AWS resources with the specified permissions.
Step 1: Select trusted entity
- Navigate to AWS Management Console.
- In the left-hand menu, click on Roles, and then click Create role.
- Under Select trusted entity, choose AWS account.
- Select the option Another AWS account and enter 794031221915, which is Ververica's AWS account ID.
- Check the option Require external ID for additional security.
- Enter the External ID which corresponds to the Workspace ID from Ververica Cloud. You can find the External ID in the top-right corner of the Private Connection page in Ververica or in the URL of that page.
Create a dedicated IAM Role for each Ververica Cloud workspace. If a role already exists, update its policy rather than creating a new role. Refer to AWS documentation for updating roles.
Step 2: Add permissions
- In the Add permissions screen, select the previously created policy, such as
Policy_PrivateConnection_S3. - Ensure the policy grants necessary access to the Ververica Cloud environment, like permissions for S3, or other services depending on the requirements.
Step 3: Name, review, and create
- Under Role name, provide a descriptive name for the role (e.g.,
ws_iam_role_ververica). - Optionally, add a description to make it clear that this role is for Ververica Cloud access (e.g.,
for Ververica Cloud access). - Review the trust policy and permissions summary to ensure they are correct.
- Once everything is reviewed, click Create role.
Here’s an example of a trust policy:
{
   "Version": "2012-10-17",
   "Statement": [
       {
           "Effect": "Allow",
           "Action": "sts:AssumeRole",
           "Principal": {
               "AWS": "arn:aws:iam::794031221915:root"
           },
           "Condition": {
               "StringEquals": {
                   "sts:ExternalId": "YourWorkspaceExternalID"
               }
           }
       }
   ]
}
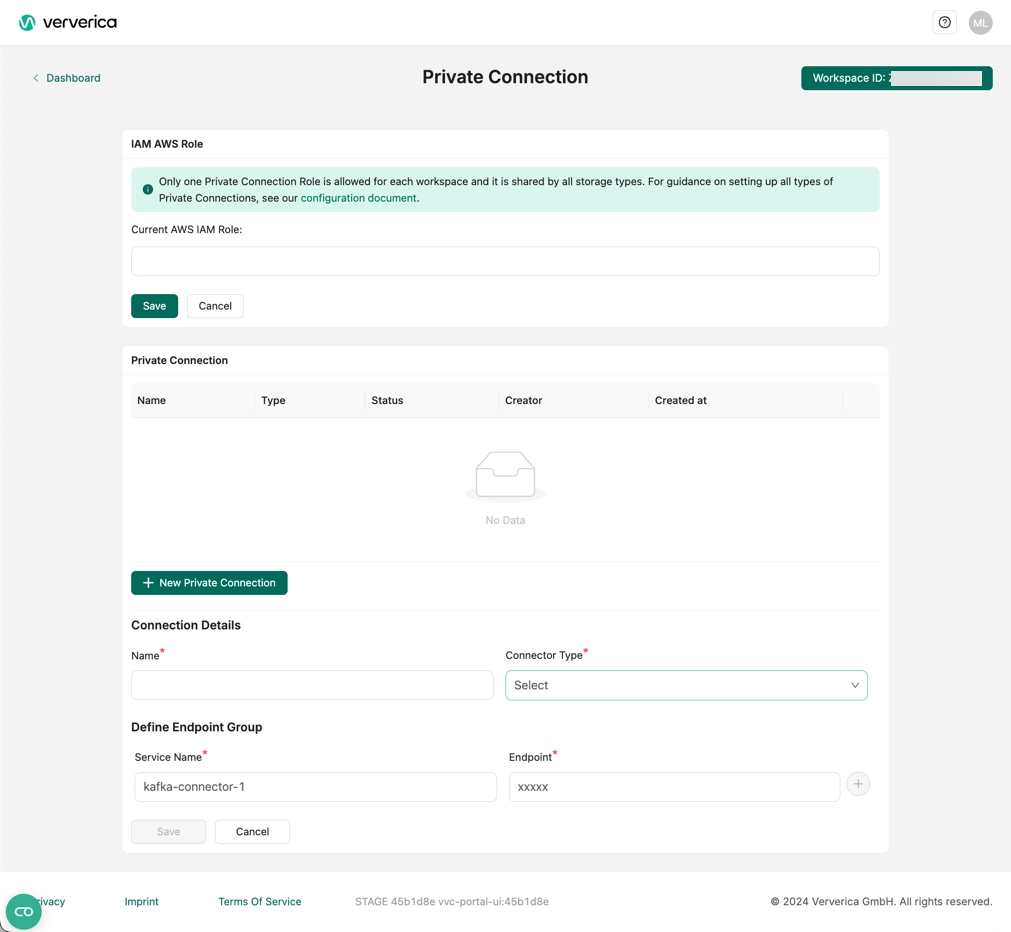
Step 4: Bind the IAM role to Ververica Cloud
- Log in to Ververica Cloud and display your Dashboard.
- Click on the Profile menu button in the upper-right corner of the Dashboard and choose Private Connection.
- Bind the IAM Role at the first section of the page and click Save.
- Click New Private Connection, fill in the Name, set the Connector Type to Amazon S3 and click Save.