Python deployment
Overview
Ververica Platform: Self-Managed allows you to run Python Deployments. This topic describes how to quickly set up a Python Deployment, run it, and view the outputs in Ververica Platform: Self-Managed.
Watch this video to learn more about Python deployments on Ververica Platform: Self-Managed.
Step 1: Prepare the Python and Input Data for Testing
You need to download the following files to be used in this tutorial:
- Download word_count_streaming.py to your local machine.
- Download Shakespeare.txt to your local machine.
Step 2: Upload the Artifact Files
To upload the artifact files:
-
In the left navigation, click the Namespace selector and select the namespace that you want to open. The inital namespace that was created during installation is called default.
-
Click Artifacts.
-
To upload the artifacts, do one of the following:
- Click Upload Artifact, navigate to and select the downloaded files, then click Open.
- Drag the artifact files from the download location into the Artifacts table.
The artifacts will be listed.
Step 3: Create a Python Deployment
To create the Python deployment:
-
In the left-navigation, click Deployments > Create Deployment and choose Python Deployment from the drop-down menu.
-
Fill in the Create Deployment form as follows (you might need to scroll down to see all the options):
- Deployment Type: PYTHON
- Deployment Name: Enter word-count-streaming-test-py for this tutorial.
- Engine Version: Leave this set to the default version.
- PYTHON URI: Click in the field and select the word_count_streaming.py from the list. (Note: Console will fill in the required URI when you select the Python file.)
- Entry Module: Leave blank.
- Entry Point Main Arguments:
--input /flink/usrlib/Shakespeare.txt - Python Libraries: Leave blank
- Python Archives: Leave blank
- Additional Dependencies: Click in the field and select the Shakespeare.txt from the list.
- Description: Leave blank for this tutorial.
- Label: Leave blank for this tutorial.
-
Click Deploy. The deployment will be listed. Until you start the deployment, it will be listed as CANCELLED (i.e. not running).
Step 4: Start the Deployment
To start the deployment:
-
To the right of the deployment name, click Start in the Actions column.
-
Fill in the startup option information. For this tutorial, use the default settings:
- Mode: Initial Mode (see Start deployment for more information.)
- Configure Autopilot: disabled (see Configure Autopilot and Scheduled Tuning for more information.)
-
Click Start.
- Initially, the state will be STARTING.
- After the deployment is started, the deployment status changes to RUNNING.
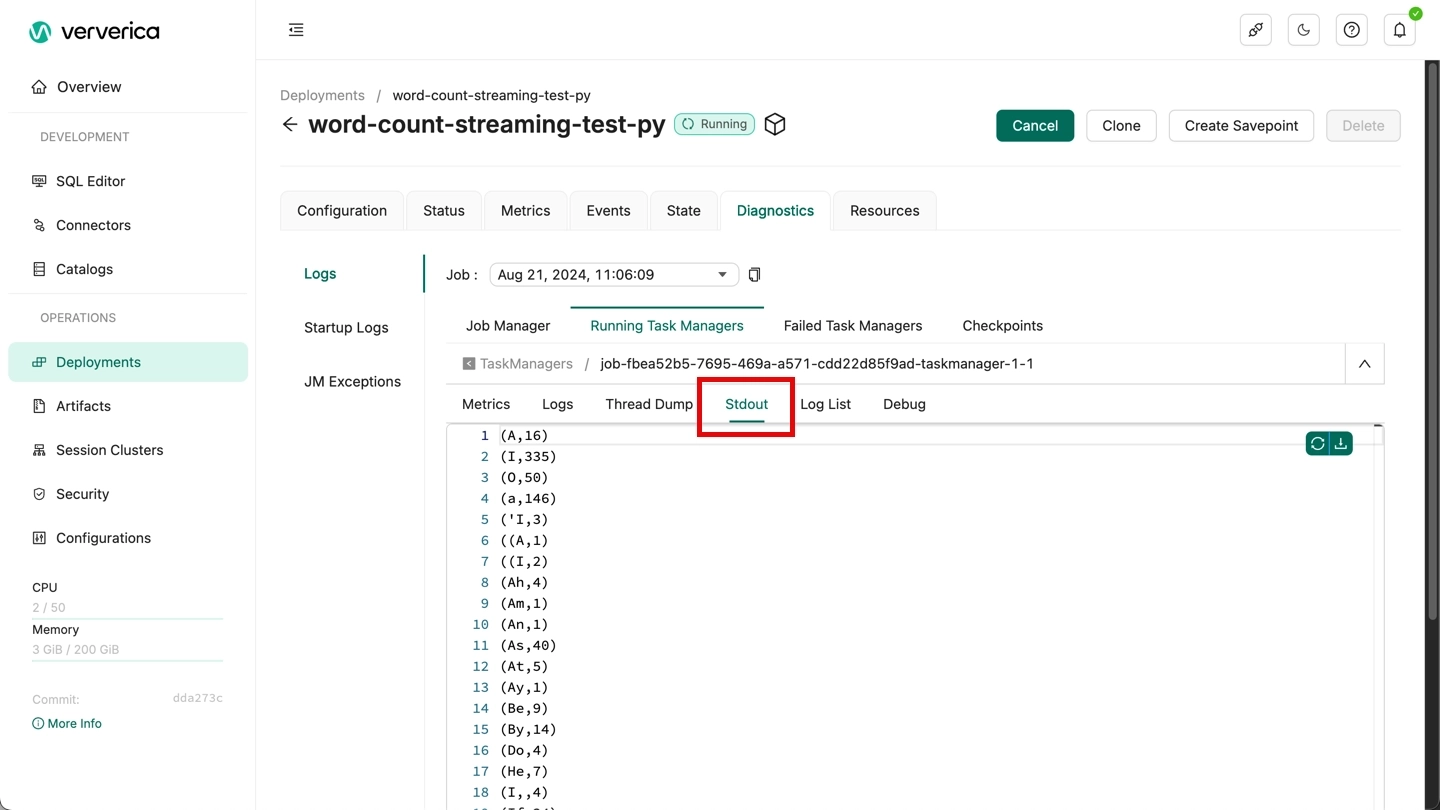
Step 5: View the Results
To view the results:
-
On the Deployments page, click the name of the Deployment.
-
Click the Diagnostics tab.
-
Click the Logs > Running Task Managers tab.
-
Click the entry in the Path, ID column.
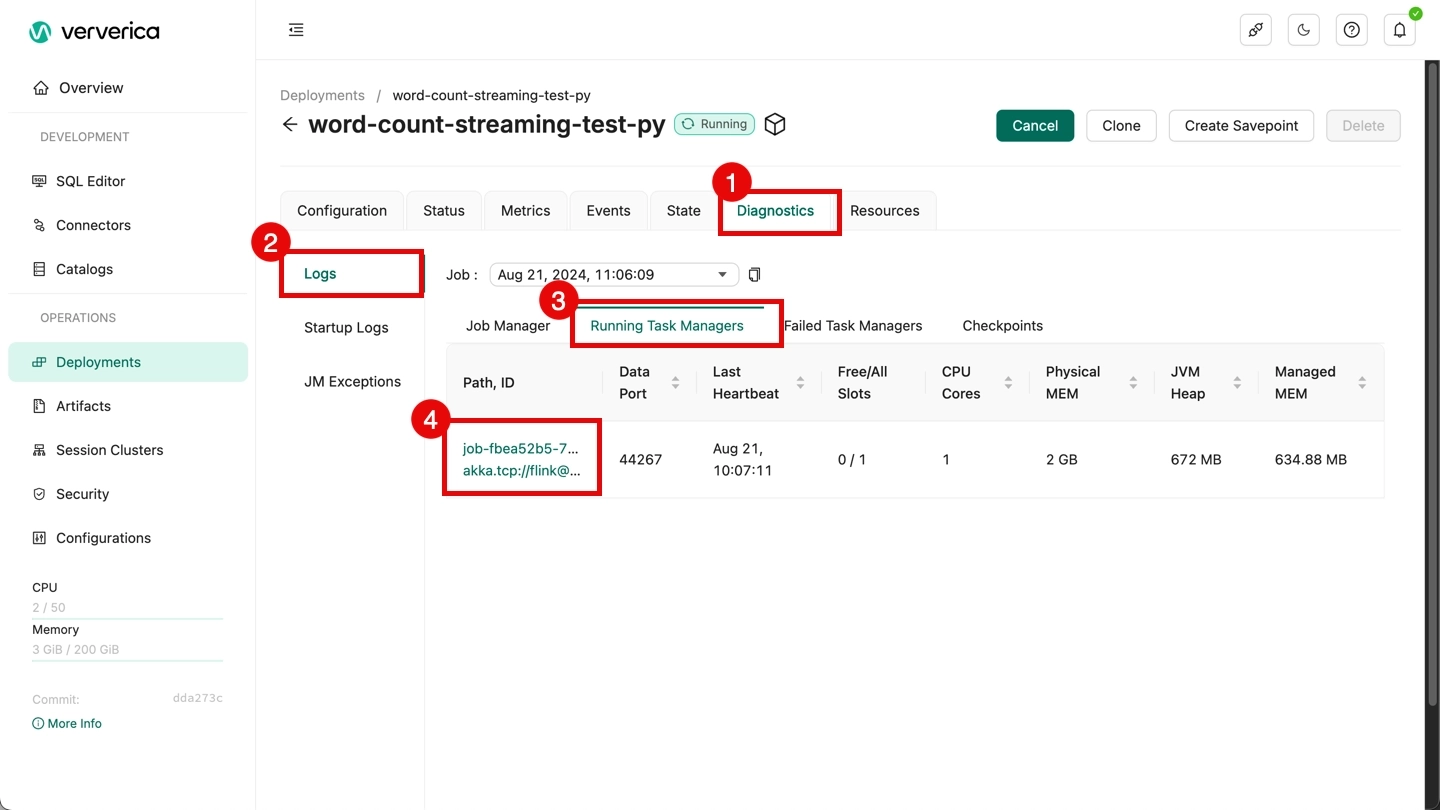
-
Display the Stdout tab to see the results.