SQL deployment
Overview
Ververica Platform: Self-Managed allows you to edit drafts and run deployments using SQL code. This topic explains how to perform various operations, such as accessing Ververica Platform: Self-Managed, creating SQL drafts, and running SQL deployments.
Watch this video to learn more about SQL deployments on Ververica Platform: Self-Managed.
Procedure
The procedure consists of three steps:
- Step 1: Create an SQL draft and write business code on the SQL Editor page.
- Step 2: Start the deployment
- Step 3: View the results of the deployment
Step 1: Create an SQL Draft
To create your first SQL draft:
-
In the left navigation, click the Namespace selector and select the namespace that you want to open. The inital namespace that was created during installation is called default.
-
Click SQL Editor page, then click New.
-
In the New Draft dialog box, select the Blank Stream Draft template and click Next.
-
Enter a Name (e.g. My_first_SQL) and click Create.
noteFor this tutorial you can accept the default values for the Location and Engine Version (you might need to scroll down to see this option).
-
Copy the deployment code below and paste it into the code editor panel on the right.
CREATE TEMPORARY TABLE datagen_source(
randstr VARCHAR
) WITH (
'connector' = 'datagen'
);

CREATE TEMPORARY TABLE print_table(
randstr  VARCHAR
) WITH (
'connector' = 'print',
'logger' = 'true'
);

INSERT INTO print_table
SELECT SUBSTRING(randstr,0,8) from datagen_source;noteThis creates a datagen source table that generates random data, and enables the system to display the data of the randstr field in the datagen source table.
-
Click Validate to check the syntax. It should pass with no issues, and a confirmation will be displayed under the SQL code panel.
-
Click Deploy.
-
In the Deploy draft dialog box, click Confirm.
-
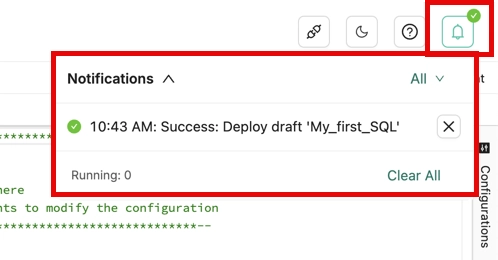
The draft name will be displayed with a green success icon, and you’ll see a notification in the top right of the Console toolbar. Click the notification icon to view the message.
Step 2: Start the Deployment
To start the SQL deployment:
-
In the Console, click Deployments.
-
Find the new Deployment and click Start in the Actions column.
-
In the Start Job dialog box, select Initial mode and click Start.
Initially, the status will be STARTING.
-
After the deployment is started, the deployment status changes to RUNNING. This indicates that the deployment is running properly.
Step 3: View the Results
To view the results:
-
On the Deployments page, click the name of the Deployment.
-
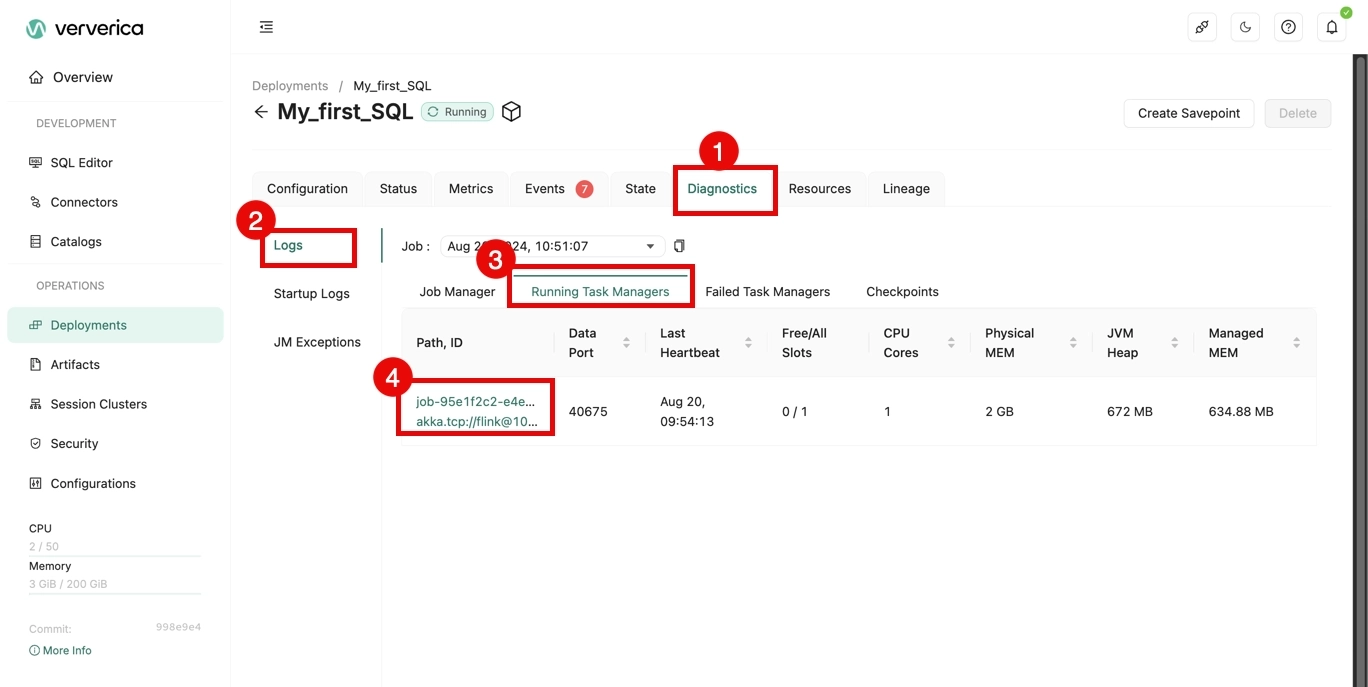
Click the Diagnostics > Stdout tab.
-
On the Logs tab, click Running Task Managers.
-
Click the value in the Path, ID column.
-
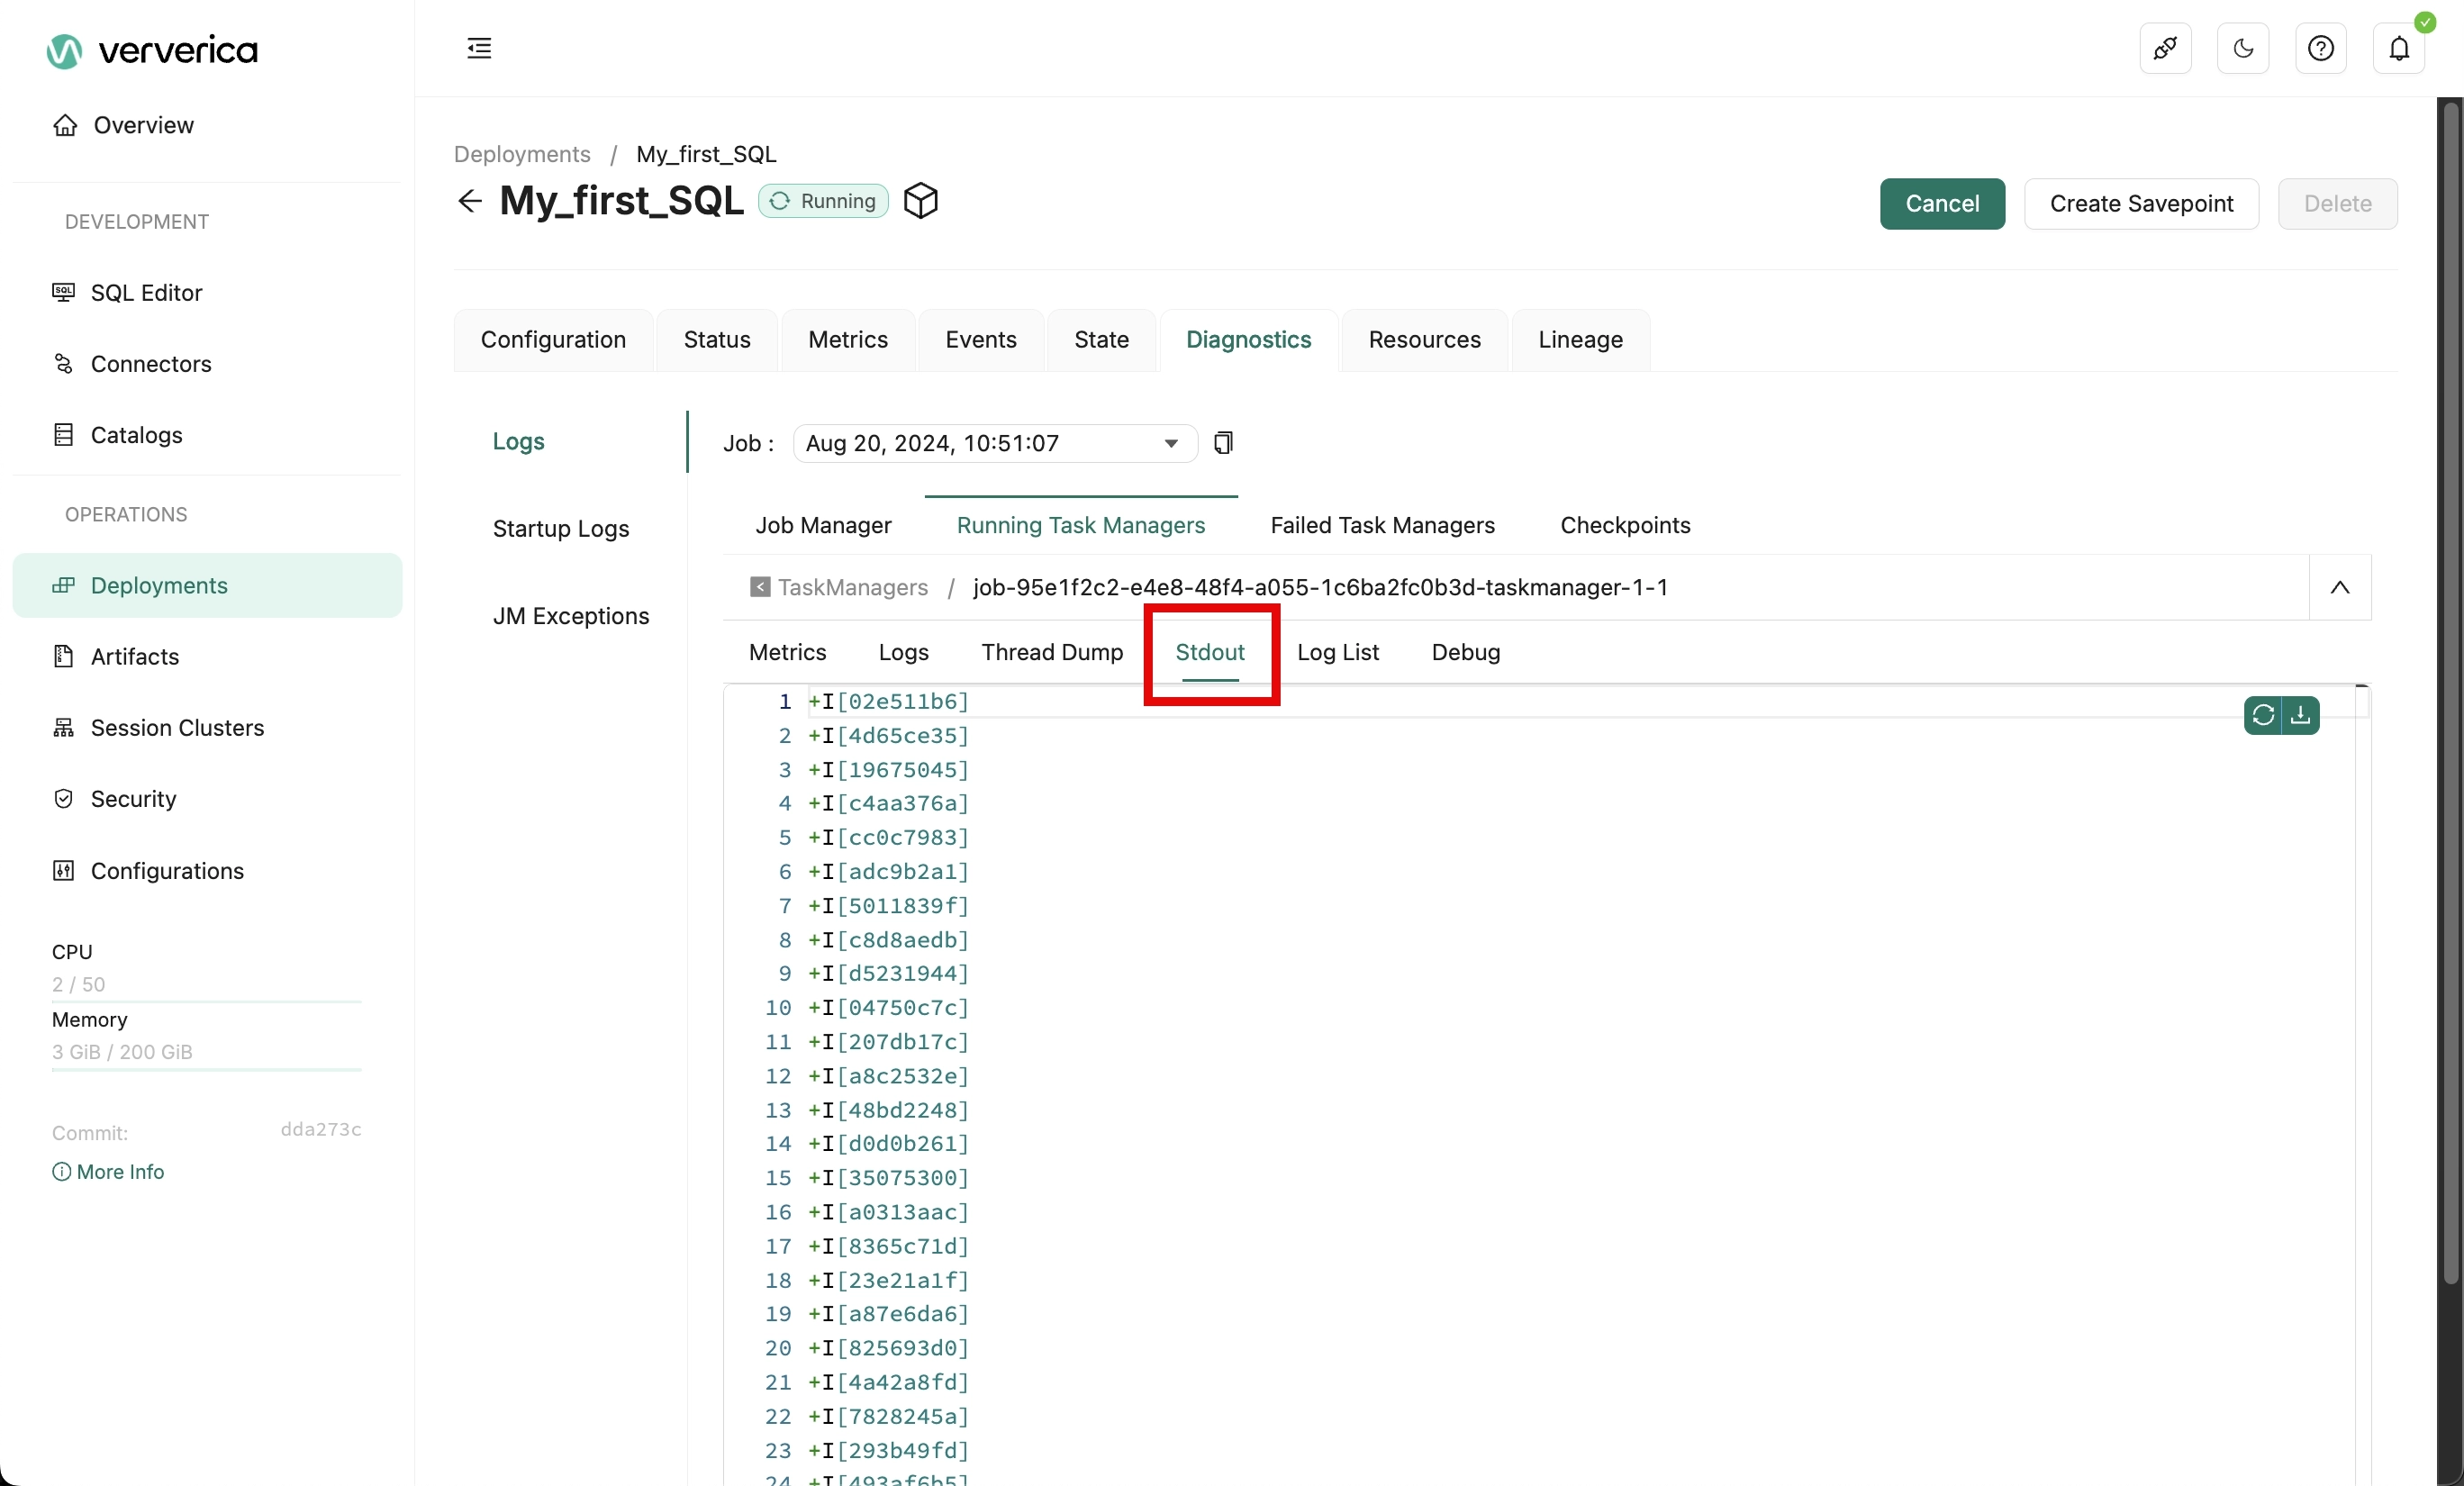
Display the Stdout tab to see the results.
More Information
For more details, see: