Get started
The basic process for getting started with Ververica Cloud is as follows:
- Create a Ververica Cloud account and log in. (If you already have an existing account, just log in as normal.)
- Create your Start for Free workspace.
- Follow one of the Quick tutorials:
Create a Ververica Cloud account and log in
Navigate to the Ververica Cloud sign-up page to get started.
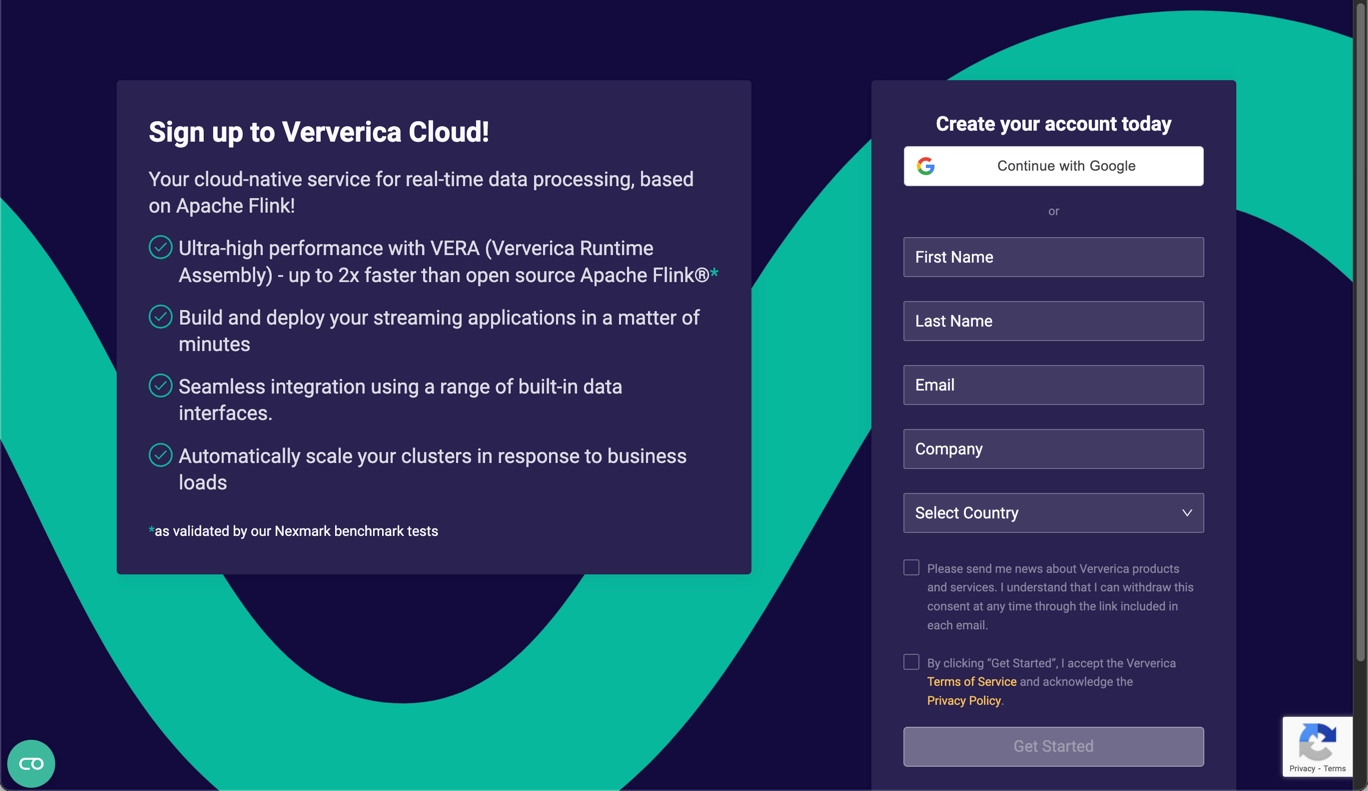
Do one of the following to sign up:
- Click Continue with Google
- Enter the details for an existing business email account. This will be your username on Ververica Cloud; temporary email addresses are not allowed.
Follow the on-screen instructions. The steps required depend on how you chose to sign up. For example, with a Google account you might be asked to provide 2-factor authentication. With a business email account, you'll receive an email from Ververica Cloud with a link to set your password, then you'll need to sign in. Once you've followed all the necessary instructions, you can proceed to the next step.
Click Get Started. A Success message will be displayed.
Your Dashboard will be displayed. Initially, it will be empty, since you've not set up any workspaces. You can now create a Start for Free workspace.
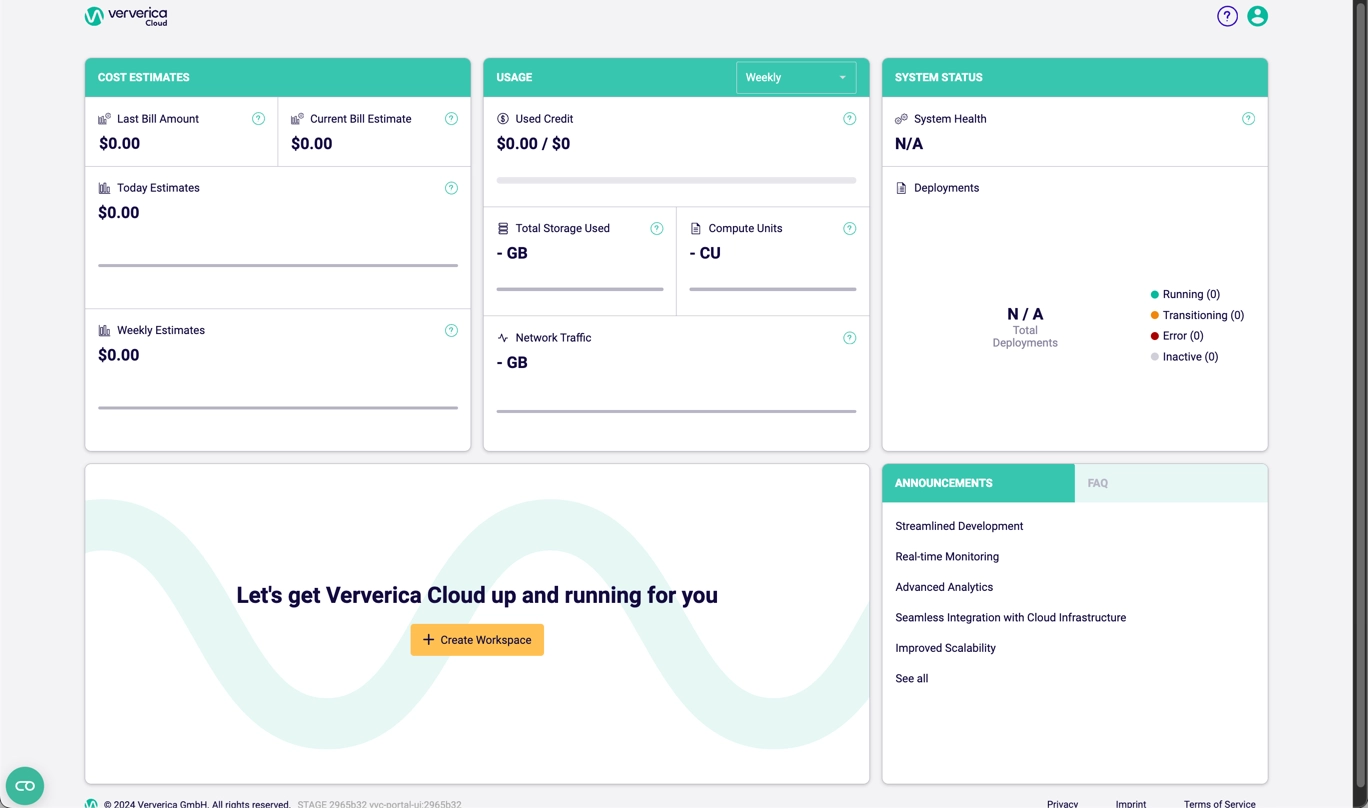
You will also receive an email in your inbox inviting you to register to access the Customer Portal. You don't need to do this right now, but when you're ready you can follow the instructions in the email then check out this topic.
Rules when setting up your initial password
- At least 1 uppercase character.
- At least 1 lowercase character.
- At least 1 number character.
- At least 1 of * $ - + ? _ & = ! % { } @.
- Between 12 and 128 characters.
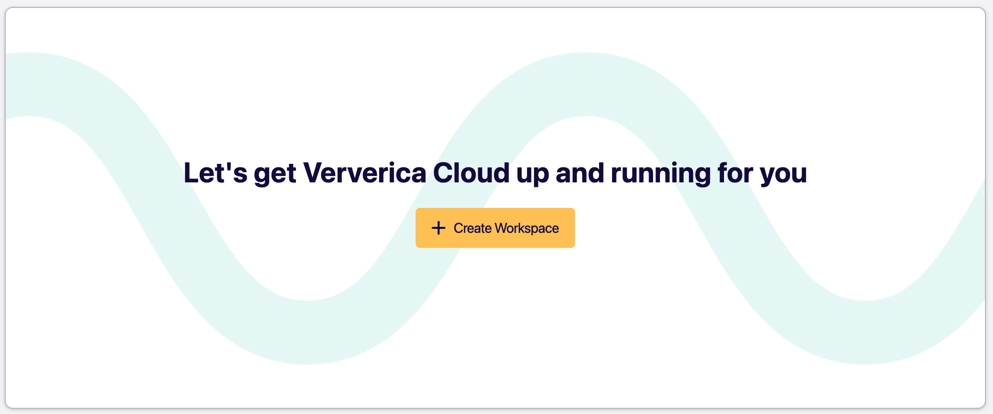
Create your Start for Free workspace
In this section, you’ll create a free workspace with sufficient capacity to run the Quick Start tutorials.
To create your Start for Free workspace in Ververica Cloud:
In your Ververica Cloud Dashboard, click Create Workspace.
In the Offering Type panel, click Start for Free under the PAY AS YOU GO option.
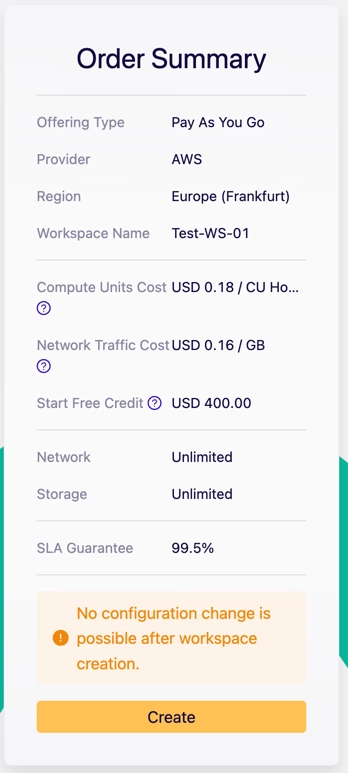
In the Offering Details panel that expands below the PAYG panel, enter the following:
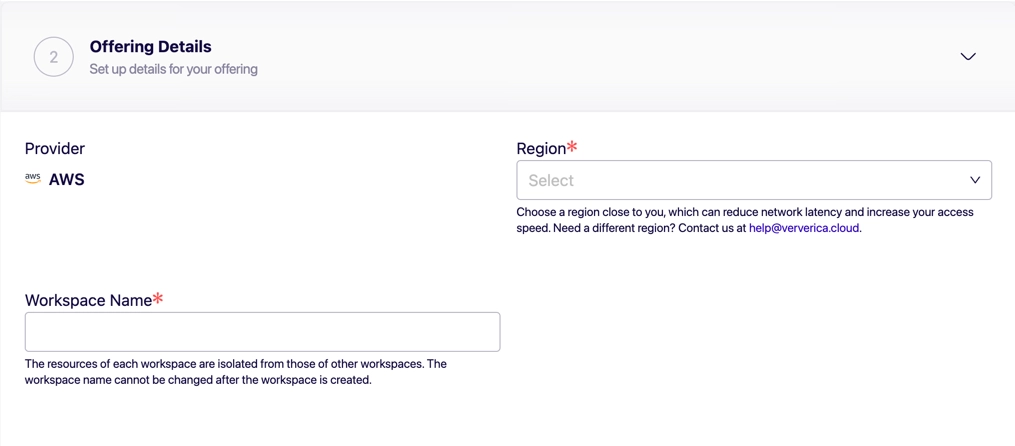
- Provider: (This is set to AWS and cannot be changed).
- Region: Select the region closest to you from the drop-down menu. Currently, we support three regions:
- US West (N. California)
- US East (N. Virginia)
- Europe (Frankfurt)
- Workspace Name: For example, call it Test-WS. In general, you can have:Note: You don’t need to worry about entering any payment details at this stage, as this is a free trial.
 - Maximum 128 characters
 - Uppercase letters
 - Lowercase letters
 - Numbers 0–9
 - Special characters: SPACE(“ “), UNDERSCORE(“_“), DASH(“-“)
In the Order Summary panel, click Create.
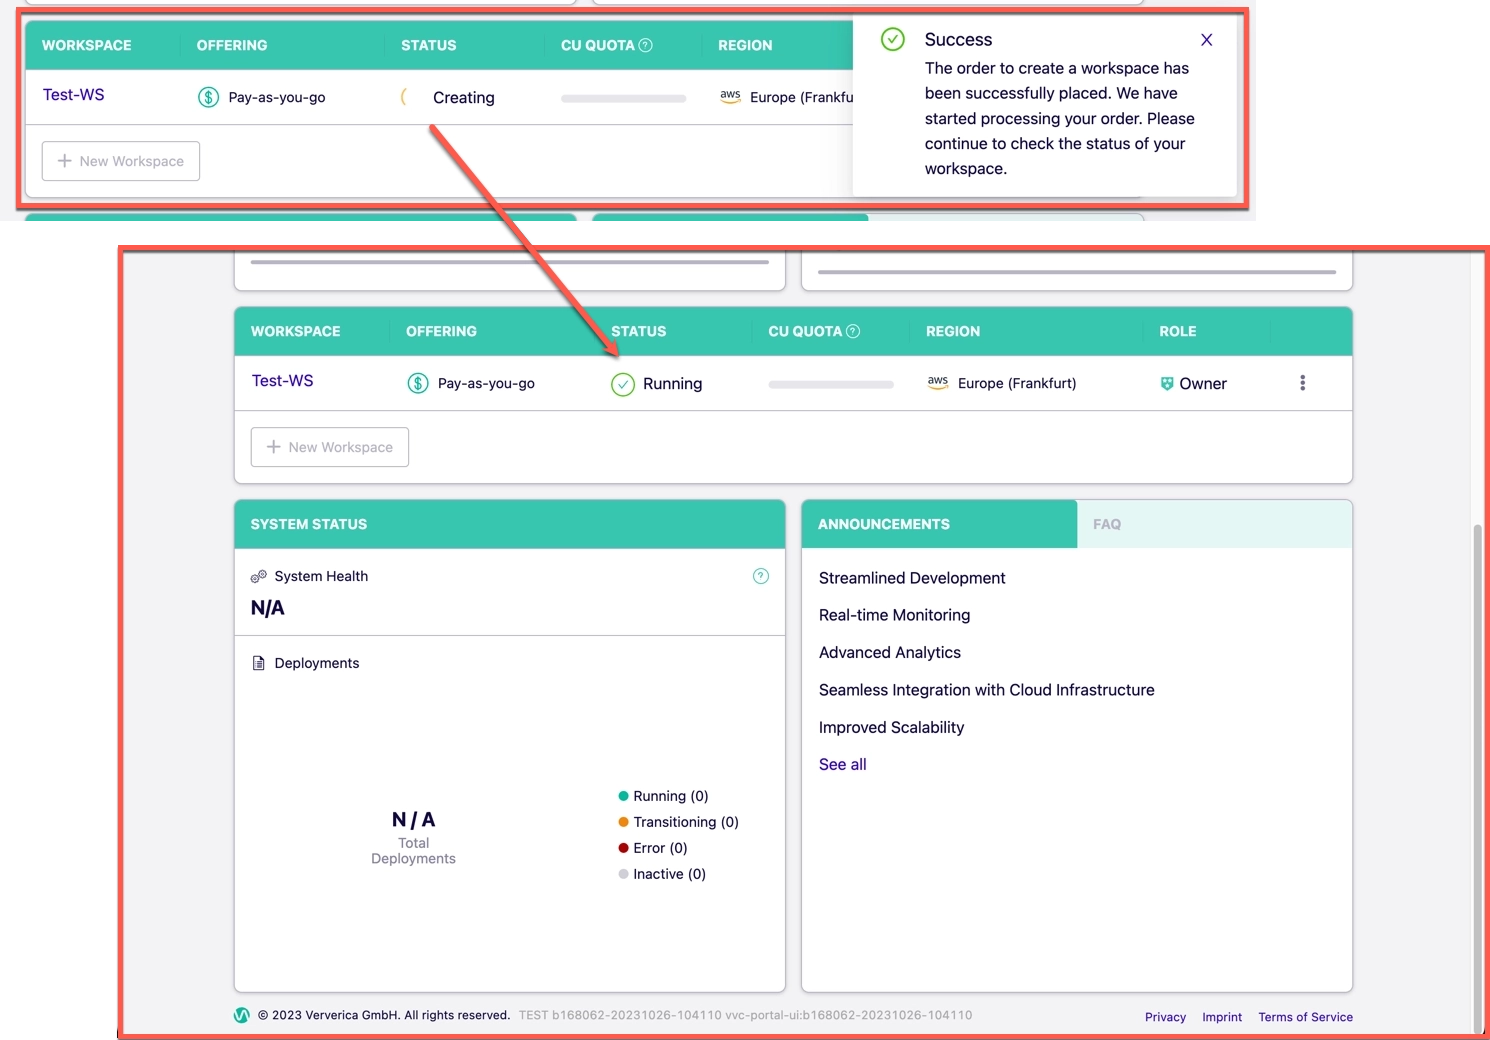
Your Dashboard page will be displayed, with your new workspace listed.
After you complete the above steps, it can take a few minutes for the new Workspace to be created. While this is happening, the status will show as Creating.
That’s it. You’re ready to start developing your first application. Follow one of the Quick tutorials: