Flink SQL Templating
Flink SQL templating provides users with an interface for creating SQL queries using predefined templates rather than manual query construction for commonly used queries.
Additionally, Flink SQL templating allows for dynamic input by parameterizing parts of the query template, making queries adaptable to various use cases without modifying the underlying template.
Templates are also able to be shared across different Ververica Platform instances within the same organization.
Install Flink SQL templating
To install the Flink SQL templating feature, run the following command:
helm upgrade --install sql ververica/ververica-sql-template --version 1.0.4 --namespace <your-namespace> --values values.yaml
Example configuration
Below is an example configuration for Flink SQL templating
##
## Ververica Platform SQL Template application configuration
##
vvp:
  ## Default registry configuration.
  ##
  ## This registry will be used for all image references in Ververica Platform, including the
  ## platform components themselves as well as Flink, unless overridden in a more specific config.
  registry: eu.gcr.io/vvp-devel-240810

  ## Platform metadata persistence configuration.
  ##
  ## This section configures how Ververica Platform stores metadata such as Deployments and
  ## Namespace information.
  ##
  ## Note: `vvp.persistence.type` is a required setting.
  persistence:
    ## REQUIRED: The type of persistence to use. Must be one of:
    ## * jdbc: store data in the database configured in the `datasource` section below
    ##   * Supported JDBC drivers: `sqlite`, `postgresql`, `mysql`
    ## * local: a preset for JDBC storage using SQLite on a local volume (required for Community
    ##   edition)
    type: ""

    ## Datasource configuration. This section is a Spring Boot object; see the Ververica Platform
    ## documentation for examples and see [1] for Spring Boot's documentation.
    ##
    ## [1]https://docs.spring.io/spring-boot/docs/2.2.0.RELEASE/reference/html/spring-boot-features.html#boot-features-connect-to-production-database
    #datasource: {}

##
## Additional volumes configuration.
##
## volumes: define the Kubernetes volumes that can be mounted into the Ververica Platform container(s)
## (but not Flink containers). The definition below is only an example and all volume definitions
## supported by Kubernetes are allowed.
##
## volumeMounts: define the Kubernetes volume mounts for attaching the volume(s) defined in the
## `volumes` section into the Ververica Platform container(s).
##
## Note: these volumes will only be attached to the containers running Ververica Platform itself,
##       not Flink application containers.
##
#volumes:
#- name: "my-volume"
#  secret:
#    secretName: "my-secret"
#
#volumeMounts:
#- name: "my-volume"
#  mountPath: "/some-path"
##
## Security Context of Ververica Platform Pod. Comment out when running on OpenShift.
##
securityContext:
  fsGroup: 999

##
## Container configuration for the sql-template component
##
sqltemplate:
  image:
    ## Defaults to the registry specified under `vvp.registry` plus "/vvp-sql-template".
    #repository:
    tag:
    pullPolicy: Always

  resources:
    limits:
      cpu: 1000m
      memory: 1Gi
    requests:
      cpu: 250m
      memory: 1Gi

#  securityContext:
#    allowPrivilegeEscalation: false


##
## Additional environment variables for the Ververica Platform Kubernetes deployment
##
env: []

##
## Additional containers to run in the VVP Pod
## see: https://kubernetes.io/docs/reference/kubernetes-api/workloads-resources/container/
##
extraContainers: []

##
## Additional initContainers to run in the VVP Pod
## see: https://kubernetes.io/docs/reference/kubernetes-api/workloads-resources/container/
##
extraInitContainers: []

##
## Kubernetes Service configuration
##
service:
  type: ClusterIP
  externalPort: 80
  targetPort: 8080
  labels: {}
  annotations: {}

##
## Kubernetes PersistentVolume configuration
##
persistentVolume:
  enabled: false

  # These must match the accessModes of the existing PVC or dynamic provisioner
  # Ref: http://kubernetes.io/docs/user-guide/persistent-volumes/
  accessModes:
  - ReadWriteOnce

  # PVC annotations
  annotations: {}

  # Use an existing PVC
  #existingClaim: ""

  size: 8Gi

  # PV storage class
  # If defined, storageClassName: <storageClass>
  # If undefined (the default) or set to null, no storageClassName spec is
  #   set, choosing the default provisioner.  (gp2 on AWS, standard on
  #   GKE, AWS & OpenStack)
  #storageClass:

  # Subdirectory of the PersistentVolume to use
  subPath: ""


## Node labels for pod assignment
## ref: https://kubernetes.io/docs/user-guide/node-selection/
##
nodeSelector: {}

## Tolerations for pod assignment
## ref: https://kubernetes.io/docs/concepts/configuration/taint-and-toleration/
##
tolerations: []

## Affinity for pod assignment
## ref: https://kubernetes.io/docs/concepts/configuration/assign-pod-node/#affinity-and-anti-affinity
##
affinity: {}

## Priority class name for pod assignment
## ref: https://kubernetes.io/docs/concepts/configuration/pod-priority-preemption/
priorityClassName: ""

## Annotations for the Ververica Platform pod
## ref: https://kubernetes.io/docs/concepts/overview/working-with-objects/annotations/
##
podAnnotations: {}

## Labels for the Ververica Platform deployment
## ref: https://kubernetes.io/docs/concepts/overview/working-with-objects/labels
##
deploymentLabels: {}

## Labels that are added to every resource in the chart
##
extraLabels: {}

# vim: syntax=yaml
Ververica Platform configuration is provided by the values.yaml file:
vvp:
  gateway:
    services:
      sqltemplateEndpoint: http://sql-ververica-sql-template.vvp.svc/
Create an SQL template
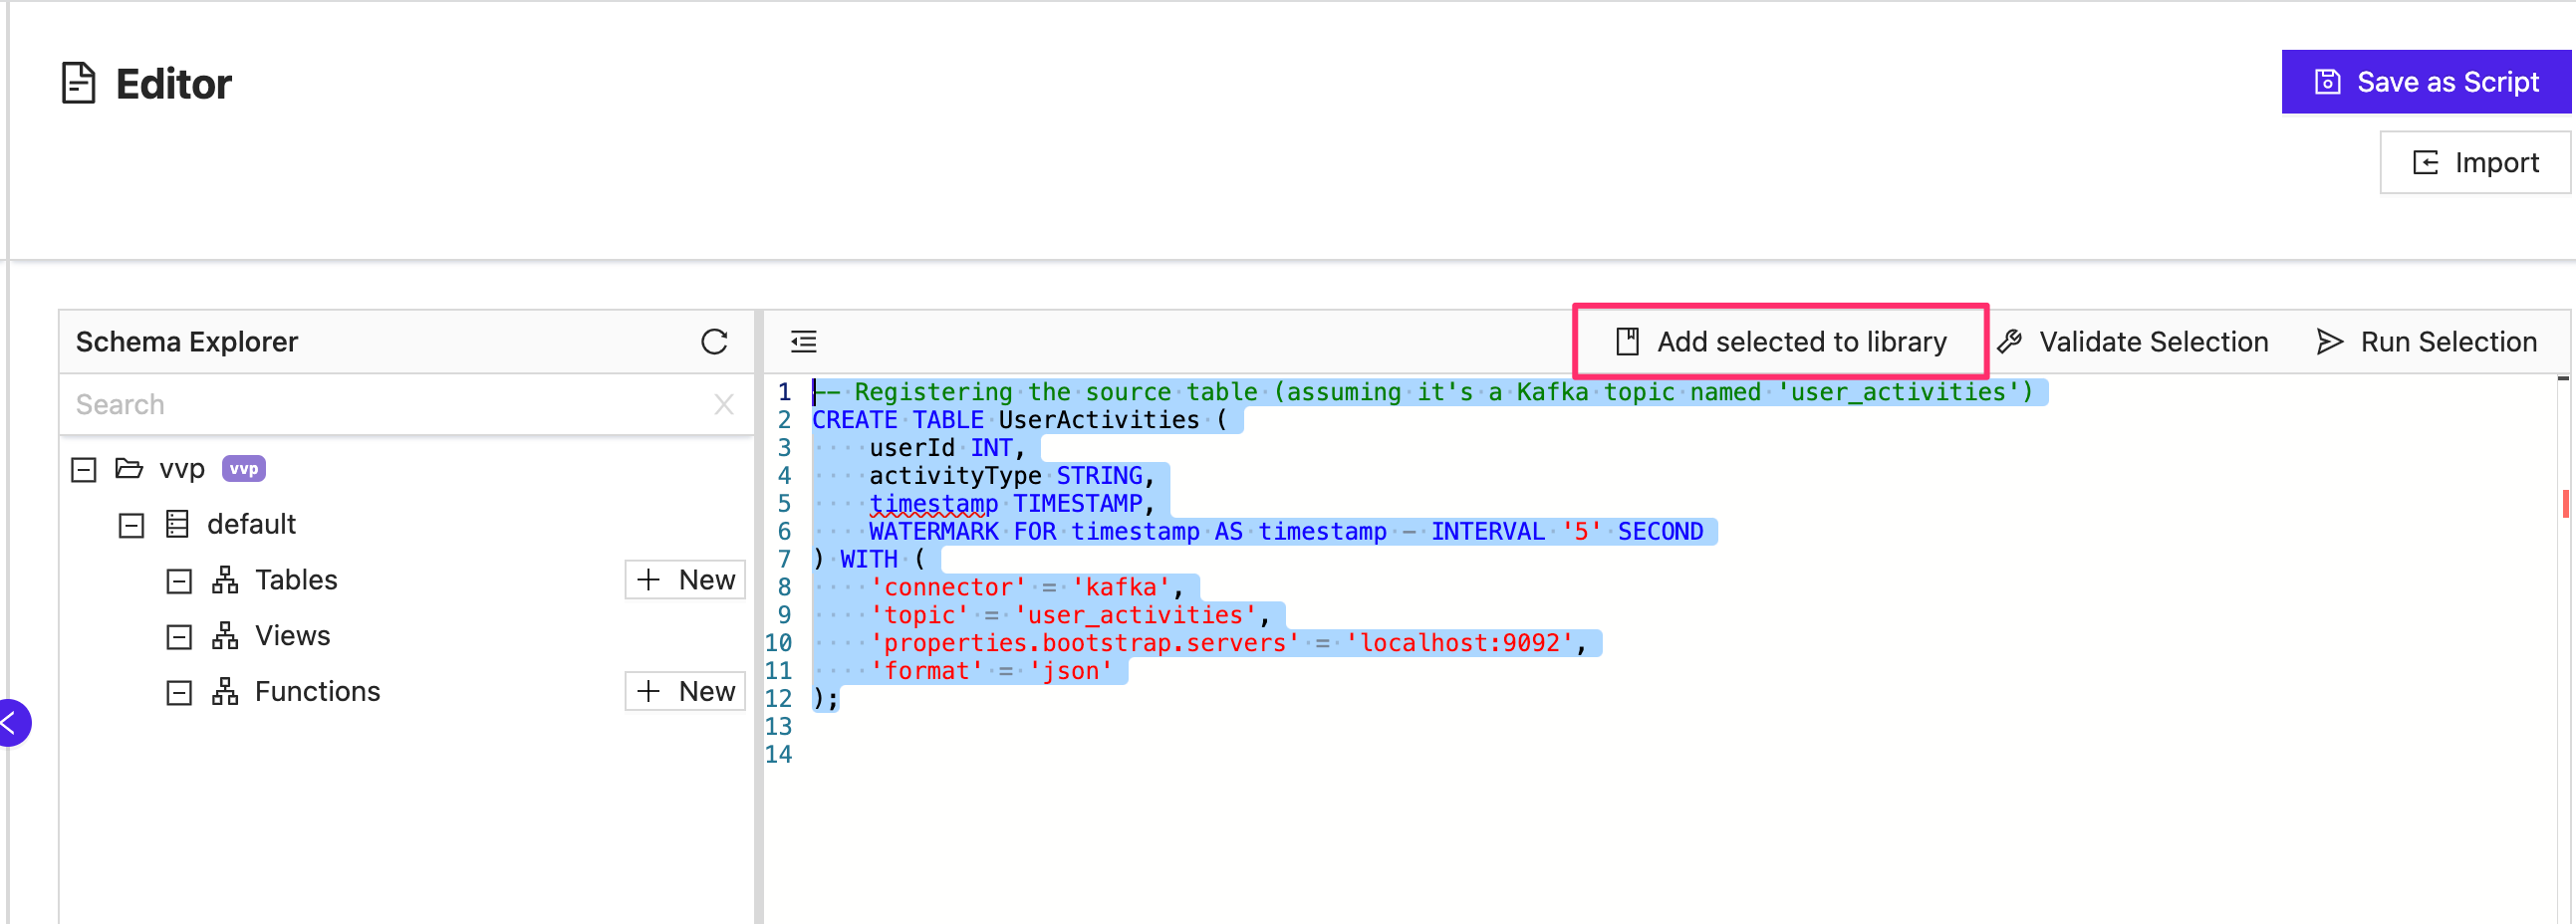
After opening the SQL Editor, you will see the option to add the selected query to the library.

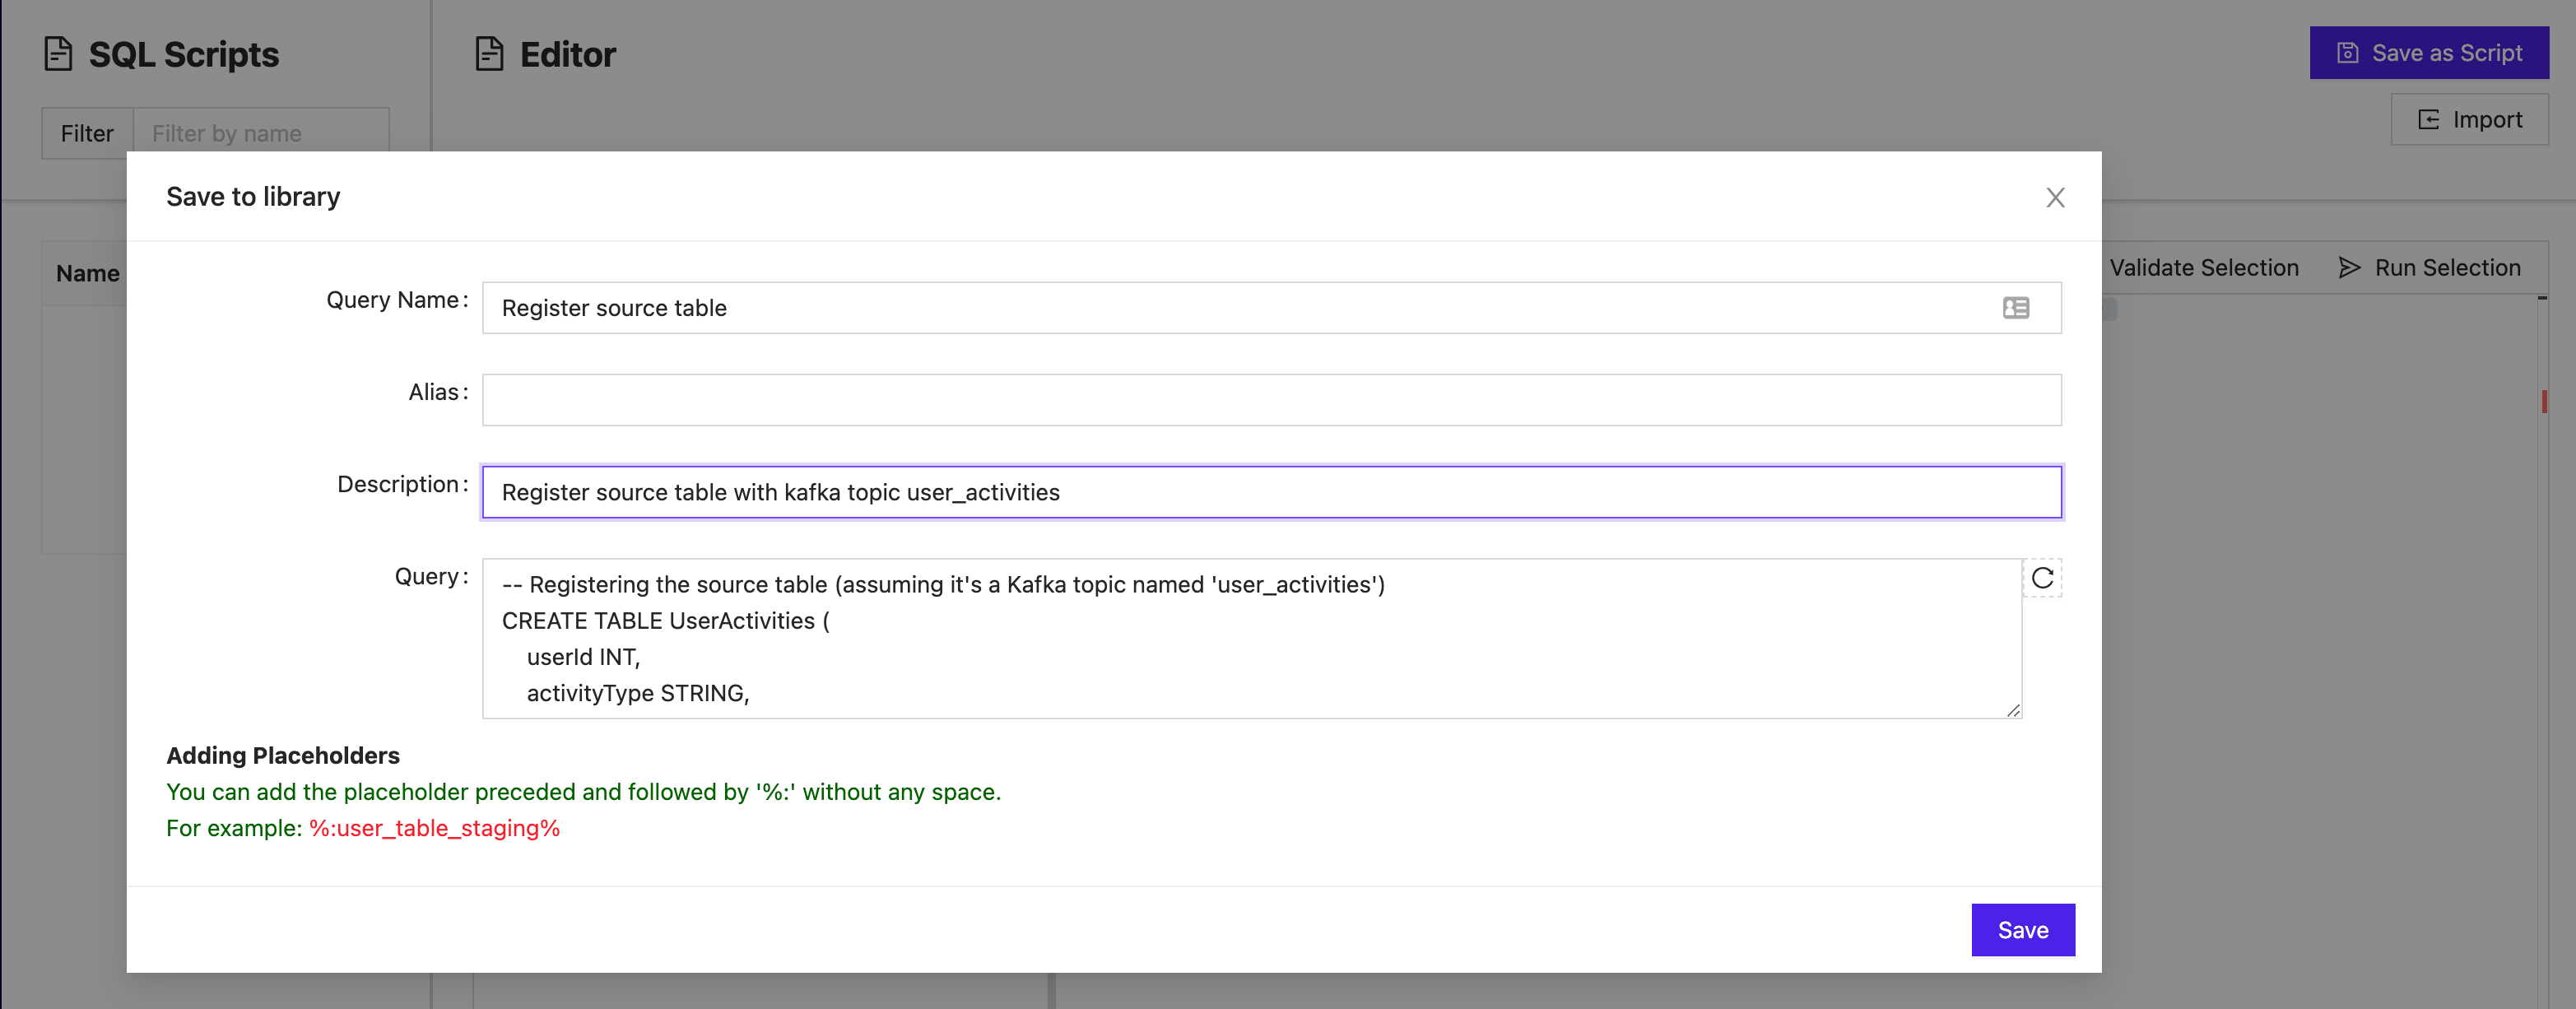
After adding the query to the library, you can give the query a name and description so that it is easily distinguishable for future use across teams in the organization. Click Save, and the query will be available in the SQL Editor for all future query construction.

Import an SQL template
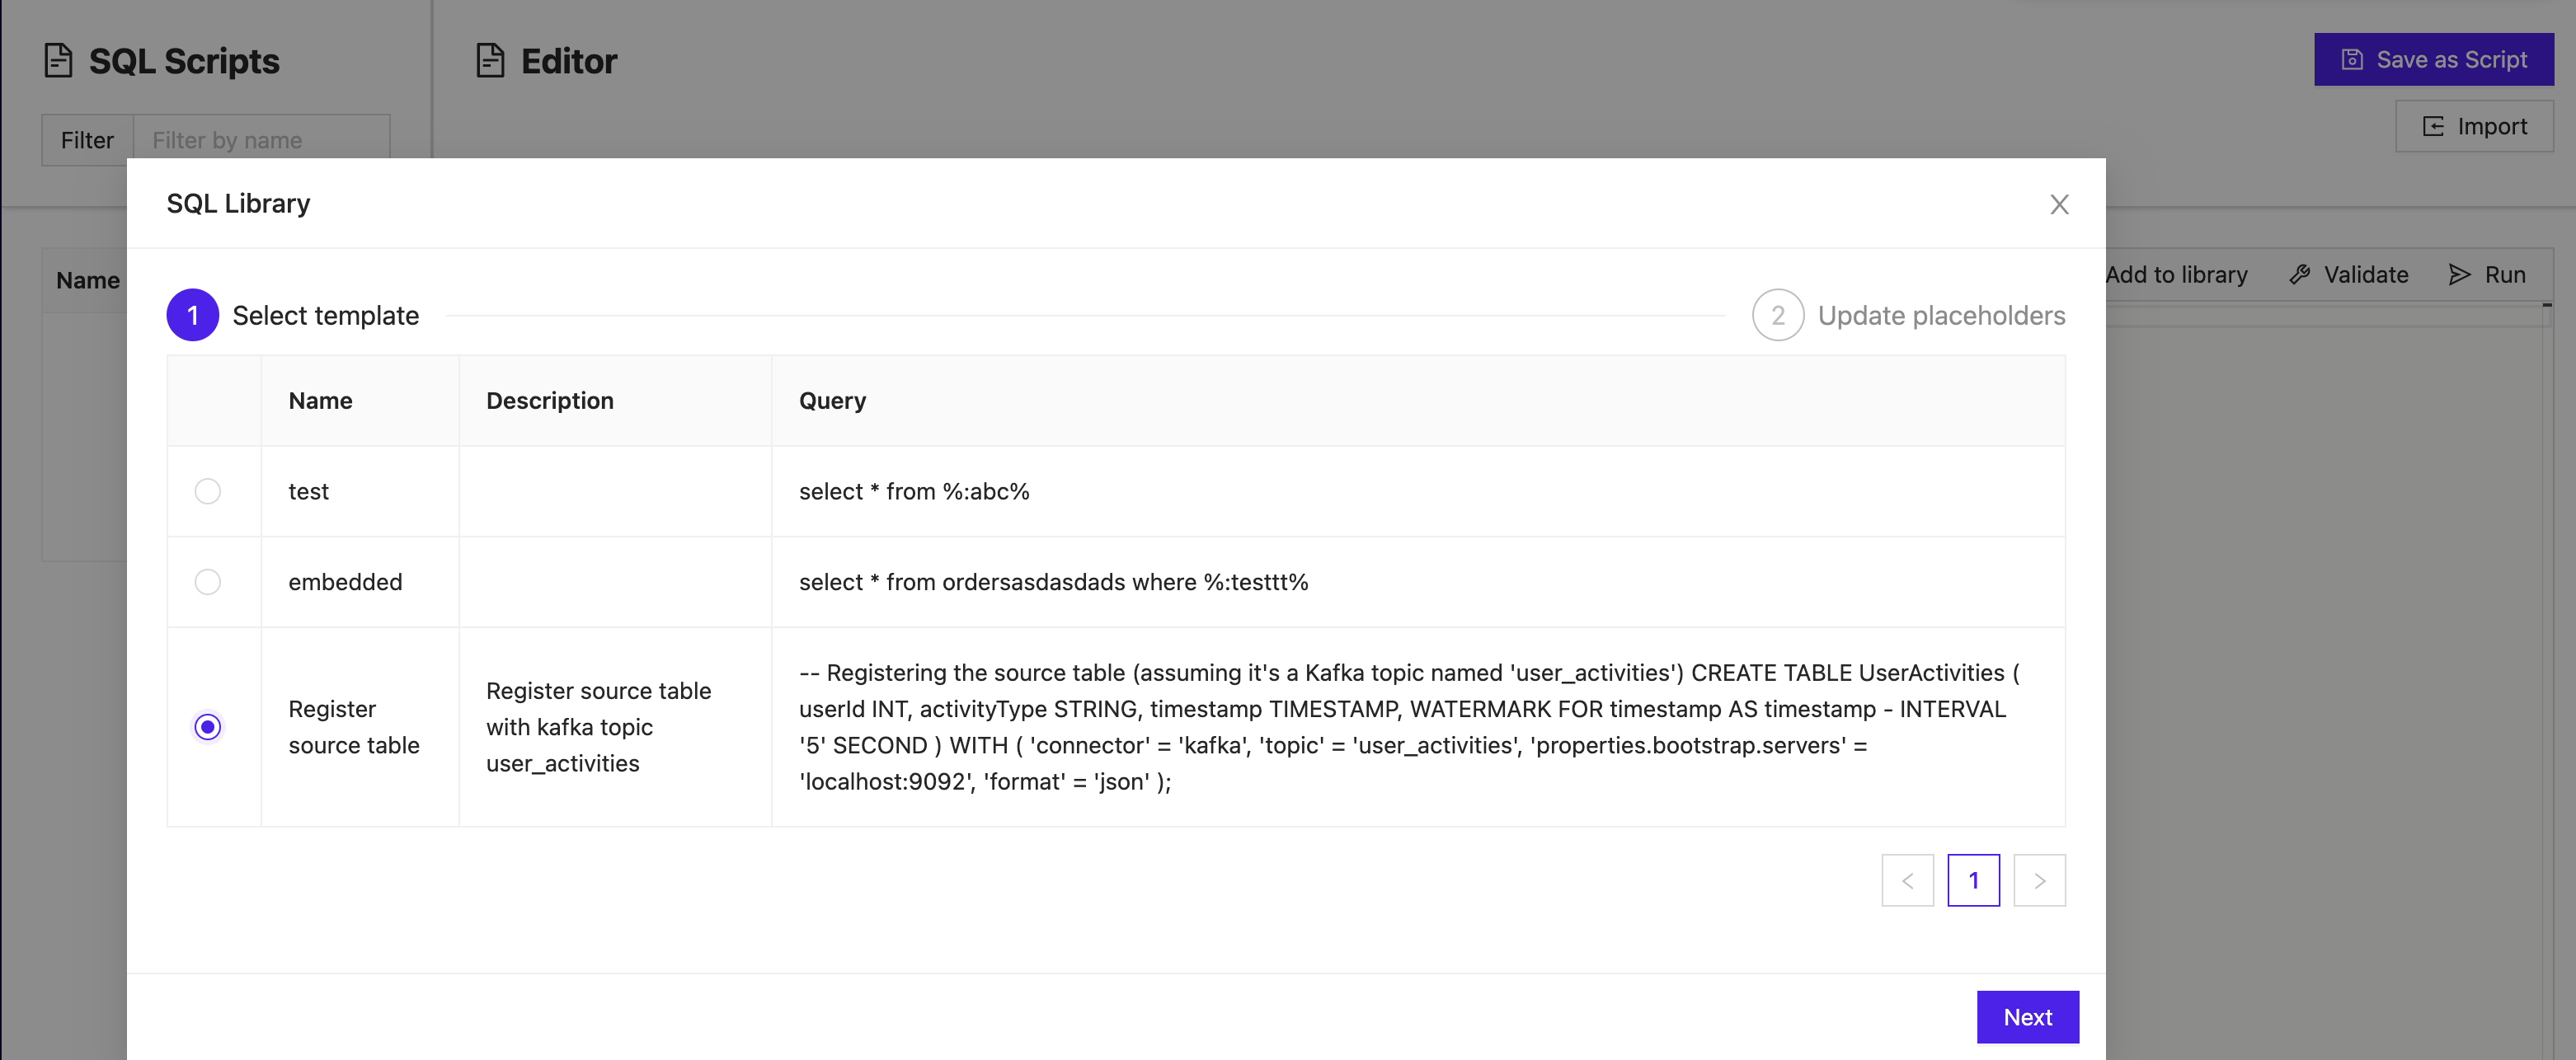
Once the template library is populated with constructed queries, you can select Import to open up the library and choose a template.

From the library, the name, description, and the query construction is visible to inform you which templates are available to choose from. Once you select the template and click Next, the editor will be populated. The query can then either be implemented or edited depending on the use case.
