Manage deployment snapshots
Status set management
The checkpoints and savepoints of a deployment are collectively called a state set. This section explains how to manage the states in the state set of a deployment. For example, you can create, view, or delete a state of a deployment, or restore a deployment from a specified state.
Background information
| Term | Description |
|---|---|
| Checkpoint (corresponds to checkpoints defined in the Apache Flink community) | Ververica Cloud manages the lifecycle of checkpoints. You cannot manually create or delete a checkpoint. You can only view information about a checkpoint. By default, a checkpoint is retained for a deployment and is used as a state that can be selected from the state set of the deployment when the deployment resumes. |
| Savepoint (corresponds to savepoints defined in the Apache Flink community) | You can manage the lifecycle of savepoints. (1) You can create a savepoint when a deployment is running or canceled. You can also use the Ververica Cloud (VVC) to create a savepoint or enable the VVC to automatically create savepoints at regular intervals. (2) You can delete a savepoint. You can also use the VVC to delete a savepoint or enable the VVC to automatically delete savepoints at regular intervals. (3) When you start a deployment, you can restore the deployment based on a specified savepoint. **Note: Savepoint creation and deletion operations at regular intervals are triggered based on rules configured by users. Therefore, these operations are also counted as management operations performed by users. |
The following table describes the operations that you can perform on checkpoints and savepoints in specific scenarios. For more information, see the related sections of this topic.
| Term | Description | Description |
|---|---|---|
| Term | If you want to manually create a savepoint when a deployment is running and you want to restore the deployment from the savepoint, you can manually create a savepoint for the deployment. Important: (1) A savepoint that is manually created can only be manually deleted and cannot be deleted based on automatic cleanup rules. (2) If you select Create a Savepoint before cancelling when you cancel a deployment, the amount of data that needs to be retrieved is reduced. However, the time required to cancel the deployment becomes longer. | Read more here |
| Configure scheduled generation of savepoints | If you want the system to automatically create savepoints at regular intervals, you can enable scheduled generation of savepoints and specify an interval at which savepoints are generated. After the rules for scheduled generation of savepoints are saved, the system automatically creates savepoints when the deployment is running. You do not need to manually create savepoints. | Read more here |
| View checkpoints and the savepoint generation history | On the Overview tab of the Deployments page, you can view information about the checkpoints and the savepoint generation history. You can quickly learn about the states of a deployment based on the generation status and related time information. | Read more here |
| Restore a deployment from a specified savepoint of another deployment | You can specify a savepoint to restore a deployment. Note: If you want to share savepoints across deployments, you must make sure that the state data between deployments is compatible. For example, you can perform a dual-run test to check the compatibility of state data between deployments. | Read more here |
| Configure automatic cleanup rules for savepoints | If you want the system to automatically delete savepoints, you can configure the maximum number of historical savepoints that can be saved and the retention period of savepoints. After the automatic cleanup rules for savepoints are saved, the system automatically deletes savepoints based on the rules when the deployment is running. Note: (1) Automatic cleanup does not delete the savepoints that are manually created. Manually created savepoints can only be manually deleted. (2) If a deployment is suspended for a long period of time, the system deletes the savepoints based on the rules when the deployment starts. | Read more here |
| Manually delete a specified savepoint | Savepoints that you manually created are no longer automatically deleted before the deployment is canceled. Therefore, you must regularly delete the manually created savepoints that are outdated. Otherwise, the savepoints occupy storage and generate unnecessary storage fees. | Read more here |
| Configure the parameters that are related to state backends | You can configure the parameters that are related to state backends. You can specify the streaming state backend, configure the time-to-live (TTL) of state data in SQL deployments, and specify whether the temporary data generated during the savepoint creation is stored on a local disk. | Read more here |
Manually create a savepoint
You can manually create savepoints only for a deployment that is in the RUNNING state.
- Log in to Ververica Cloud.
- On the Dashboard page, locate the workspace you want to manage, click the title of the workspace or this icon ⋮, and select Open Console.
- In the left-side navigation pane of the Console, click Deployments.
- Click the name of the desired deployment.
- In the upper-right corner of the Deployments page, click Create Savepoint.
- In the Create Savepoint dialog box, configure the Format parameter and enter the savepoint description in the Description field.
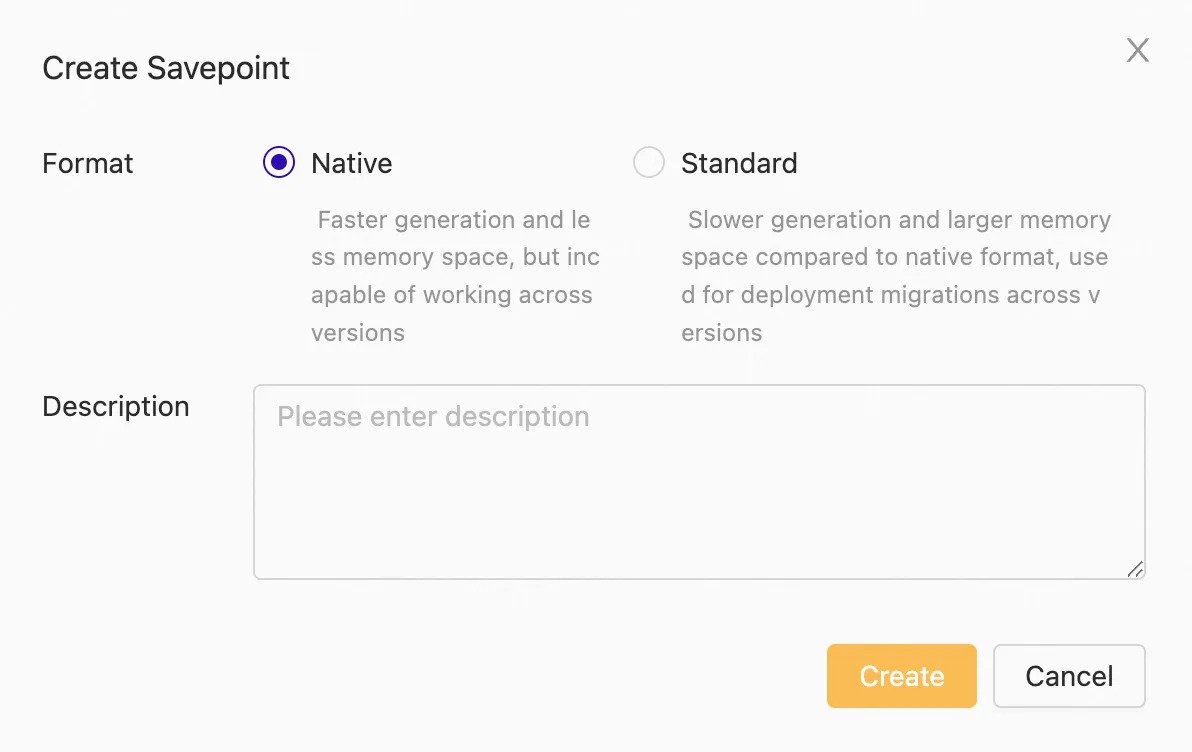
- Click Create.
Configure scheduled generation of savepoints
- Log in to Ververica Cloud.
- On the Dashboard page, locate the workspace you want to manage, click the title of the workspace or this icon ⋮, and select Open Console.
- In the left-side navigation pane of the Console, click Deployments.
- Click the name of the desired deployment.
- In the upper-right corner of the Deployments page, click State tab.
- On the Configure tab under the State tab, turn on Job snapshots that are automatically generated at regular intervals and configure the Period setting parameter.
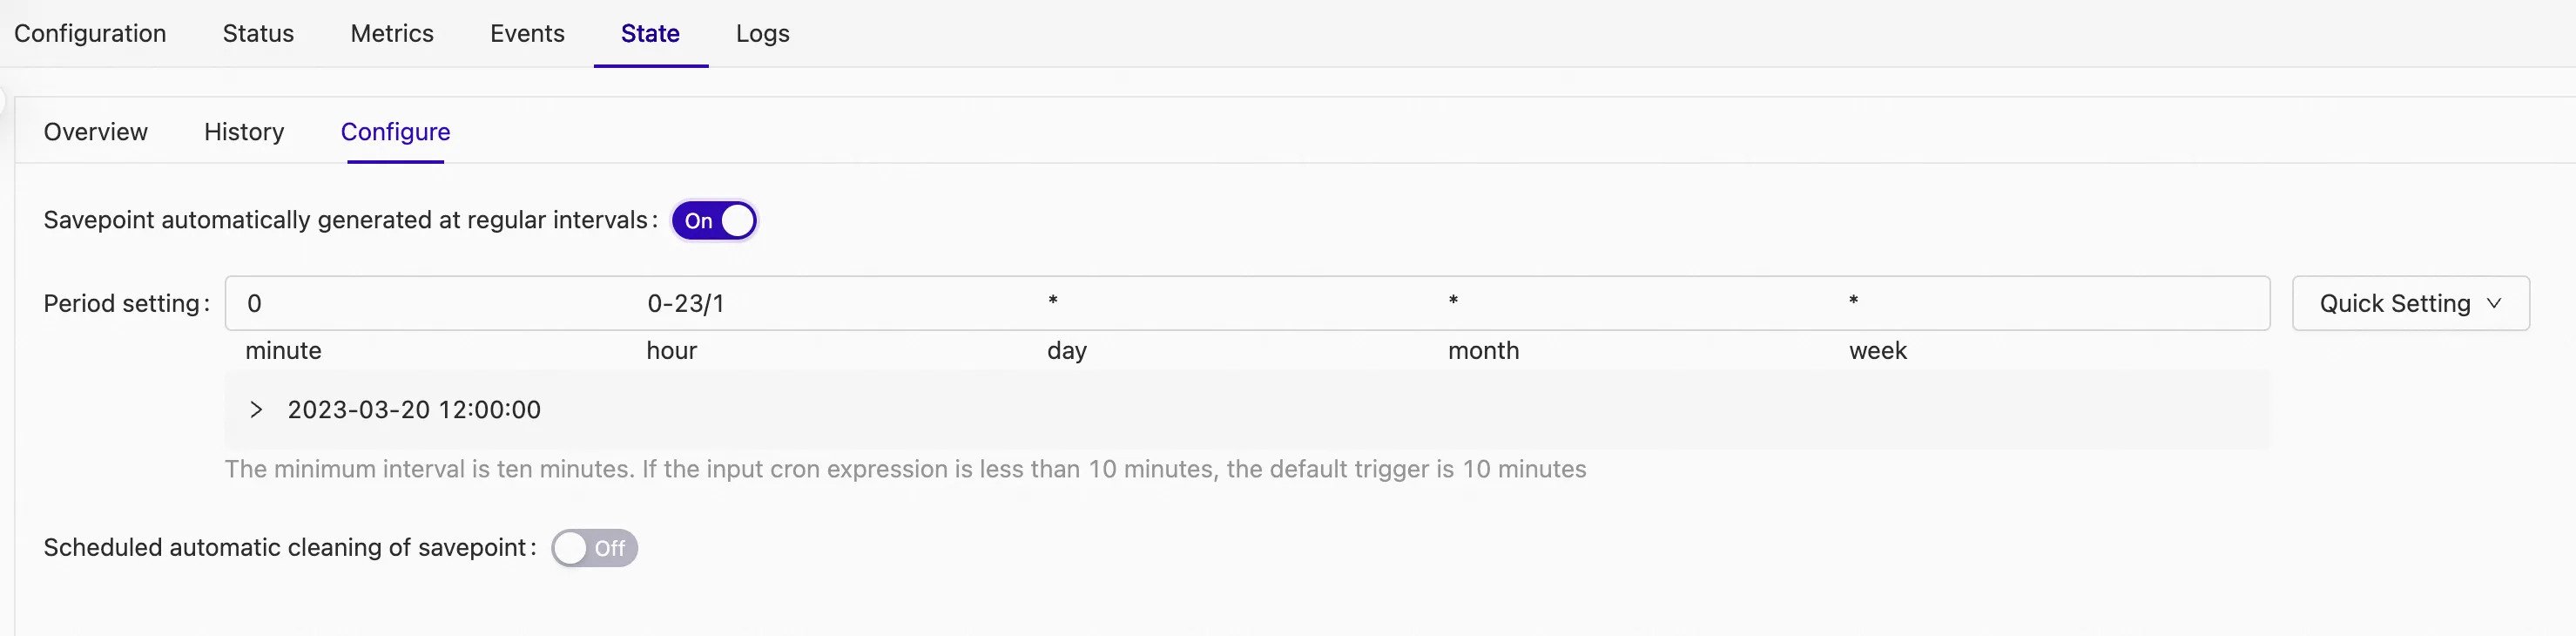
The minimum interval is 10 minutes. If the interval that you specify by using a CRON expression is less than 10 minutes, the system automatically creates savepoints at an interval of 10 minutes.
- Turn on Savepoint automatically generated at regular intervals**.
- Configure the Period setting parameter.
You can click Quick Setting and select a period of time from the drop-down list based on your business requirements. You can also use a CRON expression to specify the interval.
To use a CRON expression to specify the interval, you can click the field that you want to modify in the Period setting parameter and change the value of each field. The following table describes the values of the five fields in a CRON expression and the special characters that are supported.
| Field | Required | Valid value | Special character |
|---|---|---|---|
| Minute | Yes | [0, 59] | , - / |
| Hour | Yes | [0, 23] | , - / |
| Day | Yes | [1, 31] | , - / |
| Week | Yes | [1, 7] or [MON, SUN] Note: If you use the [1, 7] format, 1 indicates Monday and 7 indicates Sunday. | , - / |
| Month | Yes | [1, 12] or [JAN, DEC] | , - / |
The following table describes the meanings of the special characters that are supported in each field in a CRON expression.
| Special character | Description | Example |
|---|---|---|
| . | Indicates all valid values. | In the Month field, an asterisk () indicates every month. In the Week field, an asterisk () indicates every day of the week. |
| , | Lists enumerated values. | In the Minute field, 5,20 indicates that the task is triggered once at the 5th and 20th minutes. |
| Special character | Indicates a range. | In the Minute field, 5-20 indicates that the task is triggered once every minute from the 5th minute to the 20th minute. |
| / | Indicates increments. | In the Minute field, 0/15 indicates that the task is triggered once every 15 minutes from the beginning of an hour. In the Minute field, 3/20 indicates that the task is triggered once every 20 minutes from the 3rd minute of an hour. |
The following table describes sample values of CRON expressions.
| Special character | Description |
|---|---|
15 10 * * * | Executes the task at 10:15 every day. |
0 12 * * * | Executes the task at 12:00 every day. |
0 10,14,16 * * * | Executes the task at 10:00, 14:00, and 16:00 every day. |
0/30 9-17 * * * | Executes the task every 30 minutes between 09:00 and 17:00 every day. |
14 * * * | Executes the task every minute between 14:00 and 14:59 every day. |
0-5 14 * * * | Executes the task every minute between 14:00 and 14:05 every day. |
0/5 14 * * * | Executes the task every 5 minutes between 14:00 and 14:55 every day. |
0/5 14,18 * * * | Executes the task every 5 minutes between 14:00 and 14:55 and between 18:00 and 18:55 every day. |
0 12 * * WED | Executes the task at 12:00 every Wednesday. |
15 10 15 * * | Executes the task at 10:15 on the 15th day of every month. |
10,44 14 * 3 WED | Executes the task at 14:10 and 14:44 every Wednesday in March every year. |
- Click Save Changes.
View the state generation overview
- Log in to Ververica Cloud.
- On the Dashboard page, locate the workspace you want to manage, click the title of the workspace or this icon ⋮, and select Open Console.
- In the left-side navigation pane of the Console, click Deployments.
- Click the name of the desired deployment.
- In the upper-right corner of the Deployments page, click State tab.
- On the Overview tab under the State tab, view the information that is described in the following table.
| Section | Description |
|---|---|
| Checkpoints | Allow you to view information about the last successful and failed checkpoints, including Checkpoint ID, Completion Time, Duration, and Size. |
| Savepoints | Allow you to view information about the last successful and failed savepoints, including Snapshot ID, Complete time, Duration, and failure time. |
Restore a deployment from a specified savepoint of another deployment
You can restore only a deployment that is in the CANCELLED state from a specified savepoint. If your deployment is in the RUNNING state, you must cancel the deployment first.
- Log in to Ververica Cloud.
- On the Dashboard page, locate the workspace you want to manage, click the title of the workspace or this icon ⋮, and select Open Console.
- In the left-side navigation pane of the Console, click Deployments.
- Click the name of the desired deployment.
- In the upper-right corner of the Deployments page, click State tab.
- Click the History tab under the State tab.
- In the Savepoints section, find the desired savepoint.
- Click Start job from this snapshot in the Actions column.
- In the Job Startup Configuration dialog box, configure the parameters.
Configure automatic cleanup rules for savepoints
- Log in to Ververica Cloud.
- On the Dashboard page, locate the workspace you want to manage, click the title of the workspace or this icon ⋮, and select Open Console.
- In the left-side navigation pane of the Console, click Deployments.
- Click the name of the desired deployment.
- In the upper-right corner of the Deployments page, click State tab.
- On the Configure tab under the State tab, configure automatic cleanup rules for savepoints.
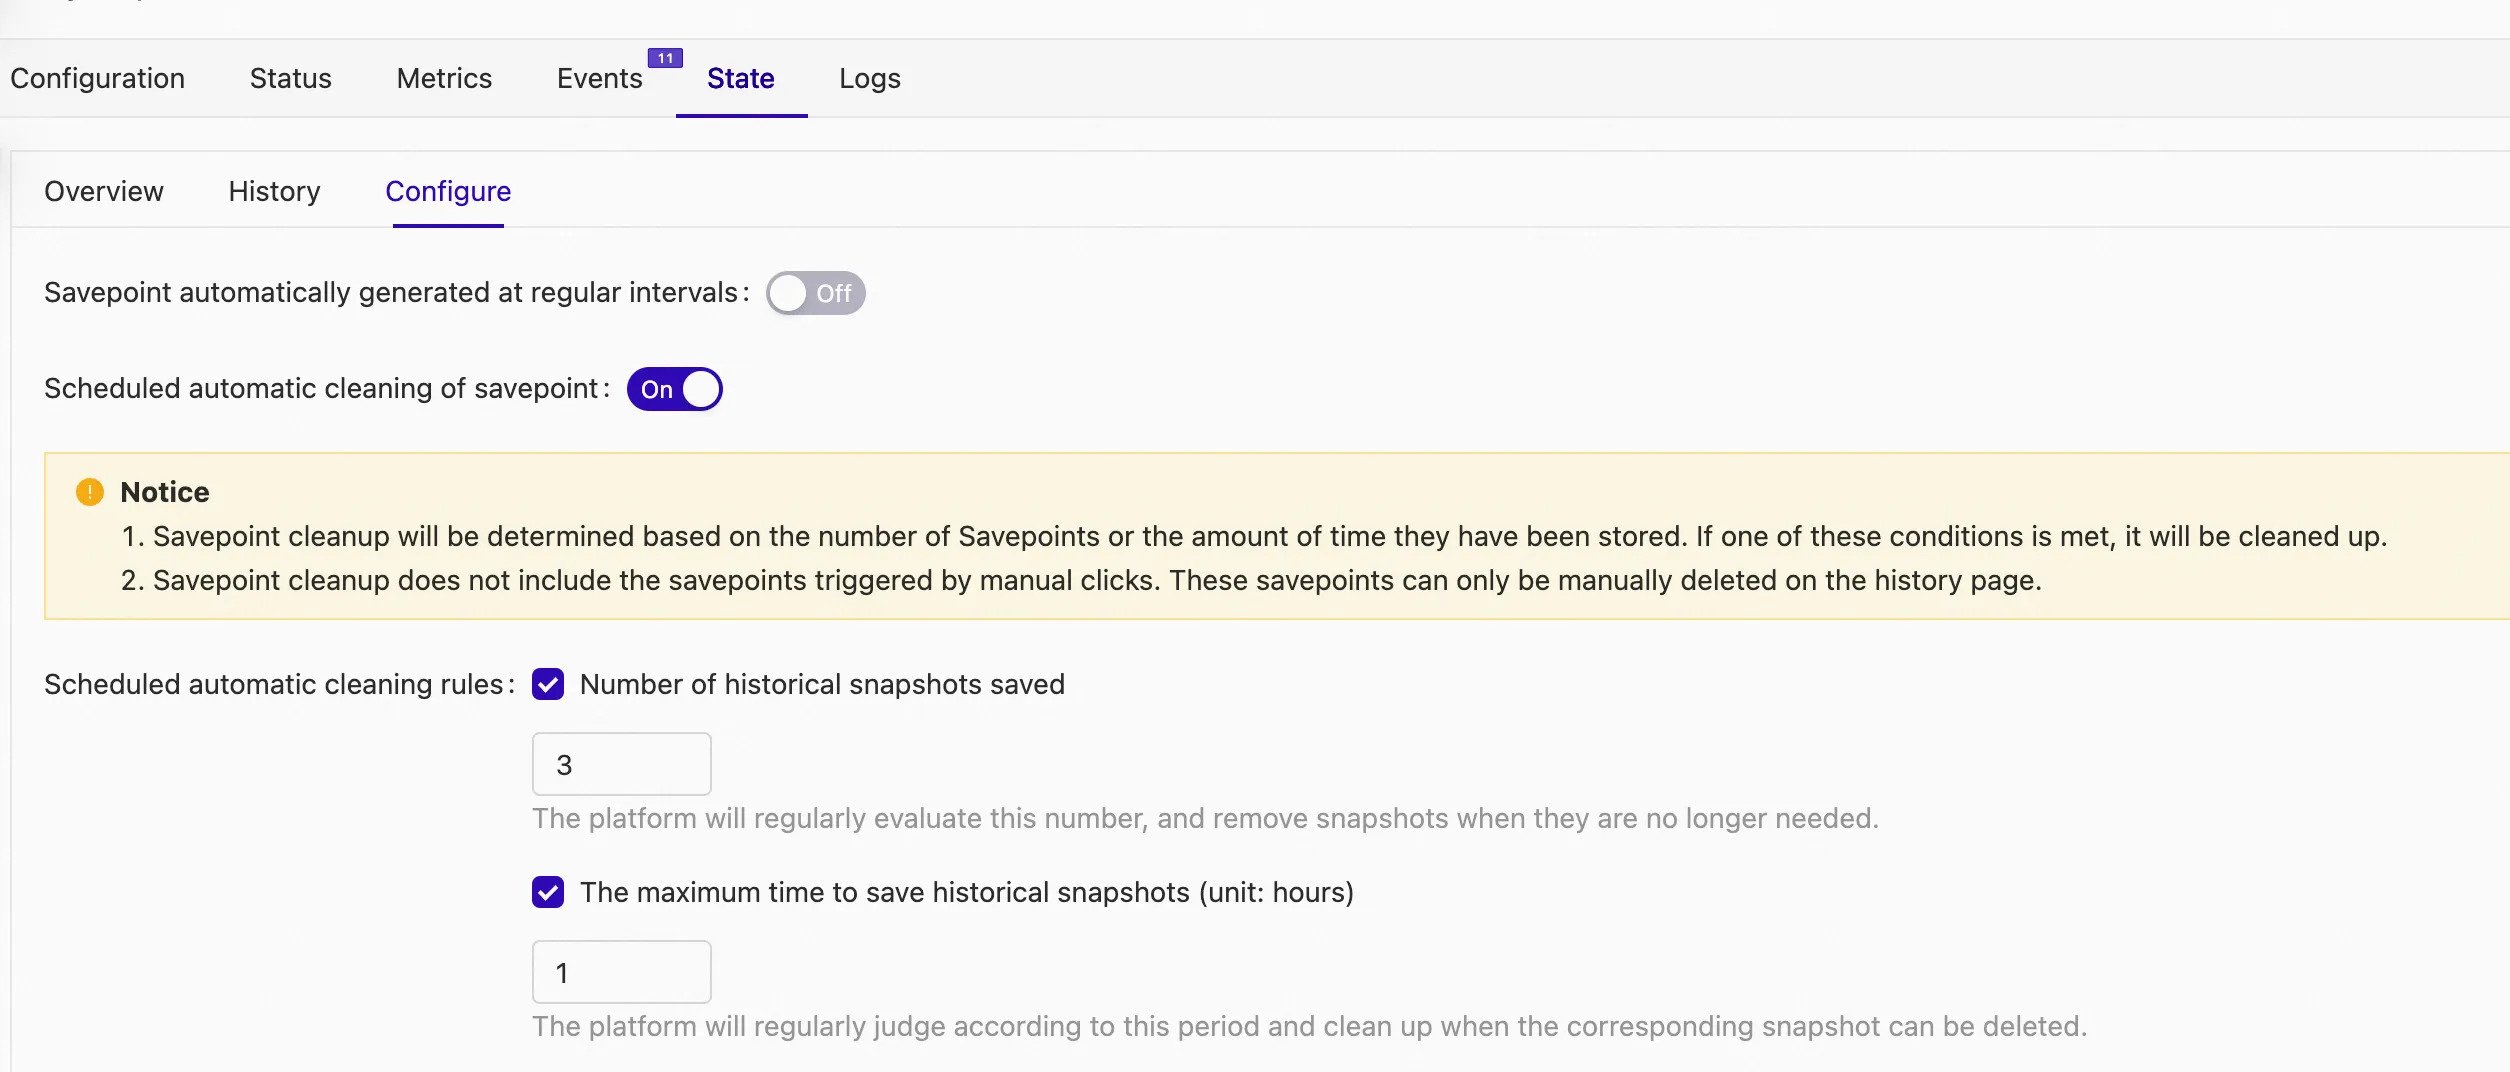
- Turn on Scheduled automatic cleaning of savepoint.
- Configure the Number of historical snapshots saved and The maximum time to save historical snapshots (unit: hours) parameters. When the deployment is running, the system automatically deletes savepoints if one of the conditions is met.
- Click Save Changes.
Manually delete a specified savepoint
- Log in to Ververica Cloud.
- On the Dashboard page, locate the workspace you want to manage, click the title of the workspace or this icon ⋮, and select Open Console.
- In the left-side navigation pane of the Console, click Deployments.
- Click the name of the desired deployment.
- In the upper-right corner of the Deployments page, click State tab.
- On the History tab under the State tab, move the pointer down.
- In the Savepoints section, find the desired savepoint.
- Choose More > Delete this snapshot in the Actions column.
- In the message that appears, click OK.
Configure the parameters that are related to state backends
- Log in to Ververica Cloud.
- On the Dashboard page, locate the workspace you want to manage, click the title of the workspace or this icon ⋮, and select Open Console.
- In the left-side navigation pane of the Console, click Deployments.
- Click the name of the desired deployment.
- Choose Parameters, and click Edit.
- Update
State Expiration Time. Then, click Save.