Amazon DynamoDB
Amazon DynamoDB is a fully managed NoSQL database service provided by AWS, designed for high availability and seamless scalability. It supports both key-value and document data models, catering to various application needs. DynamoDB is built to handle high-throughput, low-latency workloads, ensuring consistent single-digit millisecond performance at any scale. Its automatic traffic management, on-demand capacity mode, and real-time monitoring features make it a robust choice for applications requiring a fast, flexible, and reliable database solution.
Prerequisites
To set up the integration, ensure an IAM user with the requisite permissions is available. This user should be permitted to create the IAM role and establish DynamoDB tables. To create a DynamoDB table, follow the guidelines in the Amazon DynamoDB documentation. Upon successful creation, retrieve the Amazon Resource Name (ARN) of the DynamoDB table. Flink jobs will utilize this ARN for seamless data processing and analysis.
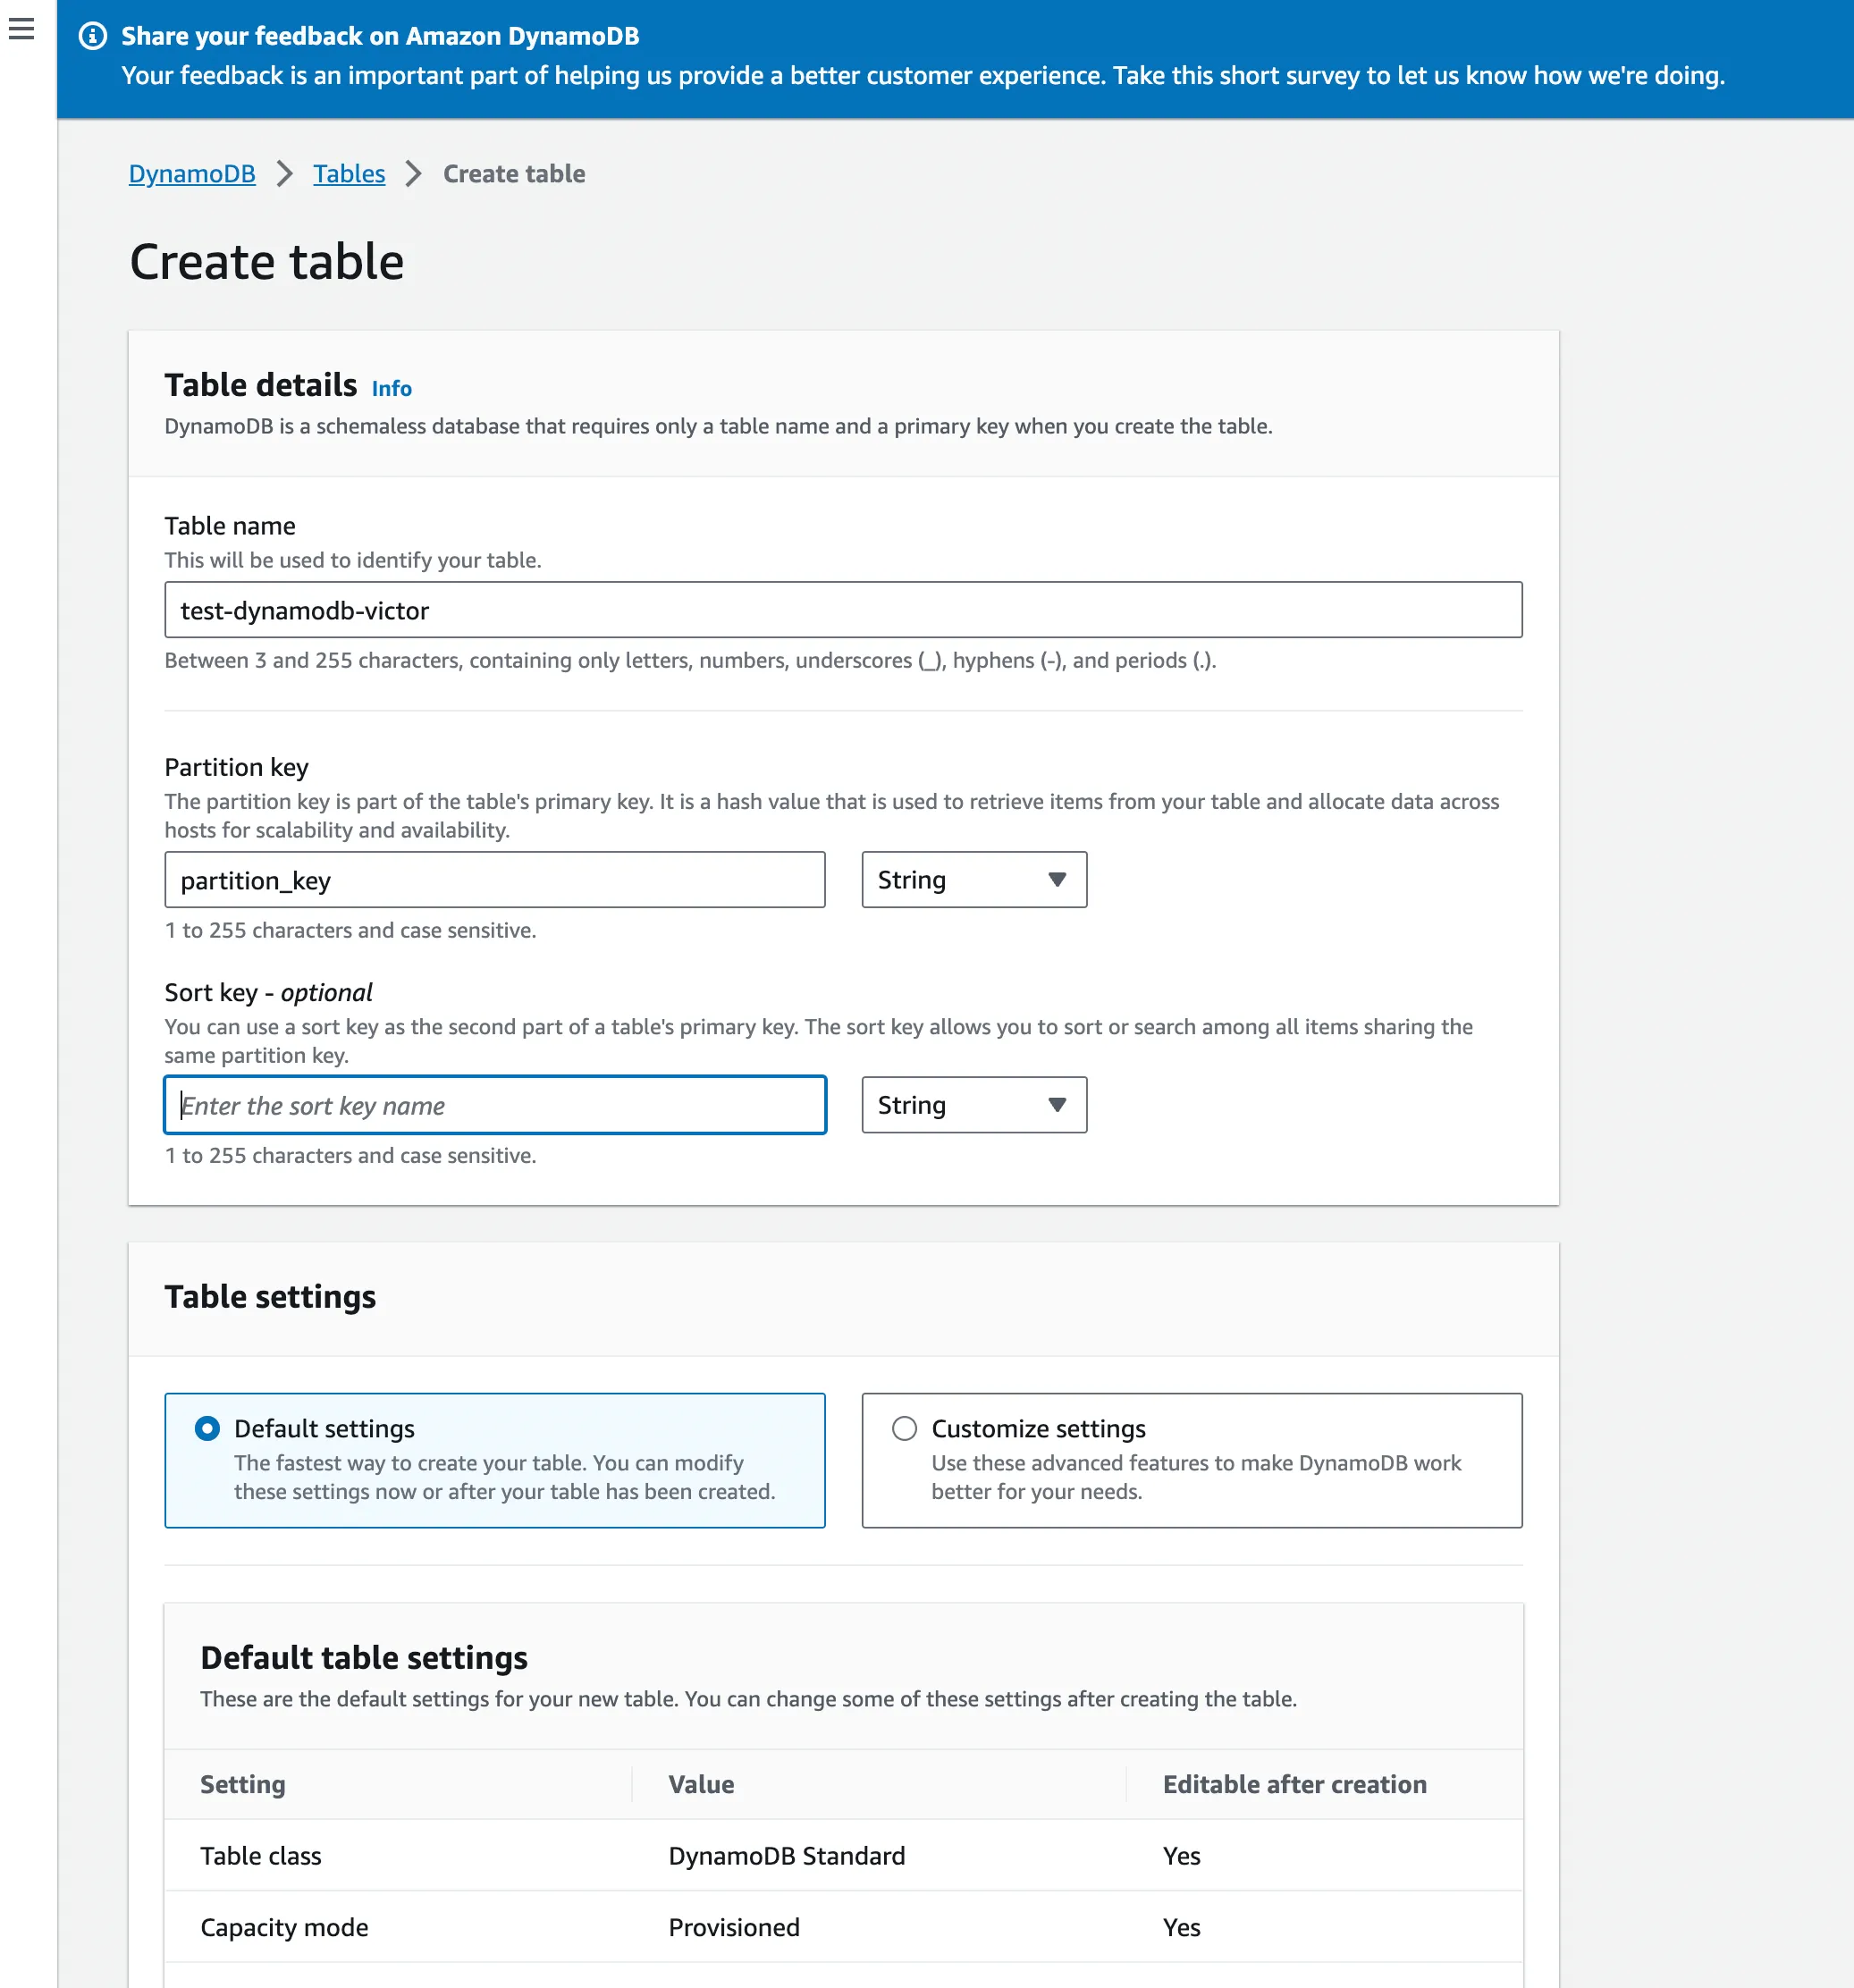
Step 1: Create a DynamoDB Table
- Navigate to the Amazon DynamoDB service console by searching ‘DynamoDB’ from the search bar.
- Click Create table on the top-right corner.
- Fill in the table name, the partition key, select the Default settings, and then click Create table.
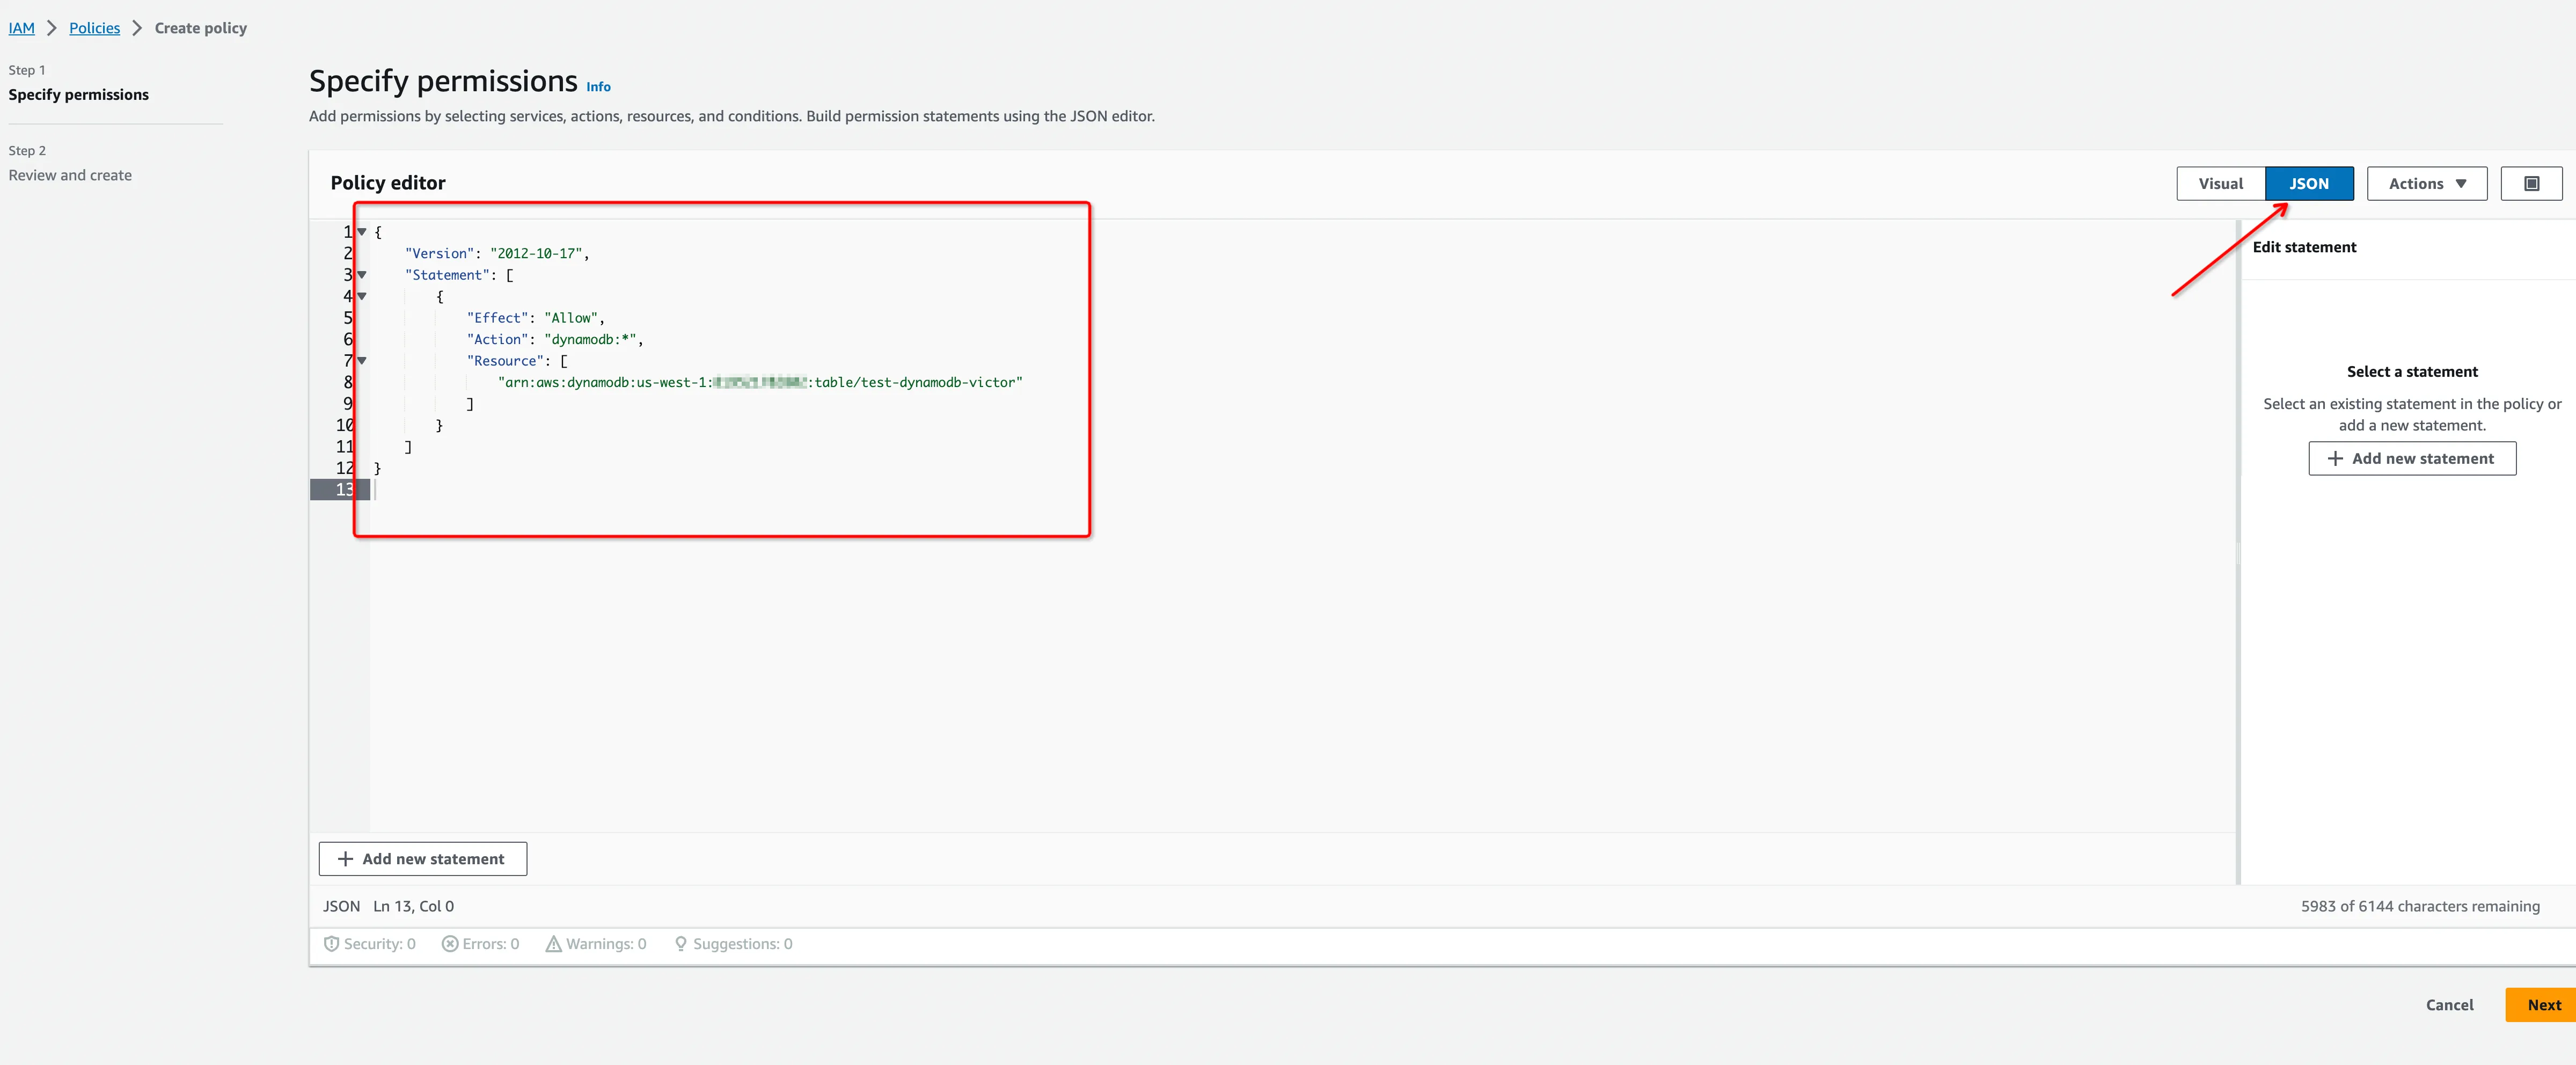
Step 2: Create a Permissions Policy
Create an IAM Permissions Policy with the needed permissions that Ververica Cloud will assume for this role and then accept the endpoint connection request. Refer to AWS docs to learn more information about the policies.
{
    "Version": "2012-10-17",
    "Statement": [
        {
            "Effect": "Allow",
            "Action": "dynamodb:*",
            "Resource": [
                "arn:aws:dynamodb:us-west-1:<placeholder>:table/test-dynamodb-victor"
            ]
        }
    ]
}

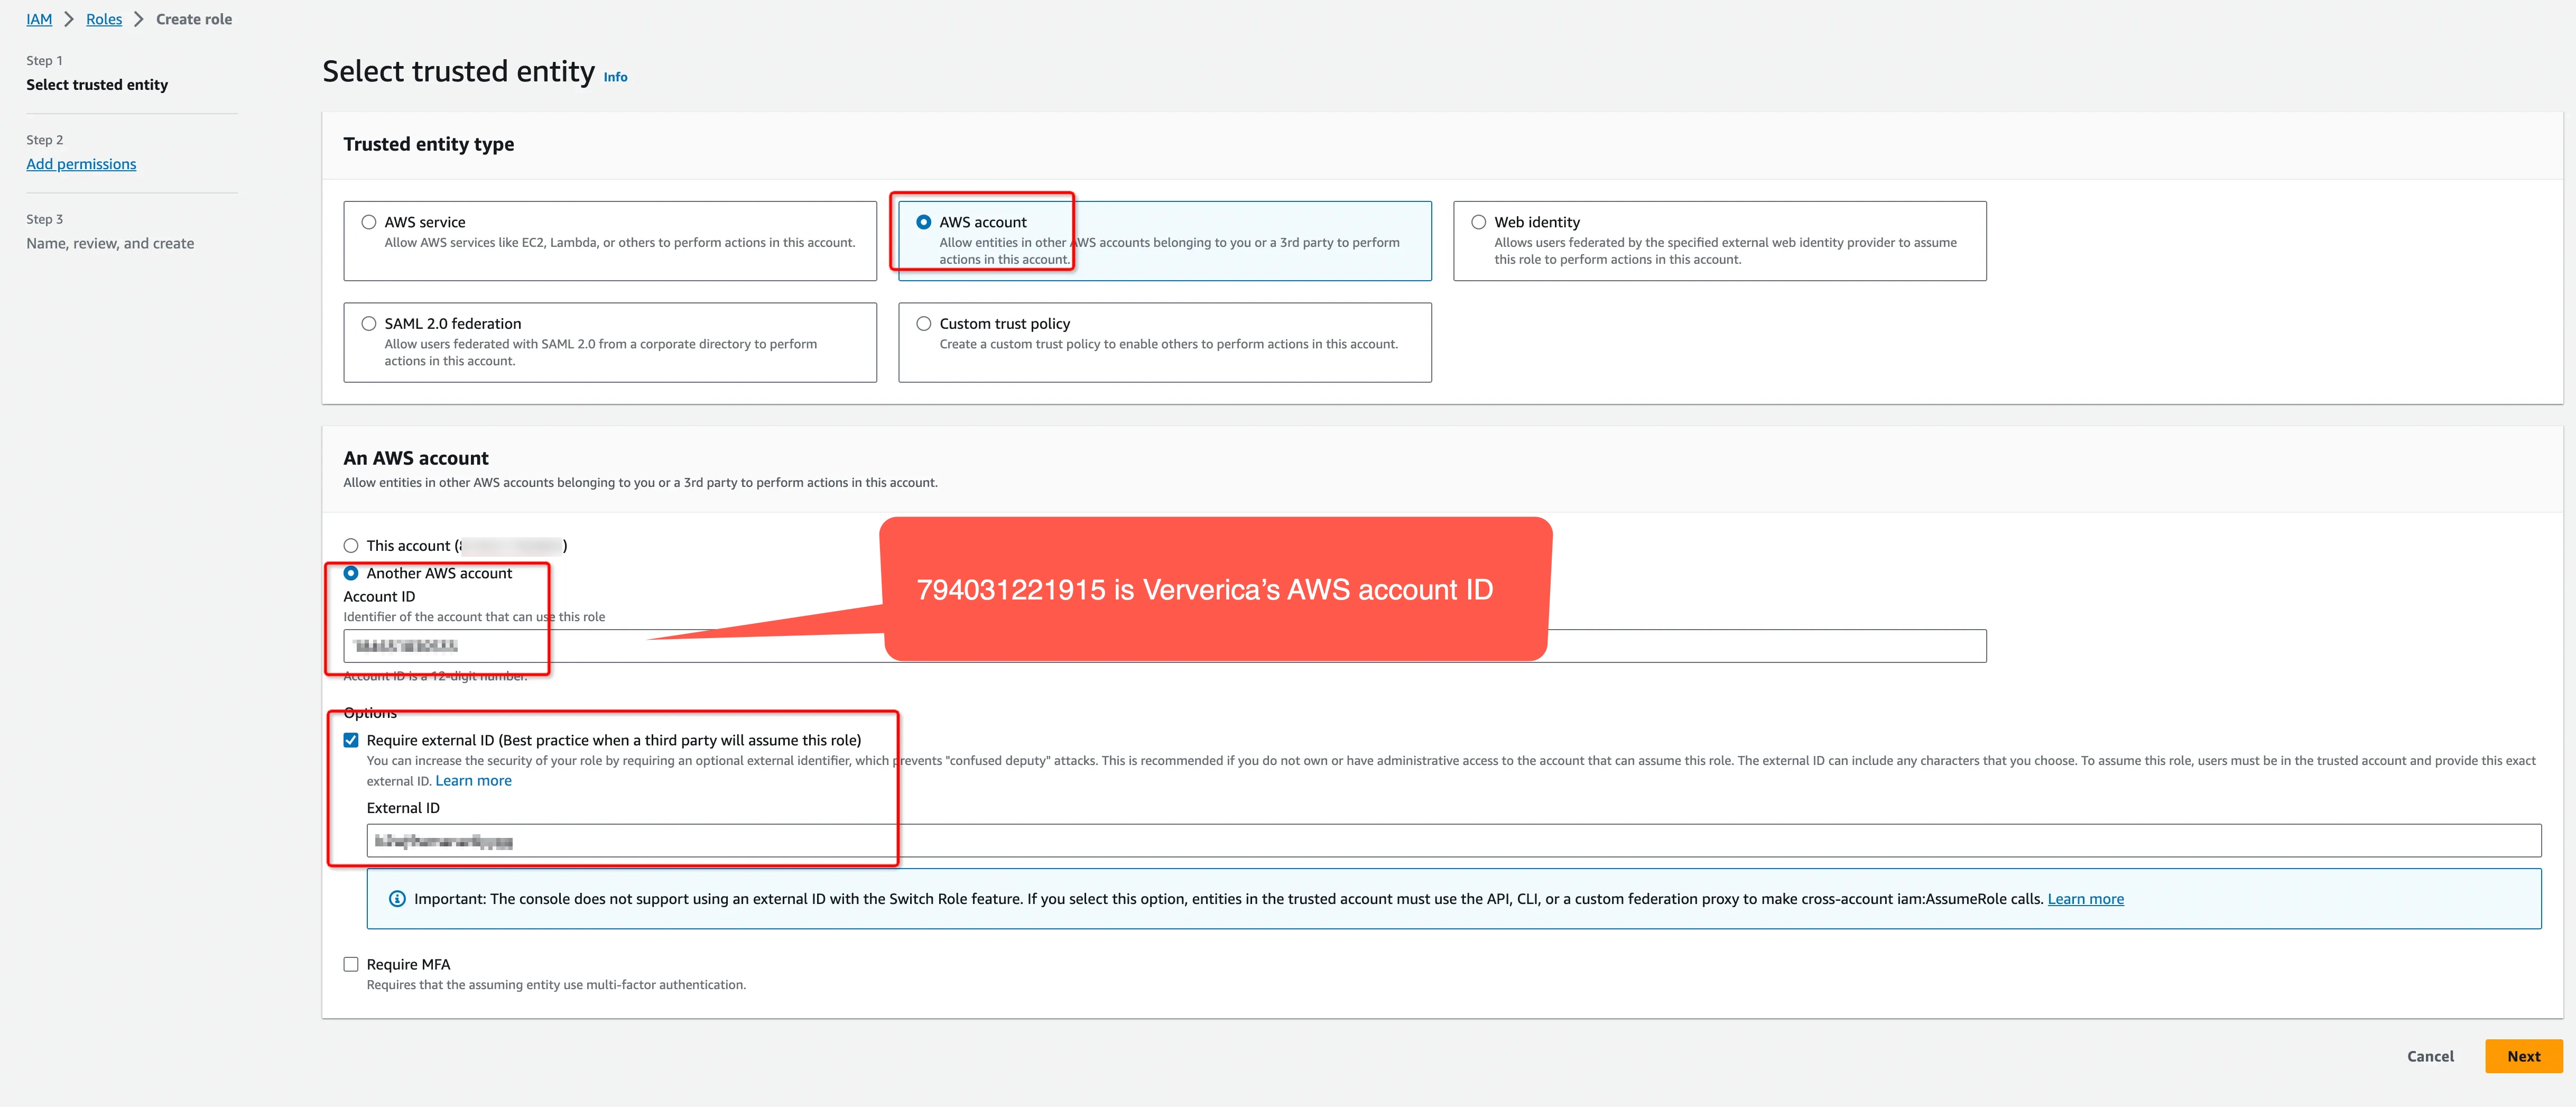
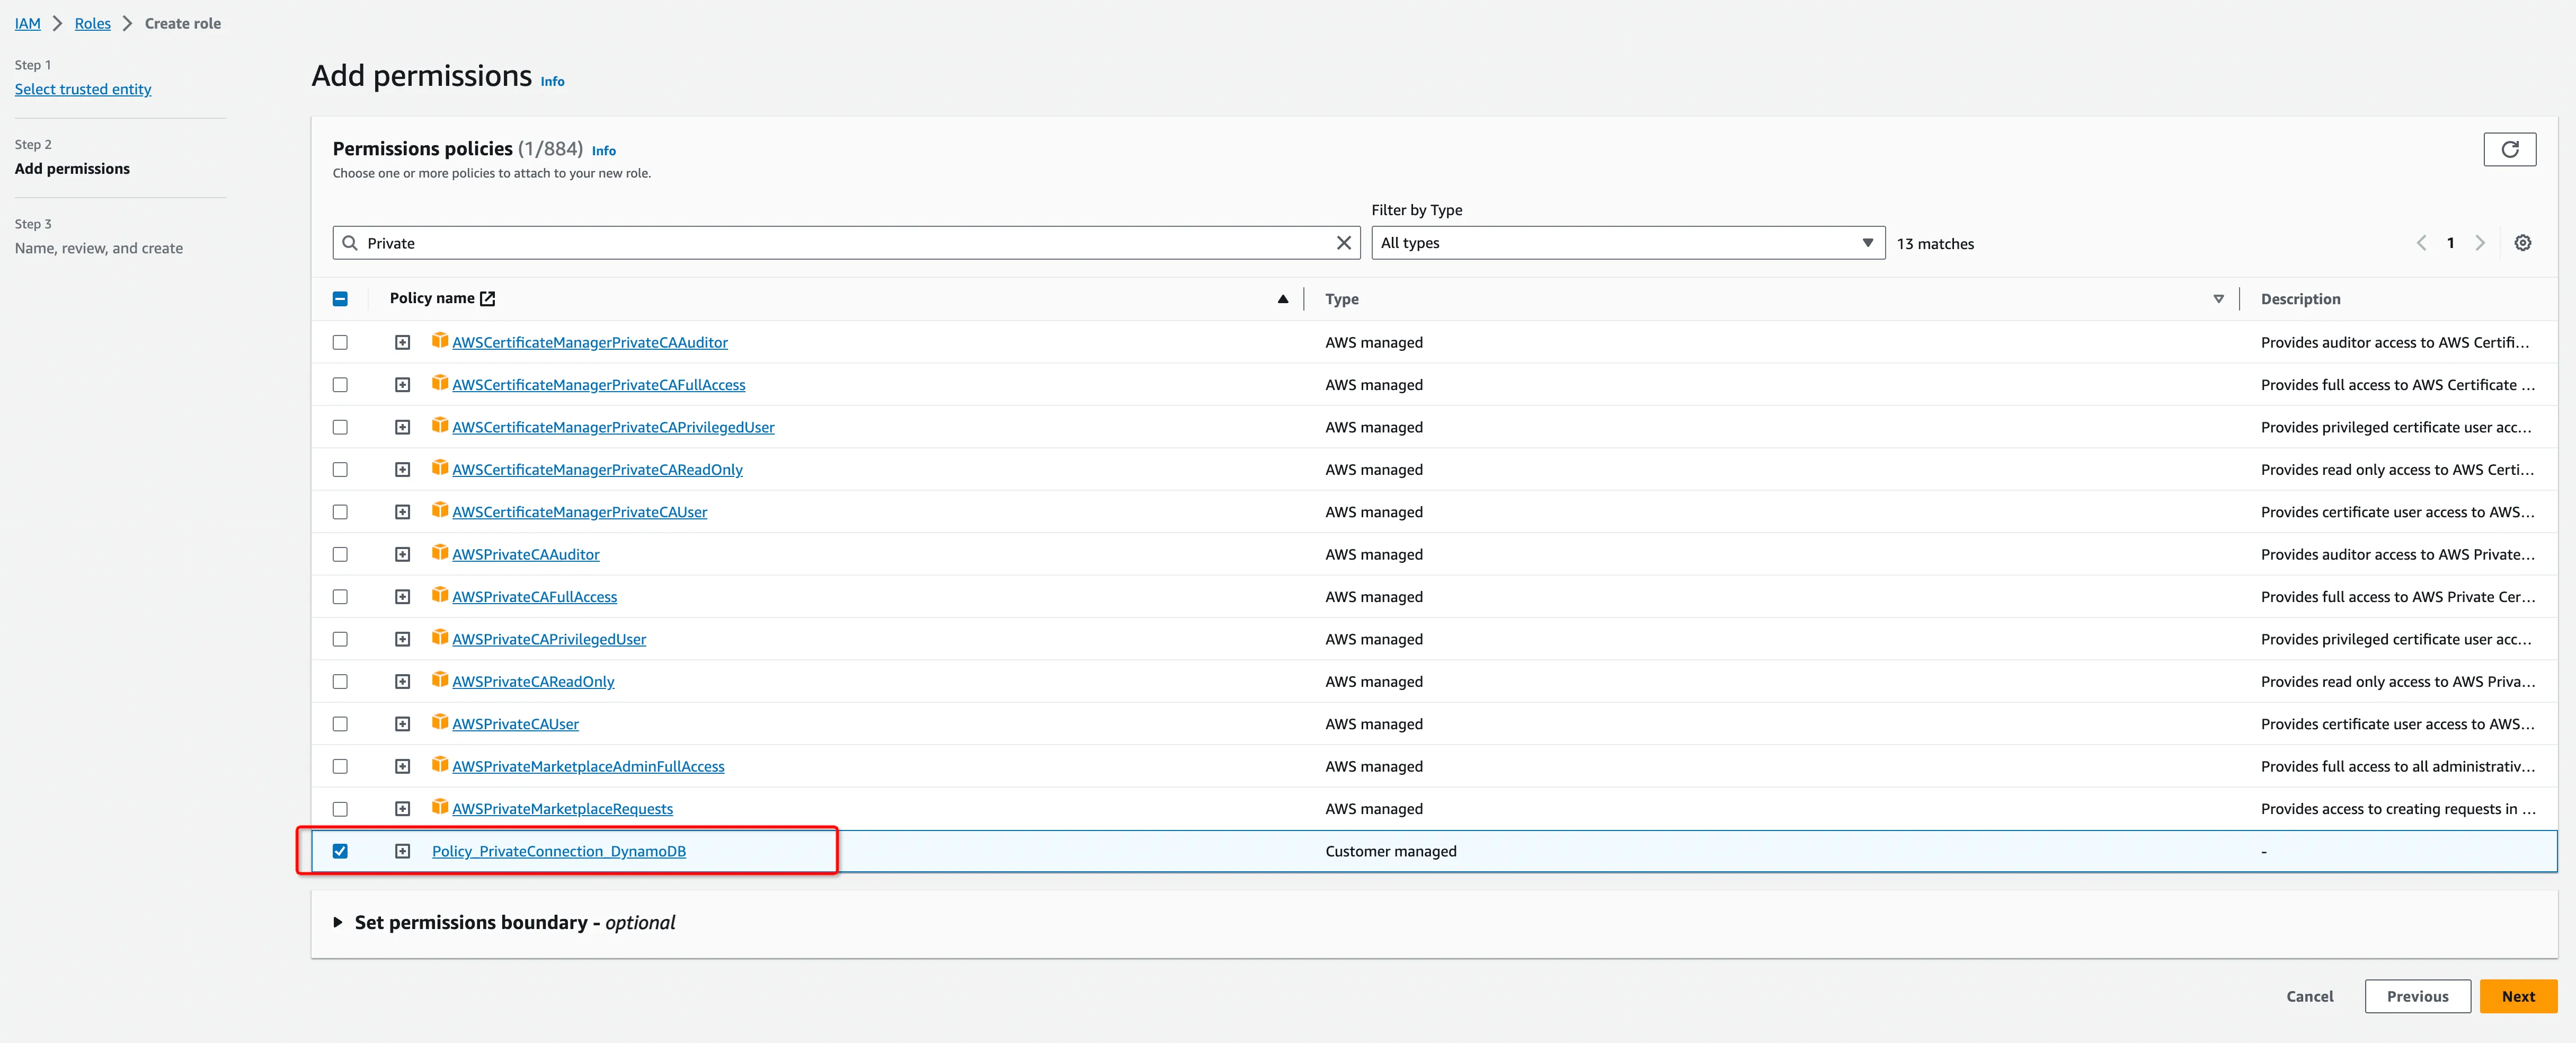
Step 3: Create an IAM Role
Create an IAM Role to grant third parties like the Ververica Cloud to access your AWS resources with the previous permission policy.
The ‘External ID’ is actually the Workspace ID where you will configure this private connection. You can copy it from the top-right corner of the Private Connection page of that workspace. You can also find it in the URL when you enter the Ververica Console.
794031221915 is Ververica's AWS account ID.
Please create a dedicated IAM Role for each Ververica Cloud workspace. If the workspace is already bound with an IAM role, please update the policy instead of creating a new one. Refer to the AWS docs for how to create/update the IAM Role.
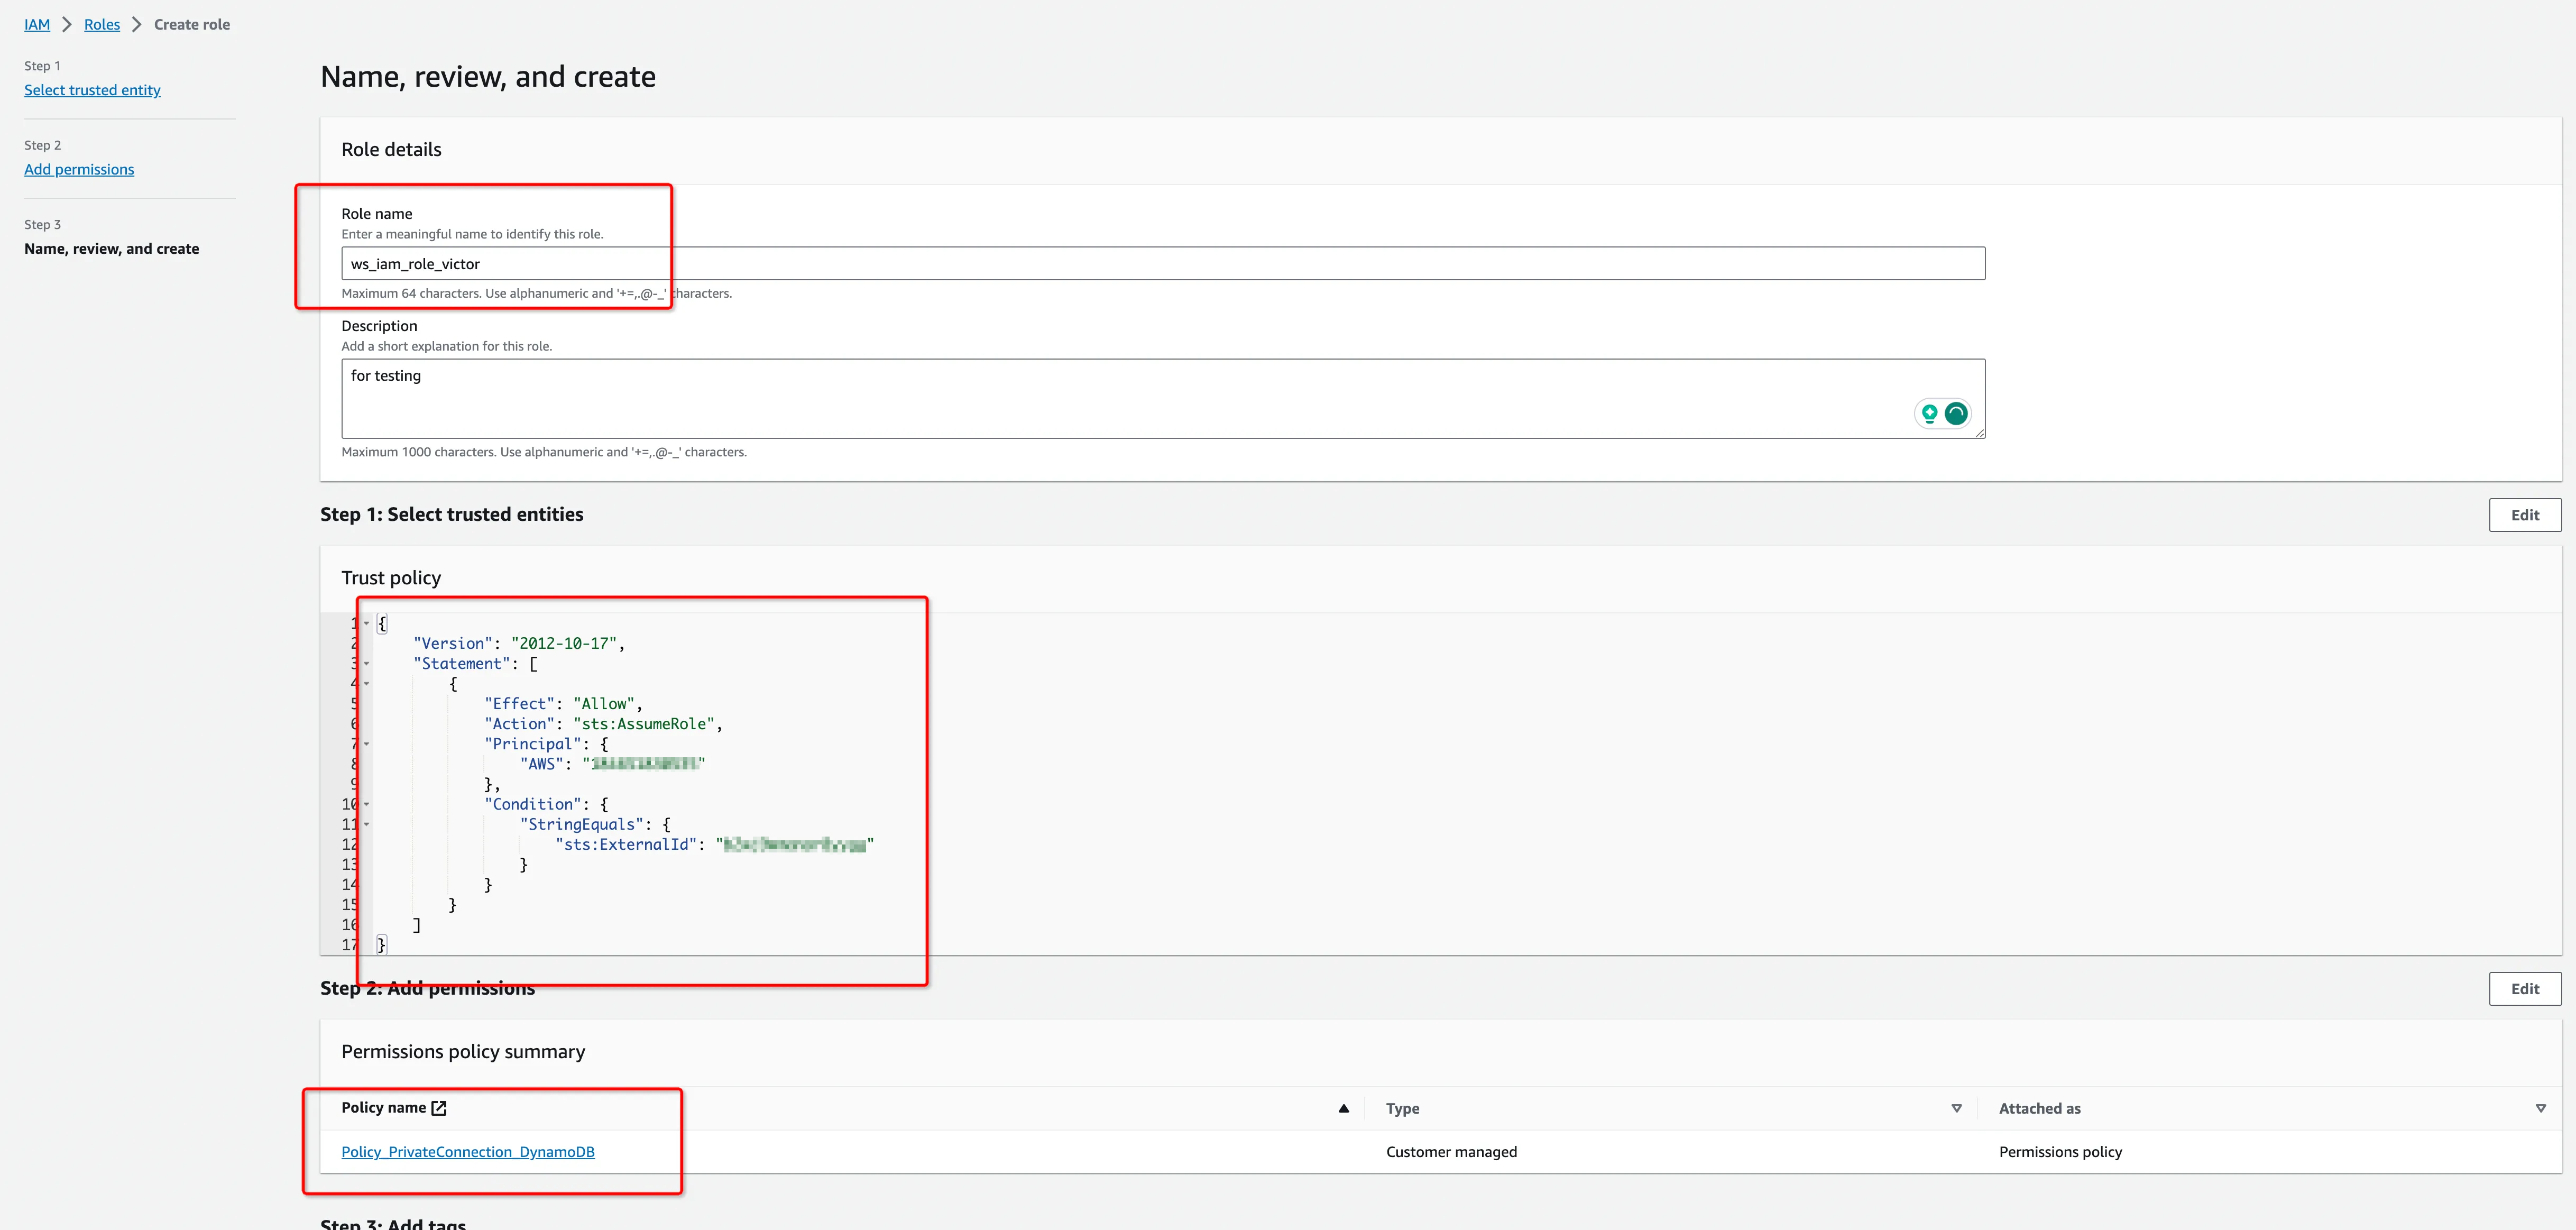
Get the ARN of this IAM Role; you will need it in the private connection configuration.
Please create a dedicated IAM Role for each workspace. If the workspace is already bound with an IAM role, please update the corresponding IMA role permissions policies instead of creating a new one. Refer to the AWS doc for how to create/update the IAM Role.
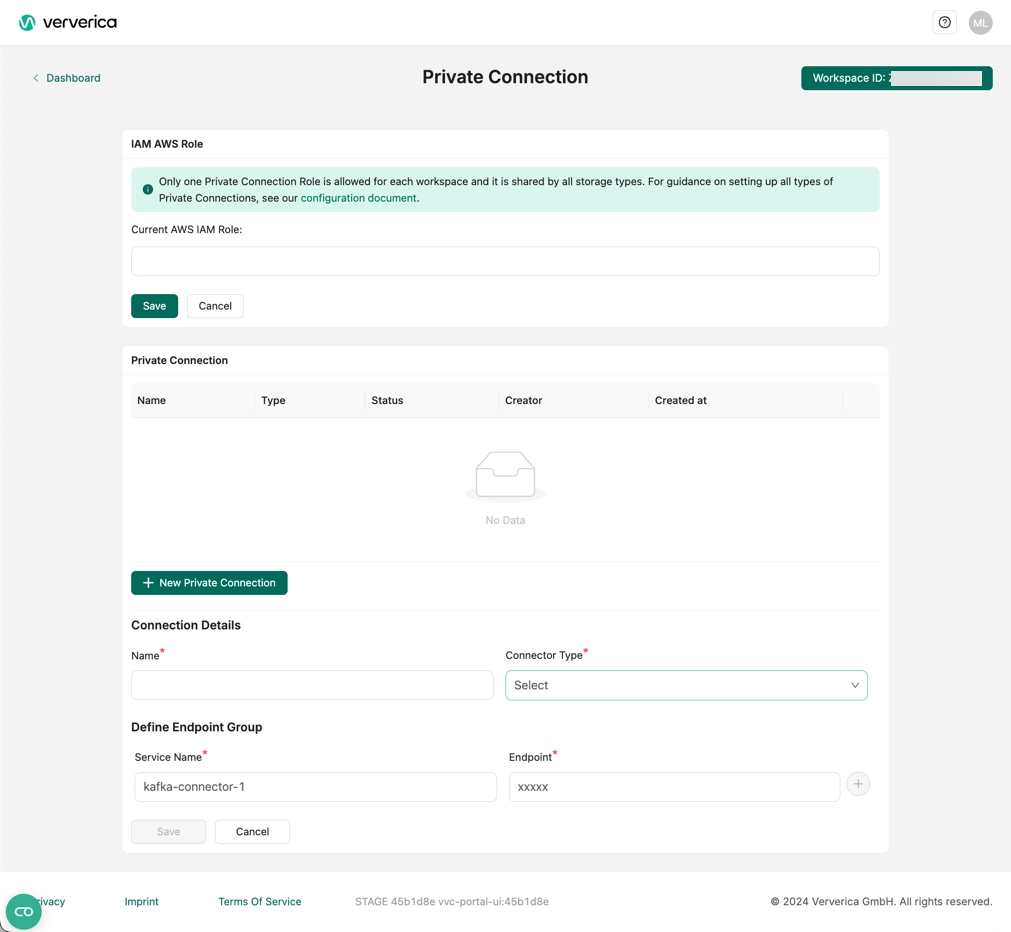
Step 4: Bind the IAM Role to Ververica Cloud
- Log in to Ververica Cloud and display your Dashboard.
- Click on the menu button (triple dots) at the end of the workspace entry and choose Private Connection.
- Bind the IAM Role at the first section of the page and click Save.
- Click New Private Connection, fill in the Name, set the Connector Type to Amazon DynamoDB and click Save.